Salesforce is a great CRM tool, but one issue that companies using the platform may face at some point is limited storage space. You can always purchase more storage space, but this will quickly eat into profits depending on how much space you need. However, there is no need to fear. There are methods of creating more storage space by using third-party systems like Dropbox and Google Drive to store our files. We demonstrate how to avoid Salesforce's file storage limit by using external files.
To give some context, the Salesforce file library uses a couple of standard objects to represent your uploaded files. First, there is the ContentDocument object, which represents an uploaded document or file. Second, there is the ContentVersion object, which represents each version of the uploaded document or file. Finally, there is the ContentDocumentLink object, which represents a connection to each individual, group, or library that has access to the uploaded document or file. To put it another way, if the Salesforce library is like a filing cabinet for a bank, the ContentDocument is a folder labeled ‘John’s Monthly Bank Statement’, the ContentVersion is each of John’s bank statements, with the most recent statement at the top of the folder, and the ContentDocumentLink is a list of everyone who is allowed to look in the folder, like John and his financial advisor.
Now that we know what objects we are working with, we can work on moving our files to a third-party system.
Step 1: Enable Files Connect
Before we can access external files, we have to enable Salesforce Files Connect. This feature allows users to access, share, and search external systems from Salesforce.

You’ll also have to give access to Files Connect to the users who will be making the connections, such as yourself. To give permission to users, you will have to enable Files Connect Cloud on their profile. You can also make a permission set if you want to give specific individuals access to Files Connect.

Step 2: Create an Authentication Provider
In order to use a third-party system, like Google Drive, as an external data source for Salesforce, you must connect the two platforms using an authentication provider. On the authentication builder for Salesforce, there are a couple of fields to focus on, such as the Name, URL suffix, Consumer Key, Consumer Secret, Authorize Endpoint URL, Token Endpoint URL, and Default Scopes. The name field is simply what you want to call this link and a URL suffix will be generated based on the Name. The other fields will be a little trickier to fill out, since they require keys generated from the third-party system that you want to connect to. Luckily, Salesforce provides some documentation on how to connect to some of these sources, such as how to create an authentication provider for Google Drive.

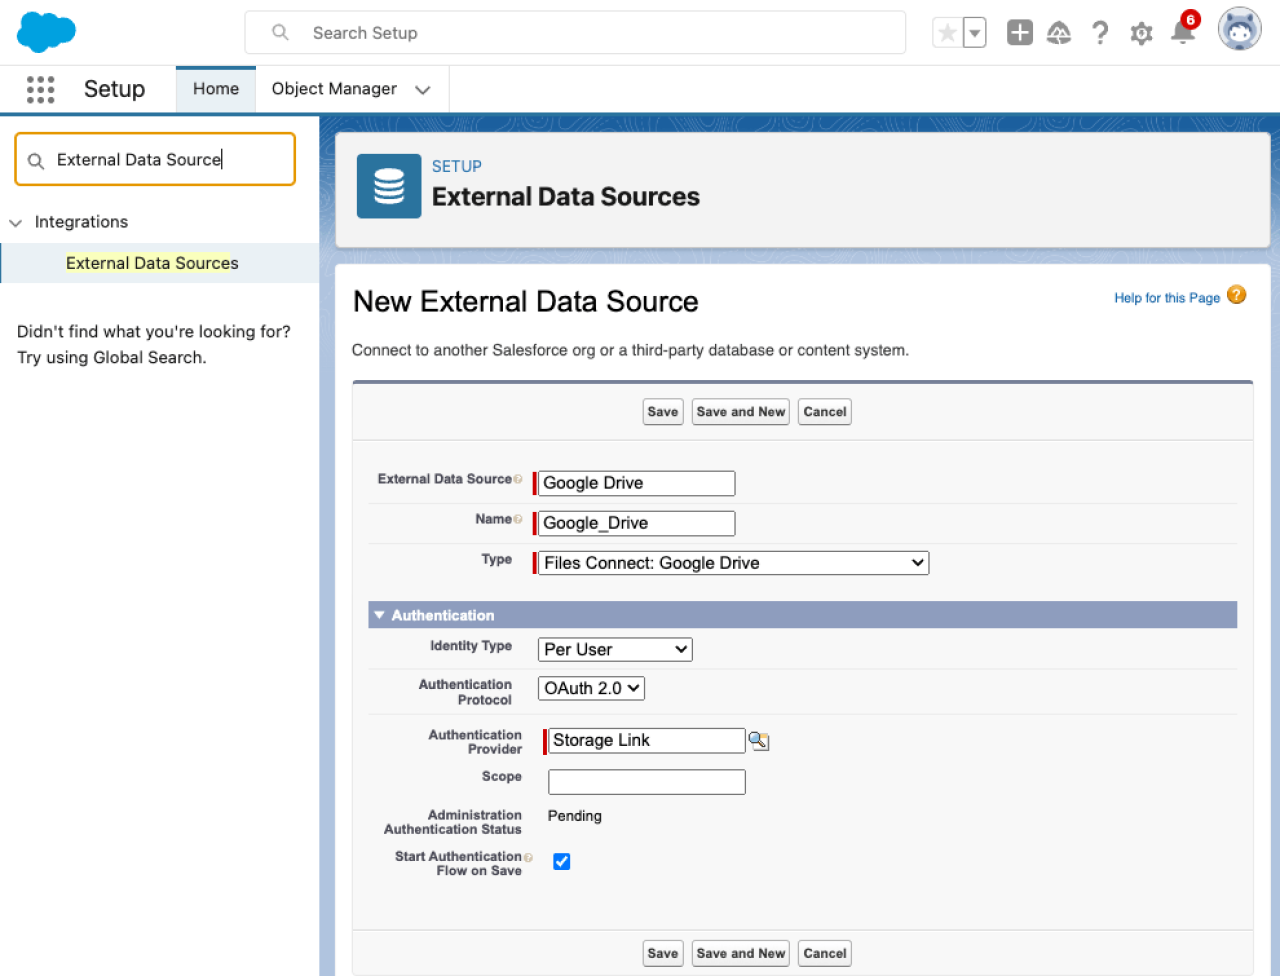
Step 3: Define External Data Sources
Now that you have made an authentication provider to a third-party source, you must also define an external data source rule so that salesforce knows how to access the data stored outside of your org. The settings of this external data source will depend on the type of external data source you are using. Yet again, Salesforce provides instructions on how to create new external data sources, such as with Google Drive. Be sure to use the authentication provider you made in the previous step, as this will give the external data source permission to access the external files.
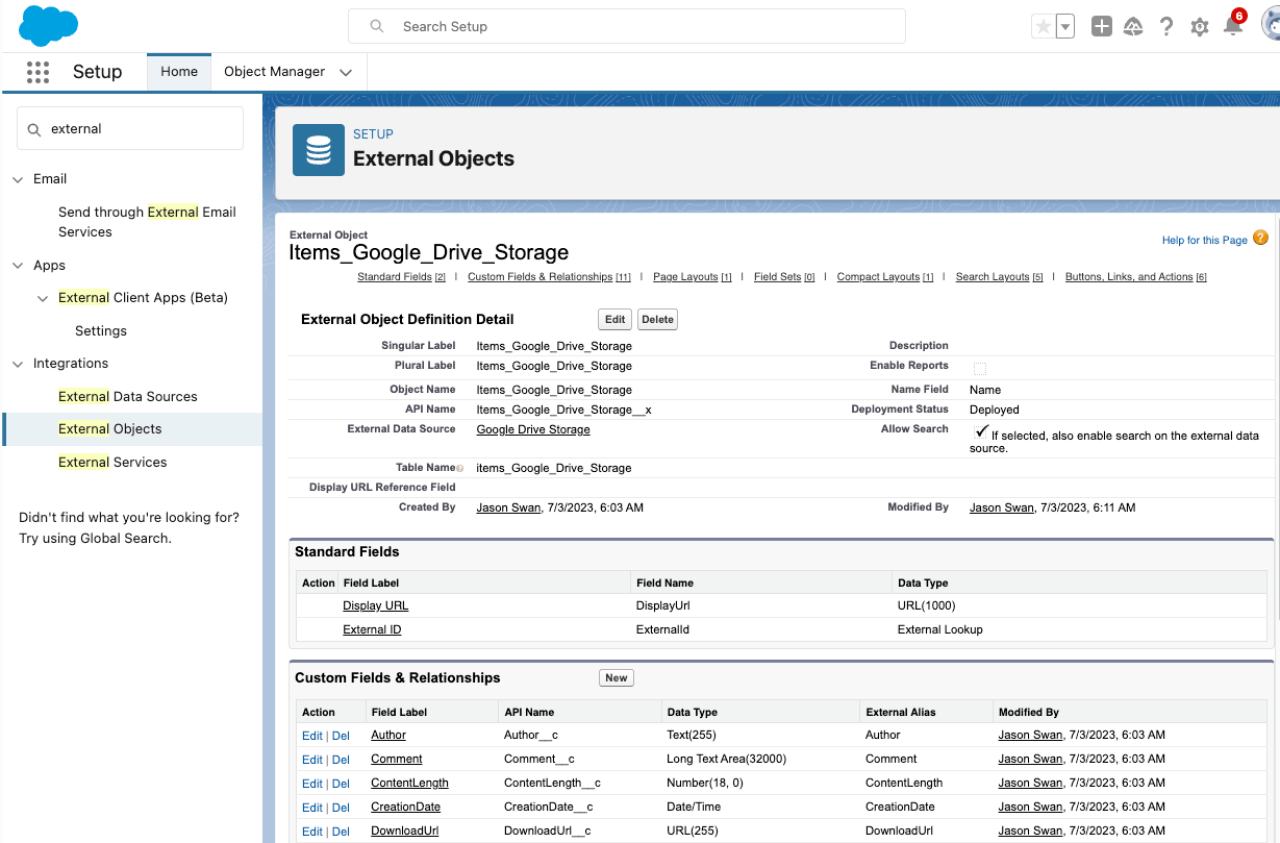
Step 4: Create an External Object
An external object is needed to connect your Salesforce records to the external data source. You can either build your own external object, or you can have Salesforce generate one from the External Data Source in the previous step. To verify that the external object was made, you can go to the ‘External Objects’ tab and look for the name of the item you just made. It is also a good idea to add a field to the external object that stores the ID of the ContentVersion record that an external record is copying, as we can reference that field when Salesforce looks for the external file. Once the external object has been added, you will have to give access through the permission set you made.
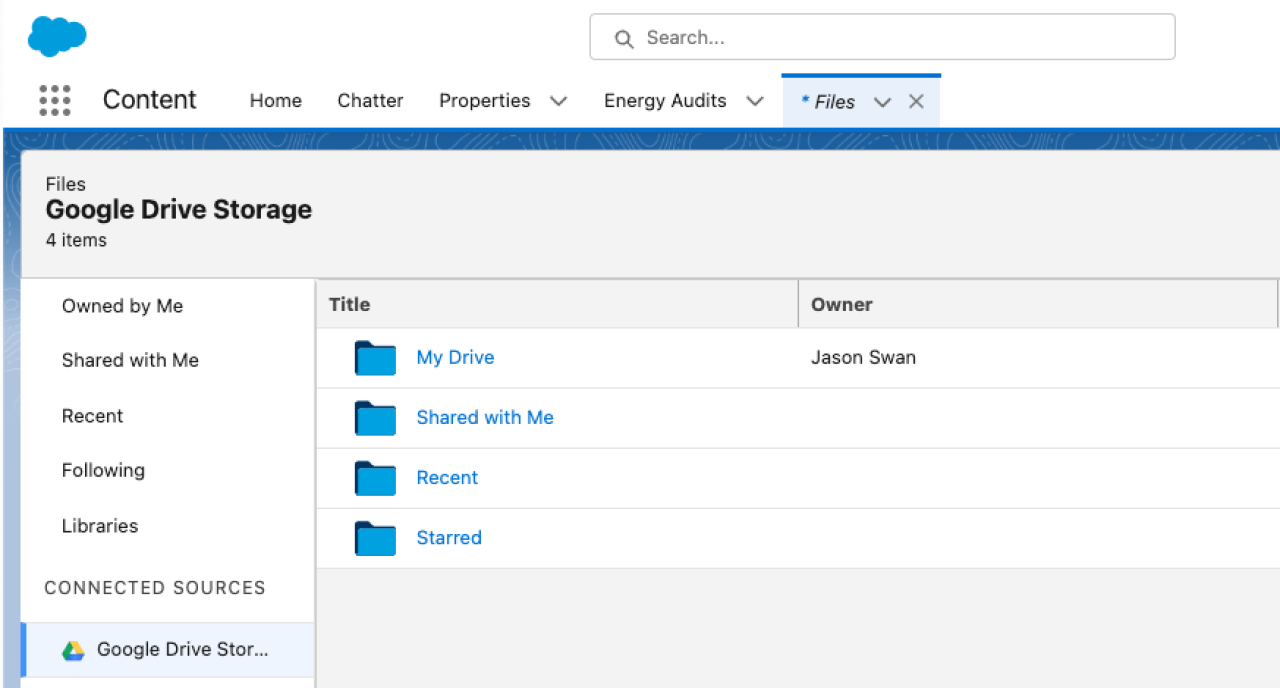
With all these steps done, you should be able to see the google drive in your Salesforce library. We’re not done yet though. Now that the connection has been established, we have to update some objects before we start transferring files.
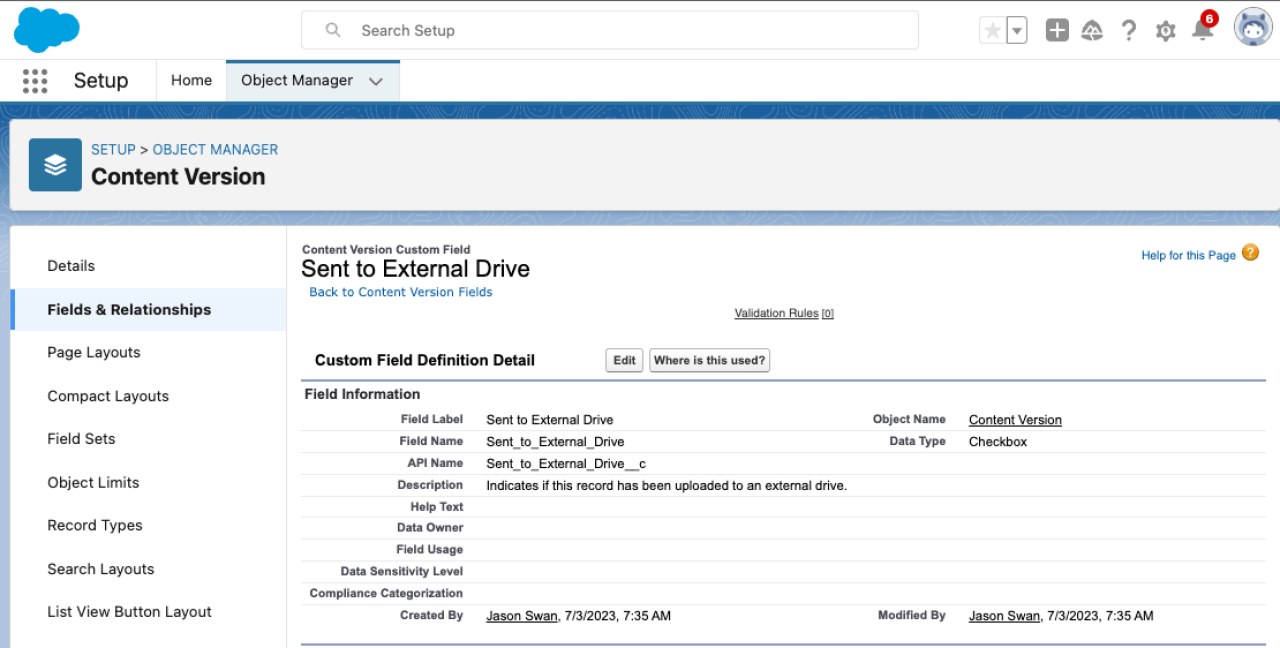
Step 5: Update ContentVersion
We need a way to detect when a file is uploaded to the external drive. To do that, add a new checkbox to the ContentVersion object, with a name like ‘Sent to External Drive,’ which will be used to track when a record is uploaded to the external drive. We also need to add a field that stores the Id of the external object on the ContentVersion. This will make it easier to build new connections to the external object.
Step 6: Create a Serverless Function
Once we have our objects and permissions set up, it's time to export our files. However, it would be too tedious and time-consuming to do it manually, so let's make a serverless function to do this for us. Using a service, such as AWS Lambda or Azure Function, create a function that takes a list of ContentVersion record IDs, uploads the records to the external data source, and then puts a checkmark on the ‘Sent to External Drive’ checkbox on the ContentVersion records in Salesforce. This lets us know which of the files have been copied over to an external storage system, which will be useful when we have to build connections to the external file. After the serverless function has been made, we can choose how to trigger it with Salesforce, such as whenever an opportunity is closed or at the end of the work day. Furthermore, we need to store the date and time that this serverless function runs. When we build the new connections to these external objects, the date and time of this sync can be used to limit the number of external objects returned when querying them. A Custom Setting can be used to store the latest sync time for your code to reference.
Step 7: Updating the ContentVersion Records
Now that the serverless function is moving the files off of Salesforce, we need to start internally referencing the external records by building connections to the external file while removing old connections to the internal file. Since it may be too much of a load on the system to query and move every file at once, we’ll have to make an apex batch job. The sample code of this apex job is available for download at the end of the article. The batch job will need to have the following steps:
Take each ContentVersion record that has been sent to an external drive and query the external object that is connected to that record.
Create a new ContentVersion record using data from the external object. Since Salesforce always uses the latest ContentVersion of a file, this will ensure that the externally stored object will be used when opening the file.
Take the ContentDocument ID from the old ContentVersion record and map it to the ContentDocument ID of the newly created ContentVersion record. This will make it easier for us to replicate the old connections to the file.
Use the old ContentDocument ID to find the ContentDocumentLink records, which tells Salesforce who has access to the file, then create new ContentDocumentLink records using the new ID from the newly created ContentVersion record. Since the new ID is pointing to the external file, these new ContentDocumentLink records will also point users to the external files.
After the batch job is finished, we have one final step. We need to run a second batch job that deletes the old ContentVersion records that have been connected to the external drive. Once those old records are deleted, you will have freed up your Salesforce storage, and the Salesforce library will contain files that are stored in an external drive.
Conclusion
Storage limits can be a pain to deal with in Salesforce. There are not many ways around the storage limit, leaving buying more storage space as a convenient but pricey solution. However, with the external storage system and the connections you just made, you no longer have to worry about what to do when your organization reaches its storage limit. Better yet, you can always repeat these steps to build additional external storage systems. Contact DB Services for any questions you have or if you need assistance setting up an external storage system for Salesforce.
Need help with your Salesforce digital transformation? Contact us to discuss Salesforce consulting, implementation, development, and support!
Download the External File Storage for Salesforce
Please complete the form below to download your FREE Salesforce file.