

Step 1: Open FileMaker Admin Console
Open a new browser window and navigate to your FileMaker Server Admin Console.
From the top nav bar, click Administration.
On the left, click External Authentication.

Select Change next to Microsoft.
The fields revealed are what you will populate in the following steps. For now, take note of the redirect URI at the top: https://YourDomain/oauth/redirect
Replace “YourDomain” with the domain of the FileMaker Server. This is also the domain of the admin console. So, for the domain cloud.example.com, the redirect URI would be https://cloud.example.com/oauth/redirect.
Step 2: Create a New Registration
Sign in to the Azure portal you want to use to manage SSO.
Click Microsoft Entra ID.

From the left menu, click App registrations.
Create a New registration.

Enter a descriptive Name.
Back in Register an application in Azure, select Accounts in this organizational directory only (Default Directory only – Single tenant) under Supported account types.
Choose Web under Redirect URI and copy in the redirect URI from the Admin Console.
Click Register.
Step 3: Modify Authentication Settings
On the left, click Authentication.

Deselect Access tokens.
Select ID tokens.
Make sure under Supported account types that Accounts in this organizational directory only (Default Directory only – Single tenant) is selected.

Set Allow public client flows to No.
Step 4: Populate Admin Cloud Azure Fields
On the left, click Overview.
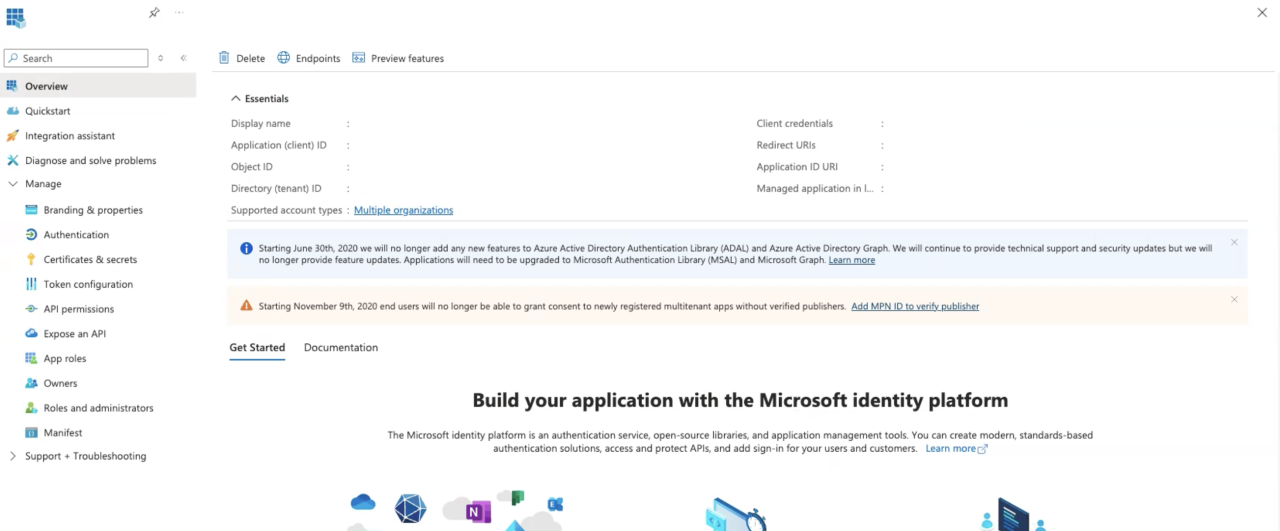
Copy Application (client) ID to the field Azure Application ID in the Admin Console.
Copy Directory (tenant) ID to the field Azure Directory ID in the Admin Console.

On the left, click Certificates & Secrets.
Under Client secrets, click New client secret.
Enter a Description and select an expiration date. Keep in mind if you do not set Expires to Never, you will have to update this field.

From this new secret, copy Value to the field Azure Key in the Admin Console.
This will be the only time you can copy this value. If you don't save this value now, you will have to create another secret later.
Click Save Authentication Settings
Below this section, in Database Sign In, set Microsoft to Enabled.

Step 5: Set API Permissions
Back in Azure, click on API permissions on the left.
Click Add a permission

Click Microsoft Graph.

Click Delegated permissions.

Search for user.read and select the User.Read permission and click Add permissions.
Since user.read may already be populated, you can discard if Add permission remains greyed out.
Click Grant admin consent for.

Step 6: Create New Group
Click Microsoft Azure, then click Groups.

Click New group.

Click No owners selected and choose the owners of the group.
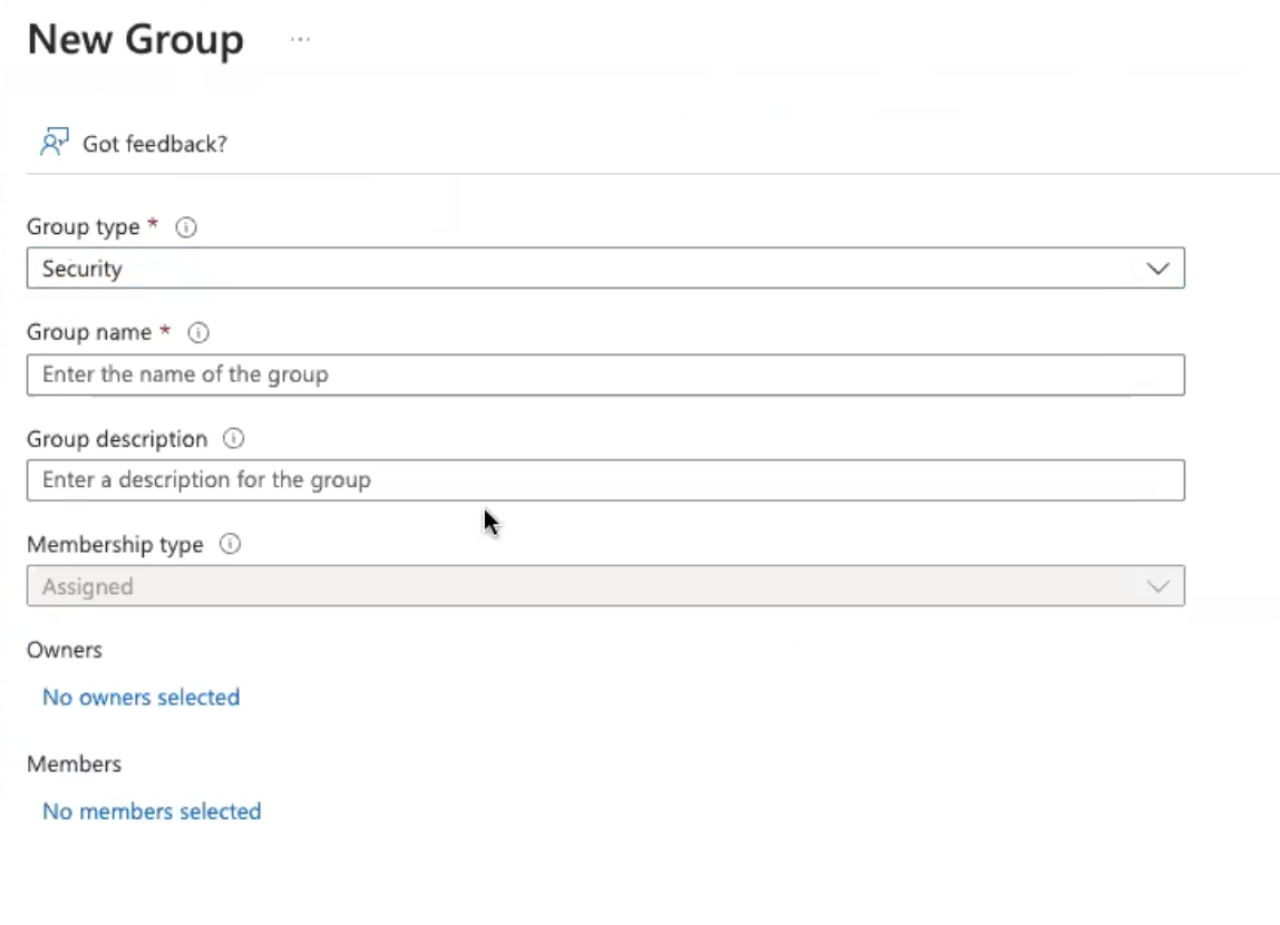
Click No members selected and add the users who you want to use SSO.
For Group type, choose Security.
For Group name, give a descriptive name.
Since a group will correspond to a permission set, it is suggested to name this group according to the permissions its members will have.
For Group description, enter a description.
For Azure roles can be assigned to the group, select No.
For Membership type, select Assigned.
Click Create.
Step 7: Add Group to FileMaker App
Click on the newly created group.
Copy the Object Id.

Open the FileMaker application you want to use SSO with.
In the upper menu bar, click File, then Manage, then Security.
Click Authenticate via and choose Microsoft Azure AD.

In the bottom left, click New.
On the right, select Group.
For Group Name, paste the Object Id.
Make sure Active is true.
For Privilege Set, select the desired privilege set.
For Description, write a short description.
Click OK.
If you want to assign different privilege sets to different users, you will need to repeat steps 6 and 7. Each created group corresponds to a single FileMaker privilege set.
If you need further assistance setting up SSO with Microsoft Azure for FileMaker, please contact our team at DB Services and we would be happy to help.
Did you know we are an authorized reseller for Claris FileMaker Licensing?
Contact us to discuss upgrading your Claris FileMaker software.