Claris Connect has served as a bridge between FileMaker applications and third-party programs since its creation, expanding the possibilities that FileMaker provides much further than before. While triggering Claris Connect flows in FileMaker now is not very complex, a new look to the Trigger Claris Connect Flow script step in Claris FileMaker 20.2 has made connecting to and triggering flows easier. Being able to connect your application to 3rd party software could be the difference maker for your business and is now easier than ever! Let’s dive into what has changed and how you can use this to your benefit when managing your application.
What is a Claris Connect Flow?
A Claris Connect Flow is a sequence of actions that will be performed when initiated by the flow trigger. Claris Connect provides numerous options and combinations for triggers and actions to be taken in a Claris Connect Flow, allowing users to connect 3rd party apps such as QuickBooks, Slack, Trello, and many more!
As depicted above, we will use a popular trigger option, HTTP Request (Webhook), to perform actions through Mailchimp.
What's different in Claris FileMaker 20.2?
In previous versions of FileMaker, developers would utilize the “Insert from URL” script step to connect to Claris Connect webhooks and trigger the appropriate flows. This required setting cURL parameters and would not return a result for users to check whether their request was successful or not. Again, if it is important that this webhook be successful before moving on to the next step in your application, we should be able to easily tell if the action was completed successfully or if we should alter course to deal with an error. Because of these factors, the “Insert from URL” script step could be intimidating for users to use and further limit the possibilities for their FileMaker applications.
In Claris FileMaker 20.1, a new script step called “Trigger Claris Connect Flow” was introduced, simplifying the user experience and utilizing more specific parameters directly pertaining to triggering Claris Connect flows. The user could input the webhook URL, any JSON Data they would like passed into the flow, an API key if desired, and the option for a result field or variable to store the action’s completion status.
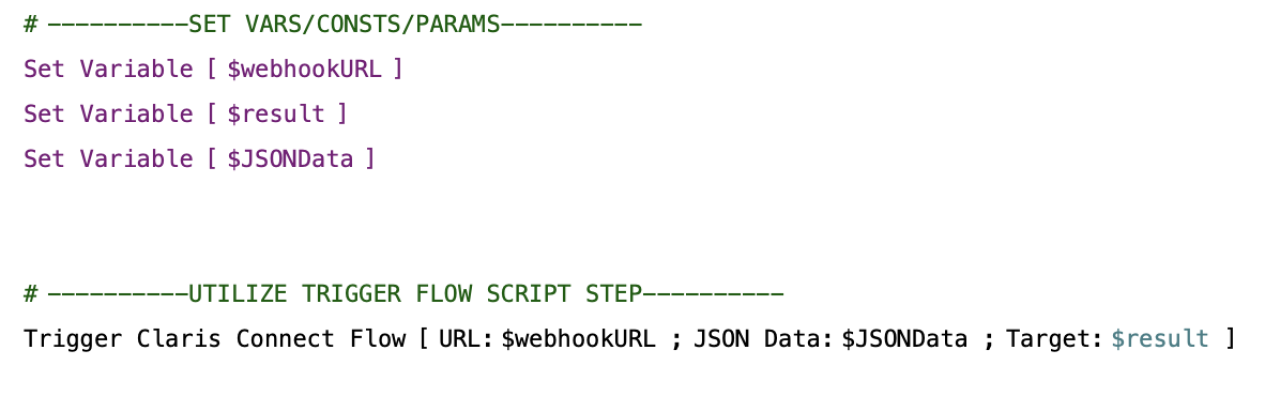
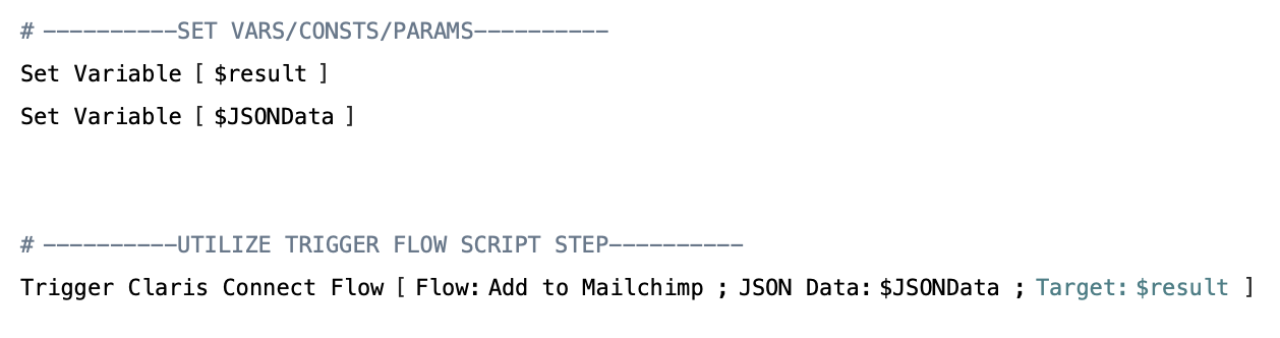
In Claris FileMaker 20.2, this step is simplified even more. It no longer requires the user to copy and insert the URL into the step, but rather uses a pop-up box displaying the current enabled flows on the teams associated with the active Claris ID currently logged in on FileMaker Pro.
Let’s look at putting this new feature into practice by creating a new flow to add user information into a Mailchimp account to be used for future marketing campaigns.
Trigger Claris Connect Flow Script Step Using Mailchimp
The first step is to ensure that the “fmapp” and “fmrest" privileges are enabled for our FileMaker application user, as these are necessary to connect to Claris Connect through the FileMaker Data API. You can accomplish this by going to the File menu > Manage > Security. In Extended Privileges, add the appropriate privilege set attached to the current user to both “fmapp” and “fmrest”.
Next, ensure that you are signed into your Claris ID so you can take advantage of the new flow lookup feature. You can sign in by going to the File menu > Sign In to Claris ID.
Finally, you should create a Mailchimp account and have at least one audience defined before following this tutorial further. Once all these steps are complete, we are ready to move to Claris Connect and create our new flow.
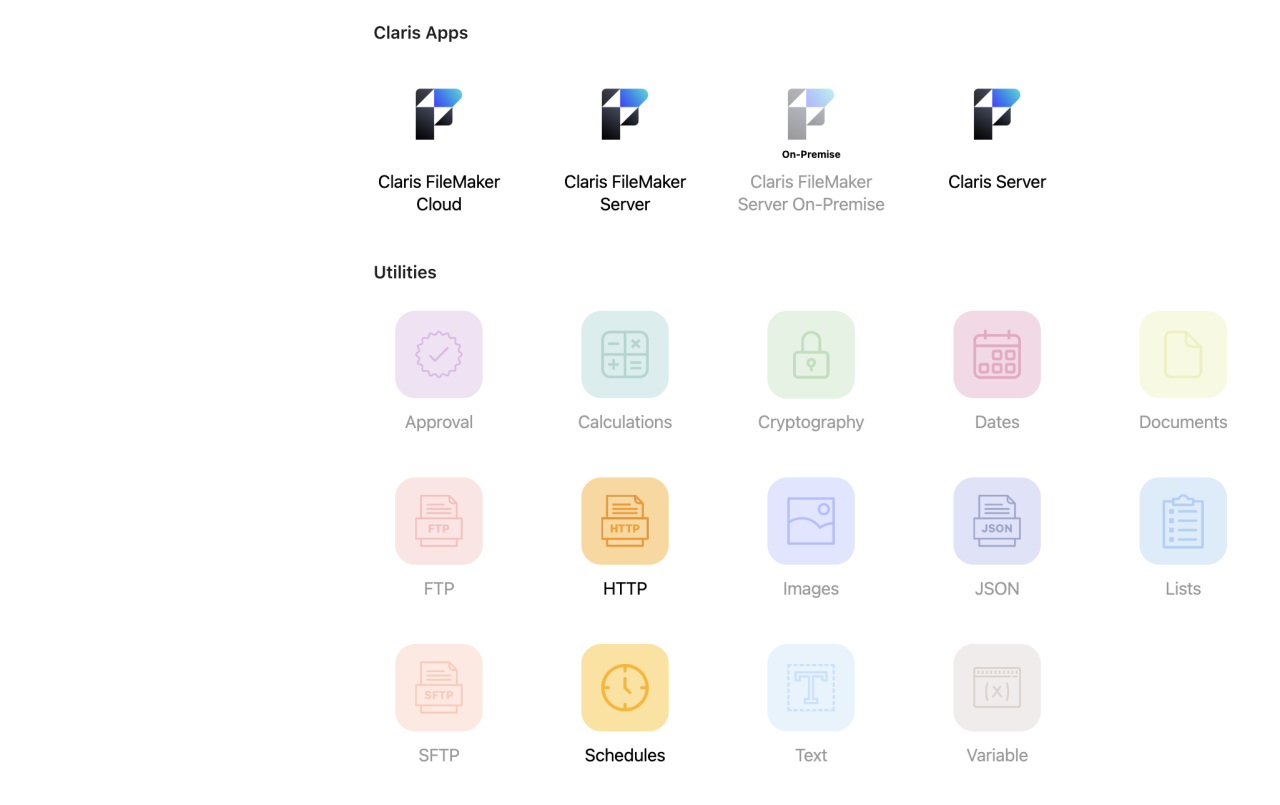
You can either create a new project or select an existing one, then select the “New Flow” button. Once again, Claris Connect offers plenty of trigger options, but for this example, we will use “HTTP”, which acts as a standard webhook trigger for our flow.
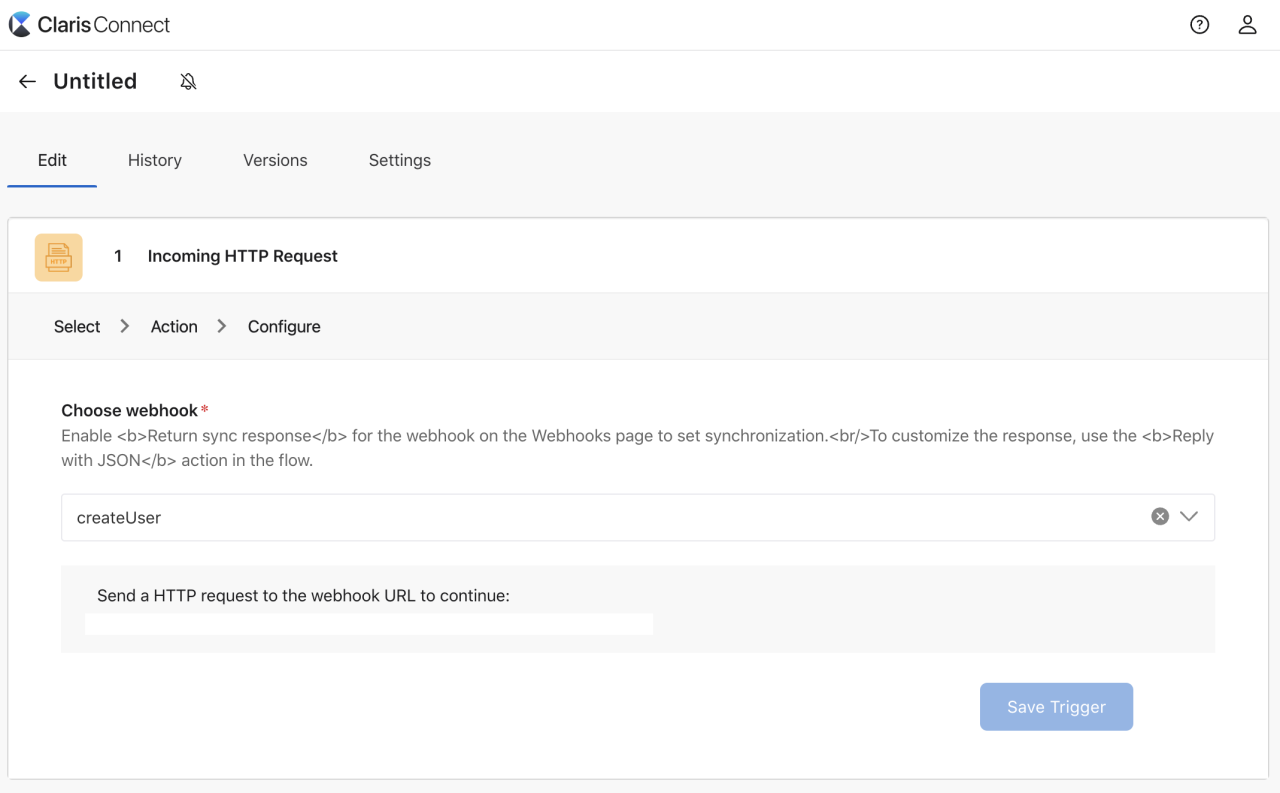
Select “Incoming HTTP Request” and Continue. Next, choose the name for your webhook. You can create a new webhook or choose an existing one to pair this flow with. Claris Connect will require you to test the link before moving on, so simply click on it to test. Once we see that it has displayed some information, return to the previous tab we were working in and click “Save Trigger”.
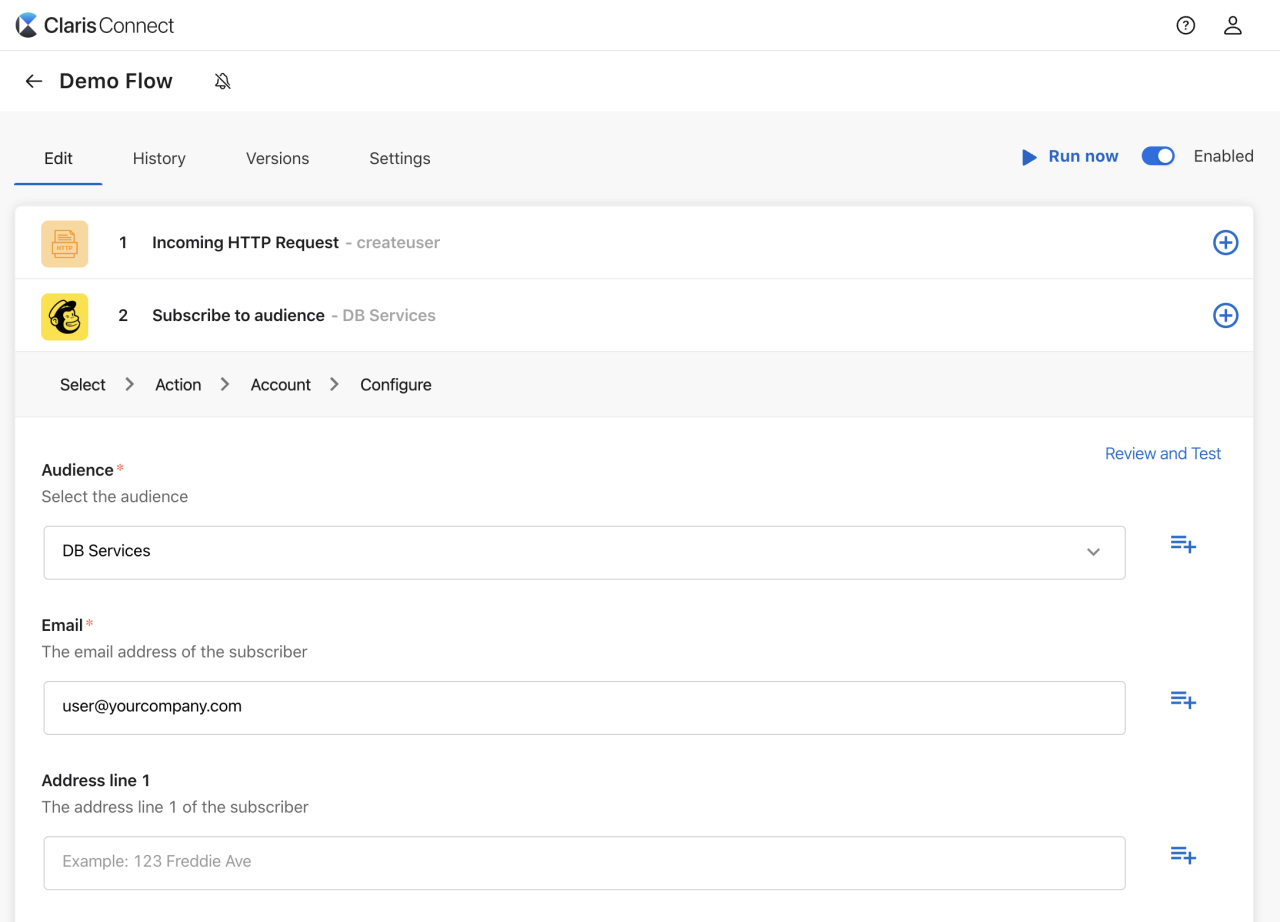
Now that our flow has been created and our trigger set, let’s rename the flow to something other than “Untitled”. Once that is done, let’s add our first action for the flow to complete. Select the plus button on the trigger and select “Action”. Select Mailchimp, and since we are adding new user information from within our FileMaker application, let’s select the “Subscribe to audience” option, which allows us to add new users to an existing Mailchimp audience you have created.
Sign into your Mailchimp account, and continue. Now, you should be on the page depicted below. This page is where we will set what data gets sent to Mailchimp and be added to our audience for future marketing emails. For initial testing purposes, let’s manually input some example data that we will use to try out our new flow. You can see below that I have selected my audience and an example email to test with.
Note that Mailchimp does not allow you to add an existing email to an audience again, so test with a different email than you used to create your Mailchimp account. After you have inputted your example data, click save and enable the flow by selecting the toggle in the top right corner.
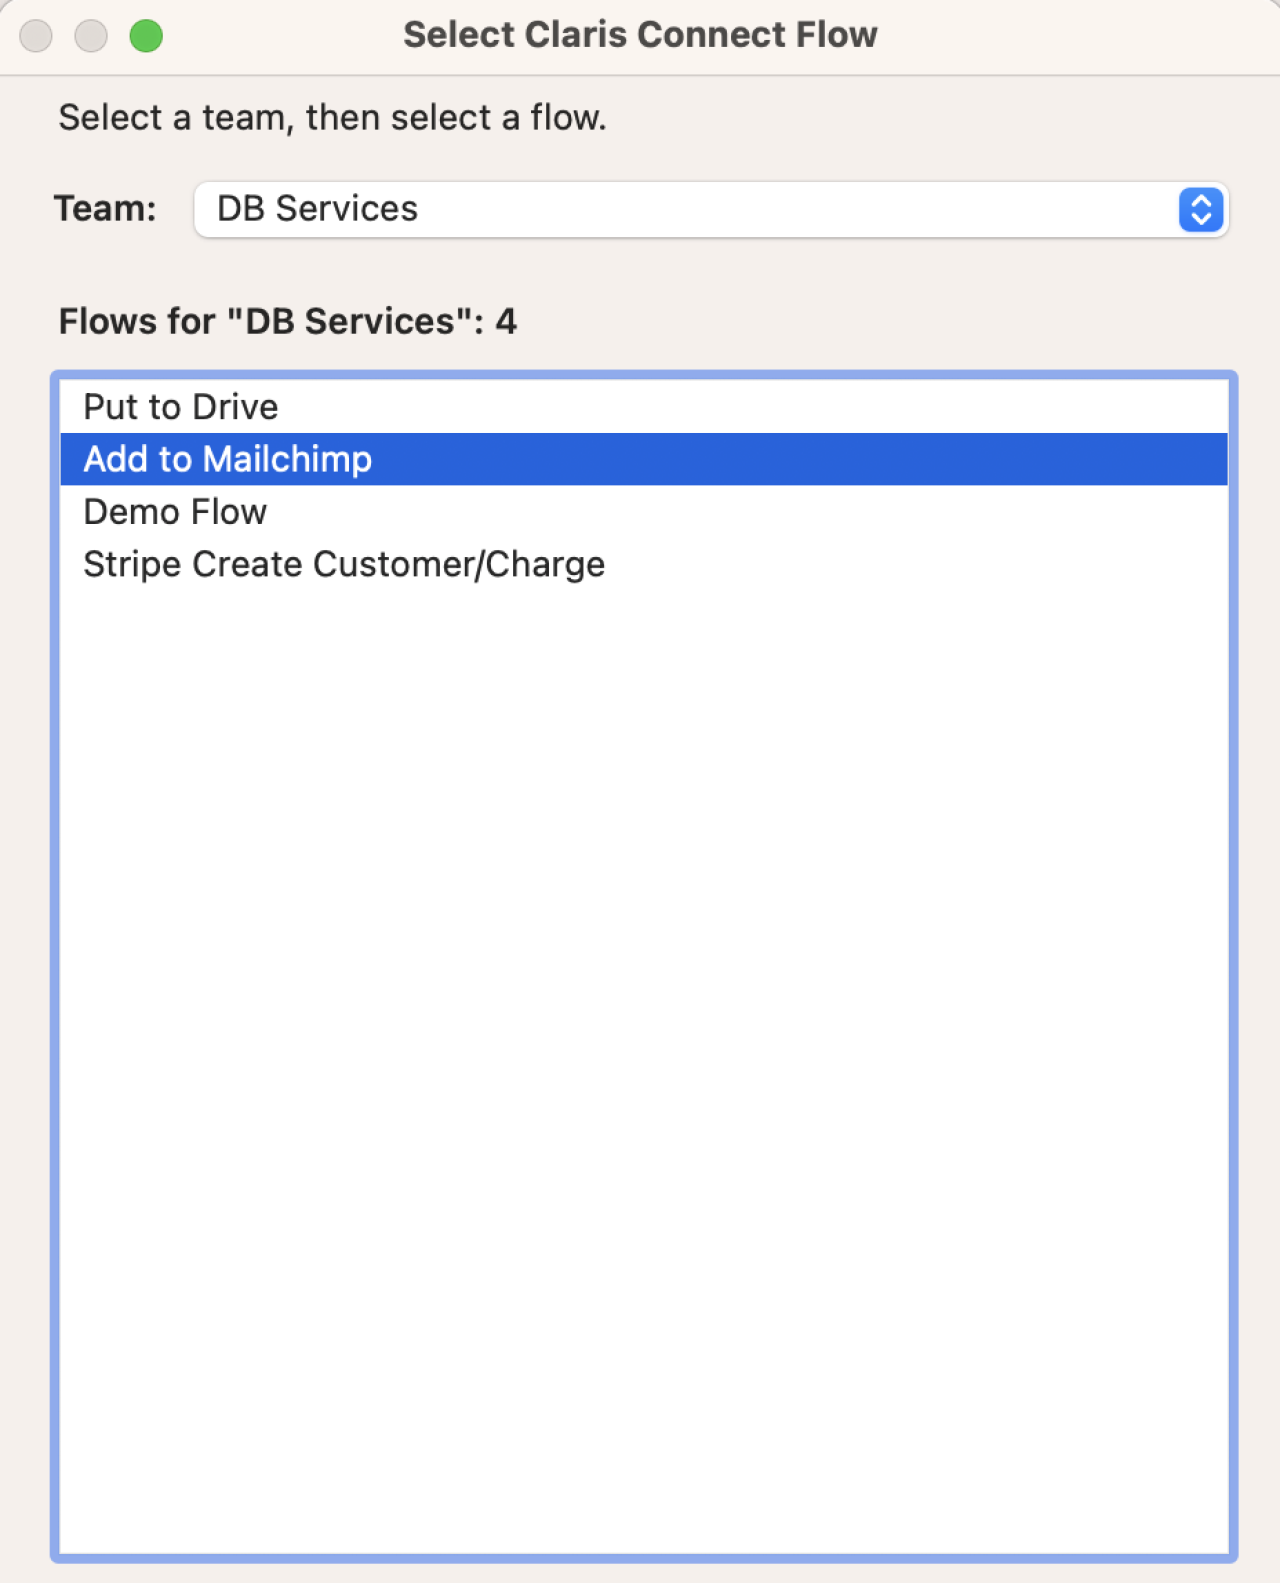
Now that we have established our flow, we are ready to make the magic happen in our application. In the demo file, open up the Script Workspace and select the “Update Mailchimp” script. Let’s connect our new flow to the “Trigger Claris Connect Flow” script step by selecting “Flow”. The new feature comes into play now as a new pop-up appears that shows us a selection of our current Claris Connect flows attached to our Claris ID (depicted below). Select the new flow we just created. Once you have chosen the new flow, you can select the gear and see that FileMaker input the webhook URL for us. You can optionally add an API Key to protect your flow further if you wish. You would need to modify the webhook in Claris Connect to use authentication and copy the Project API Key into the demo file as a parameter for the trigger flow script step.
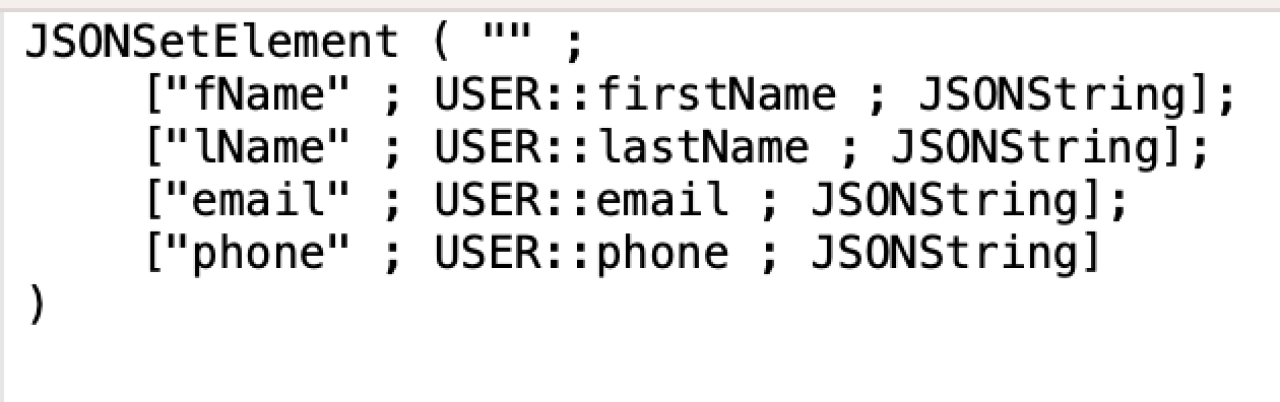
Now it's time to test out the flow trigger! Click on the “Sync with Mailchimp” button under our user info fields to trigger our flow. There is no need to create a new record and input data in these fields yet. The button click should have added our example data into Mailchimp, which you can check by viewing your Mailchimp audience members! To use actual user information from our FileMaker application, we must have a JSON object containing all user information we want to use and pass it in the JSON Data parameter of the Trigger Claris Connect Flow script step. This JSON object below has already been created and set up for use in our demo file.
In order for us to use this data in our Claris Connect flow, Claris Connect must understand the structure of the data we are providing, which is why you must pass the data to the flow once before using it. Since the JSON data was already added to the Trigger flow step previously, this step has already been done for you. Now, we can navigate back to Claris Connect and put the finishing touches on our flow.
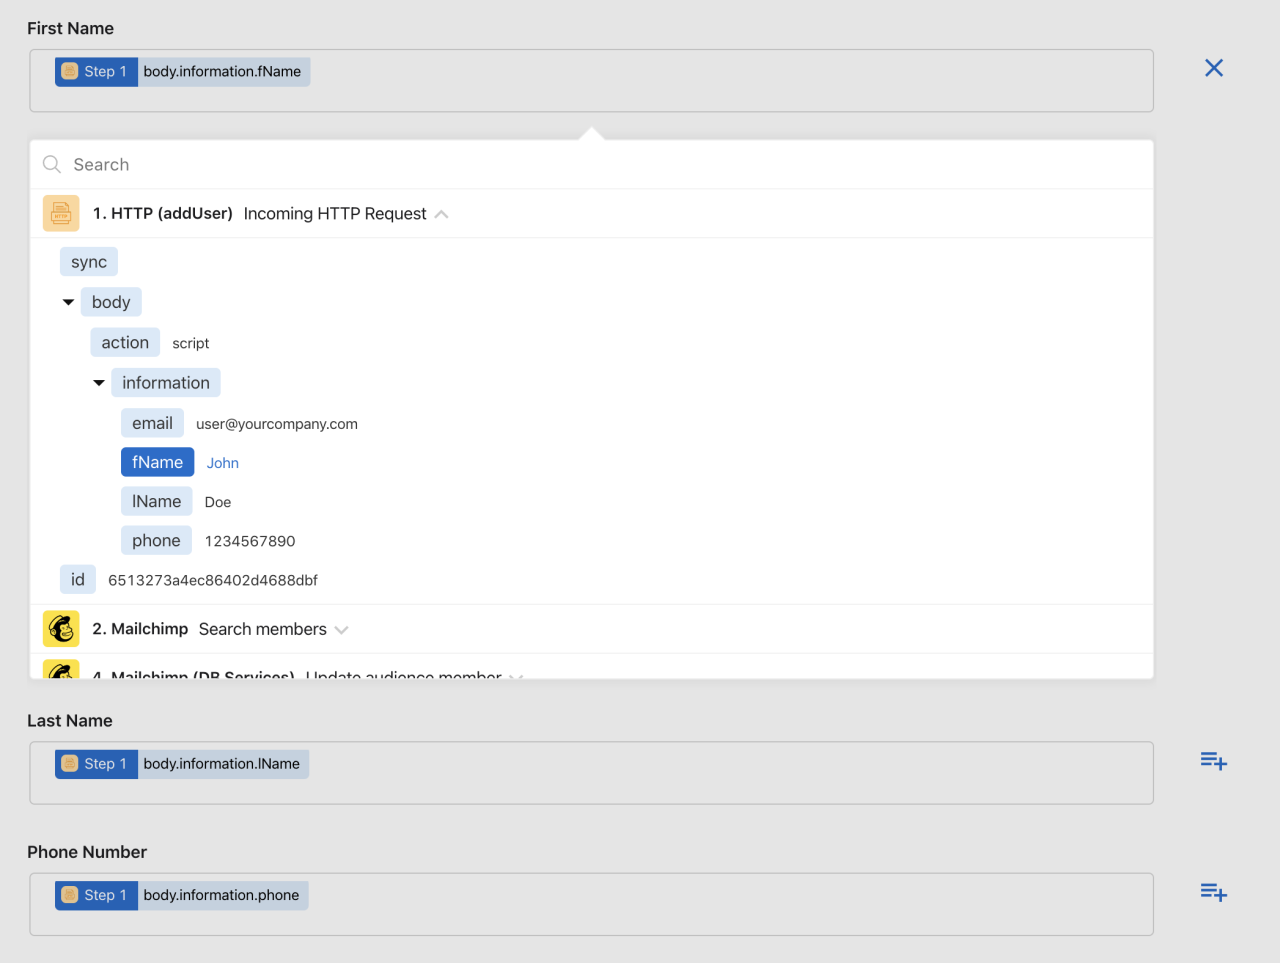
Navigate back to the Mailchimp action where we temporarily inserted example information. You will now be able to use “Step Data”, or data we received from our trigger, in the Mailchimp fields. Based on the data sent from the demo file, it makes sense to set fields based on the picture below. Once you have applied your changes, try adding a new user in the demo file and watch your new user information appear in Mailchimp!
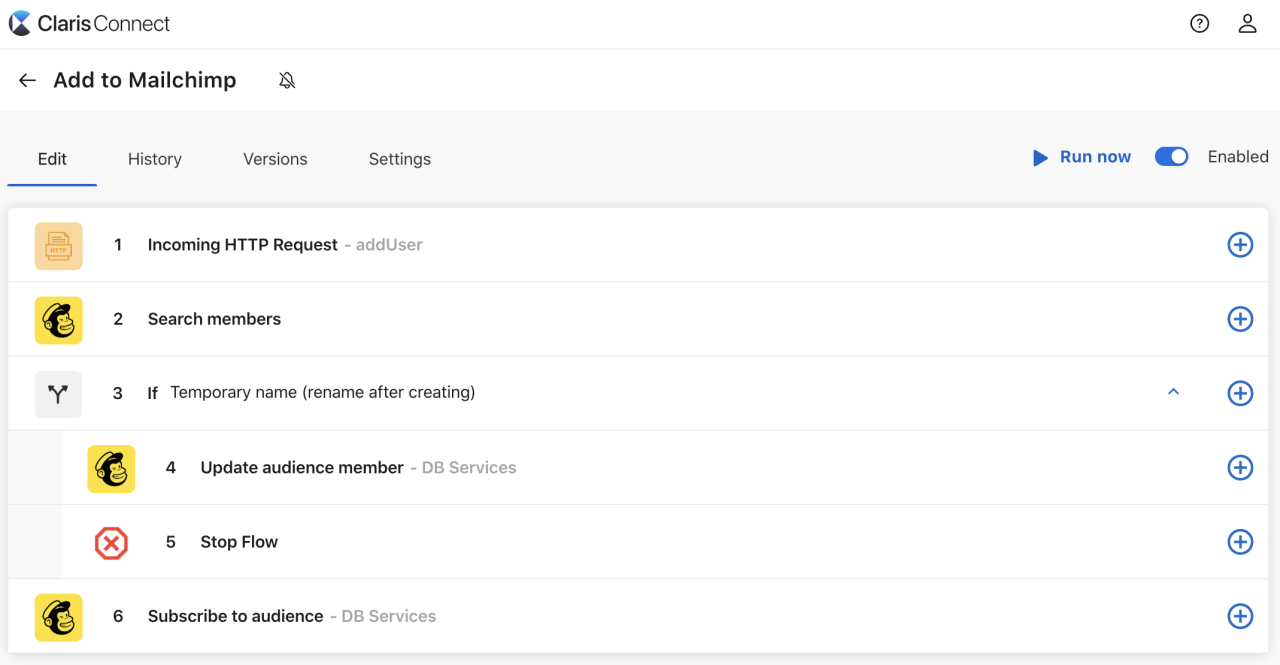
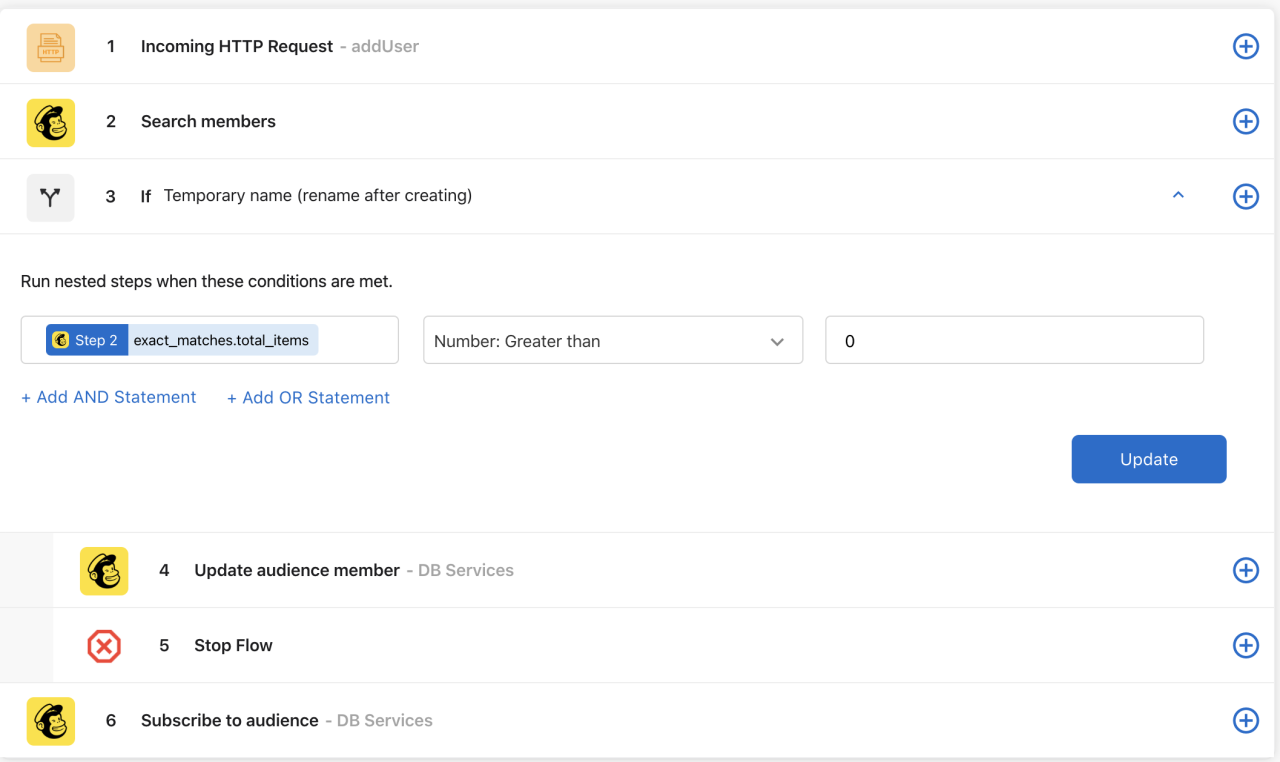
If you want to be able to update user information in your application and have that sync with Mailchimp, you can add a step before the “subscribe to audience” action to search for members with the email from your step data. You can then use an if-then step (depicted below) to determine if the “exact_matches.total_items” (the number of users it found with this email) is greater than 0 and whether you should utilize a new step to update an audience member rather than create a new user. Organize the steps appropriately to look like the image below.
Conclusion
The Trigger Claris Connect Flow Script Step is very convenient and easy to use to expand the possibilities of your FileMaker solution and further connect to other third-party apps. We recommend the use of API Keys and proper debugging throughout the application and Claris Connect flows, as they can help protect against unwanted actions being performed. The possibilities extend well past adding users to marketing email lists and can pass information both to and from your FileMaker application. Reference this article the next time you think, “I wish my application could talk with this other software,” because it probably can!
If you have any questions about Claris FileMaker 20.2 or the new Trigger Claris Connect Flow Script Step, please contact DB Services and we will be happy to help.
Did you know we are an authorized reseller for Claris FileMaker Licensing?
Contact us to discuss upgrading your Claris FileMaker software.
Download the Trigger Claris Connect Flow Script Step File
Please complete the form below to download your FREE FileMaker file.