
FileMaker 13 introduced two major interface controls that greatly enhance the user experience and modern look of a FileMaker application: Slide controls and popover buttons.
Most web users are familiar with these two controls. Slide controls have been a mainstay of homepages over the past 4 years, providing visual interest and highlighting key content on a site. Popovers are a perfect solution to showing more detail on a page without leaving the page or popping open a new window, giving the whole experience a bit of visual flair while maintaining the context of the user's work.
At its core, popover buttons are a space-folding device, akin to tab controls: they allow you to have more objects on a layout without overwhelming the user. Tools that facilitate progressive disclosure enable developers the ability to provide clean, simple interfaces that introduce detail only when the user needs it. Popover buttons are one of many tools that FileMaker 13 introduced to help developers build an interface that progressively discloses information.
Let's take a look at how to add and configure popover buttons.
Adding a Popover to a Layout
There are two main ways to add a popover button to a layout:
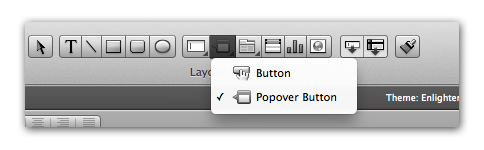
The status toolbar. The directions here differ depending on your operating system. On Mac, click and hold the Button tool on the status toolbar (shown above). Select the Popover Button option. Hover your mouse anywhere over the layout; you'll notice the pointer changed to crosshairs. Click and drag the crosshairs on the layout itself to add the button. On Windows, instead of clicking and holding the Button tool, click on the arrow next to the Button tool. Select the Popover Button option. The rest is the same.
The Insert menu. Choose Insert menu > Popover Button. FileMaker will add the popover button to the spot where you last clicked on in the layout. Immediately after adding the button, FileMaker will show you the button, the popover and the Popover Setup dialog. At this point you can add a label to the button, add objects to the popover or change the popover's settings.
Components
There are two components to a popover:
The button.
 The button looks and behaves just like a regular button, but instead of running a script when the button is pressed, it'll open up the popover. You can still run a script when the button is pressed by tying an OnObjectEnter script trigger to the popover, not the button itself! Tying an OnObjectEnter to the button doesn't do anything. Be careful: OnObjectEnter triggers fire after the event occurs,
  so the user will see the popover before your script runs.
The popover. This is the box that appears to the side of the button where your additional content goes. To show the popover in Layout Mode, either double click on the button or right click on the button and select Display Popover.
You can style these two components separately using the Inspector.
Adjusting the Knobs
Popover buttons have a couple unique settings that aren't available to other interface controls:
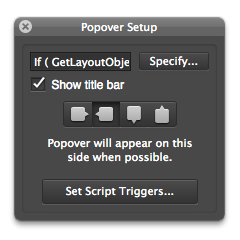
Position of the popover relative to the button. You can specify which side of the button the popover should appear next to. FileMaker will do its best to position the popover on the side you specify; however if there isn't enough room, FileMaker will display the popover on a side that does have enough space. If no side has adequate space, FileMaker will show the popover on the side you specified but it'll: 1) Be truncated, and 2) Have a scrollbar so you can access the rest of the objects.
Specifying the popover's title. The title will appear on the top of the popover and can be dynamically set from a calculation. You can choose to hide the title if necessary by unchecking the Show title bar option in the Popover Setup dialog.
Some Miscellany
There's a new badge to indicate if a button is a popover button. You can turn on the badge in layout mode via View menu > Show > Popover Buttons.
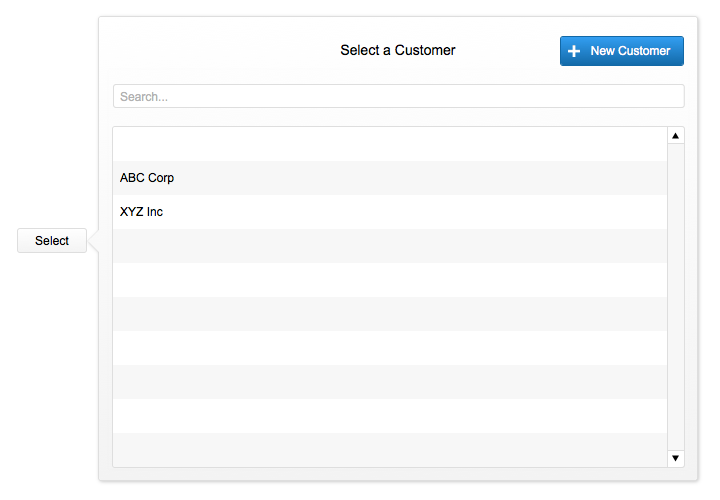
Popover buttons can be added to portals. For all those developers who were planning to use popovers to extend the amount of information in a portal row, you're in luck. However, the same restrictions apply to the popover as they do to the portal: you can't add panel controls, other portals, etc. to the popover because it's an extension of the portal.
Popovers can't be nested. Popovers within popovers within popovers? Not quite. What's interesting, though, is that FileMaker will allow you to put a popover button inside a popover, but the button won't show the 2nd popover.
Popovers can have slide controls and tab controls inside them (as long as the popover button isn't inside a portal). Feel free to space-fold yourself into oblivion by adding slide controls and tab controls to your popover. No real need to nest popovers when you can nest panel controls.
A script can be triggered when a popover is opened or closed. You can set these via the Popover Setup dialog > Script Trigger button. Configure an OnObjectEnter trigger to fire a script when the popover opens and an OnObjectExit for when the popover closes.
Modernity
The last few versions of FileMaker have seen a focus on providing developers the tools needed to make FileMaker applications modern. Themes, styles, gradients, shadows, slide controls, popover buttons—these are some of the many features demonstrating FileMaker, Inc's commitment to improving user experience and design. We are already looking forward to where FileMaker 14 will take us next!
Did you know we are an authorized reseller for Claris FileMaker Licensing?
Contact us to discuss upgrading your Claris FileMaker software.