

FileMaker Server can be set up to authenticate against Active Directory and Open Directory. For those already using a Microsoft Server as a domain controller, setup is little more than flipping a switch, while those on Mac-only networks have to do a little more.
FileMaker Server and Open Directory can be integrated on either a single machine or across multiple machines. If you are following FileMaker Server best practices, Open
Directory and FileMaker Server should be installed on separate machines. The directions for either deployment are the same, except for on the single-machine deployment do all the steps on a single machine.
Note: This tutorial assumes a two-machine deployment.
Caveats
Setup may require an advanced understanding of networking and domain name configuration.
FileMaker Server must be installed on a Mac as Windows-based PCs are not able to bind to an Open Directory domain. Windows clients will still be able to authenticate, as authentication is processed through FileMaker Server.
Each FileMaker database must have a local account with [Full Access], as an Open Directory user with [Full Access] will not be able change security settings.
Requirements
Mac OS X Mountain Lion (other versions may require a slightly different setup).
OS X Server
Sections
Mac OS X Server
Open Directory Configuration
FileMaker Server Configuration
FileMaker Pro Database Configuration
Troubleshooting
Section 1: Mac OS X Server 1
OpenDirectory Server is required and you must have a static IP and a resolvable hostname. FileMaker Server is optional.
Step-by-Step
Install Mountain Lion and update to the latest version.
If you are going to be using this machine as an Open Directory server, you will need to assign it a static IP and make sure it is using a reachable domain name.
Install OS X Server
Purchase and download Mac OS X Server from the Mac App Store.
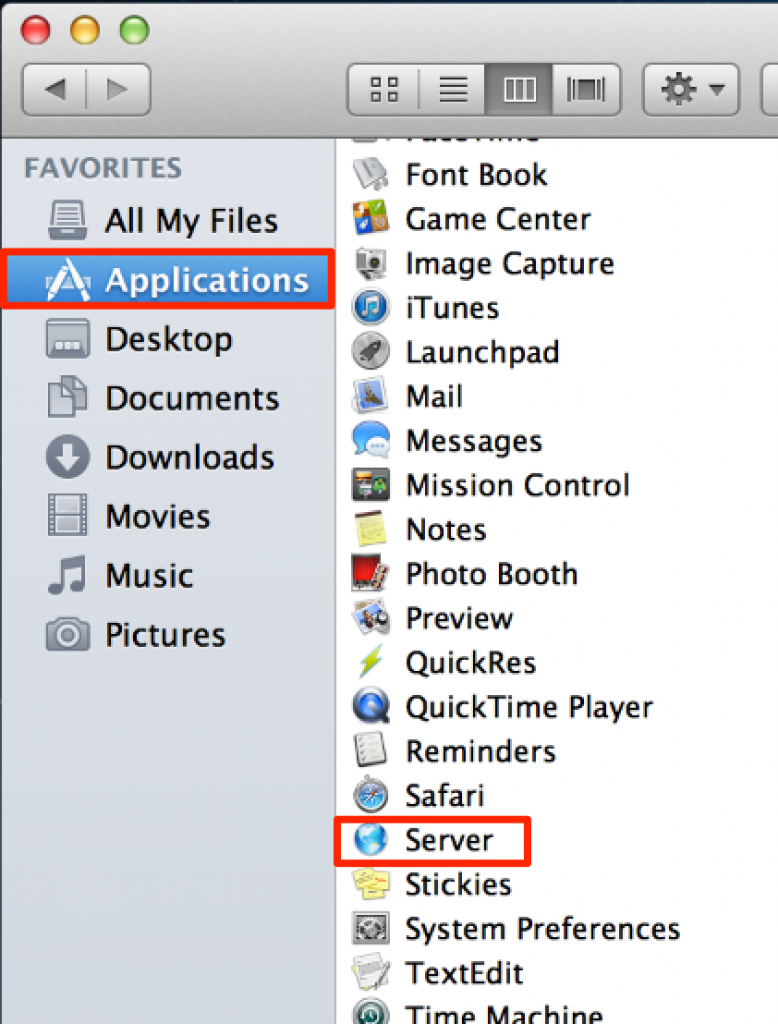
Open your Applications folder and double-click Server to begin setup.
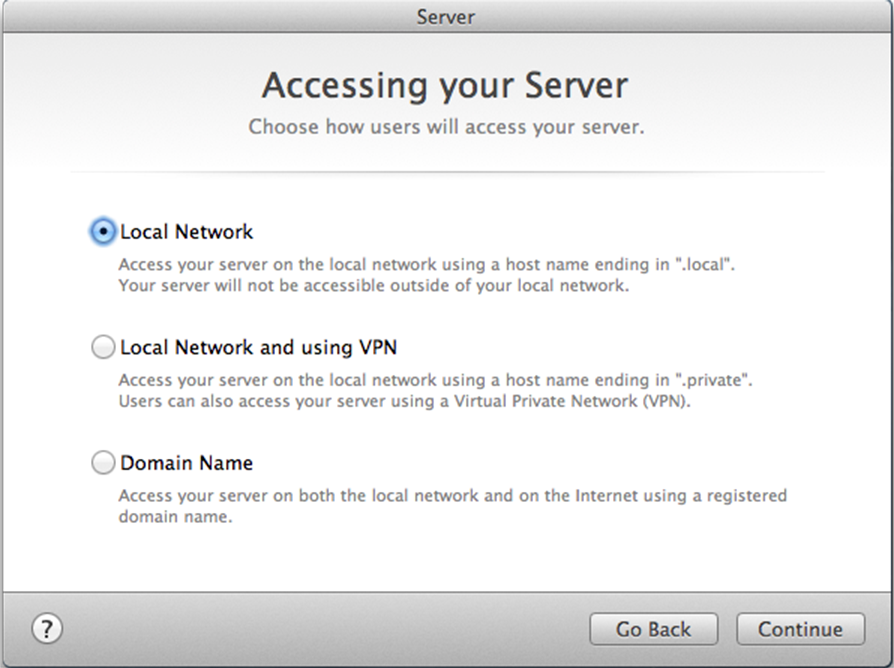
On the second page of the Server setup wizard ("Accessing your Server"), you will be given three options. If the server is not going to be accessible from outside the local network, choose "Local Network" (1)
Step through Server setup wizard: On the section "Connecting to your Server", make sure the "Network Address" (1) is set to a static IP and "Host Name" (2) is set to the domain that resolves to the static IP you configured.

Section 2: Open Directory Configuration
Static IP and Resolvable DNS Name are required for configuration.
Step-by-Step
Open the "Server" application.
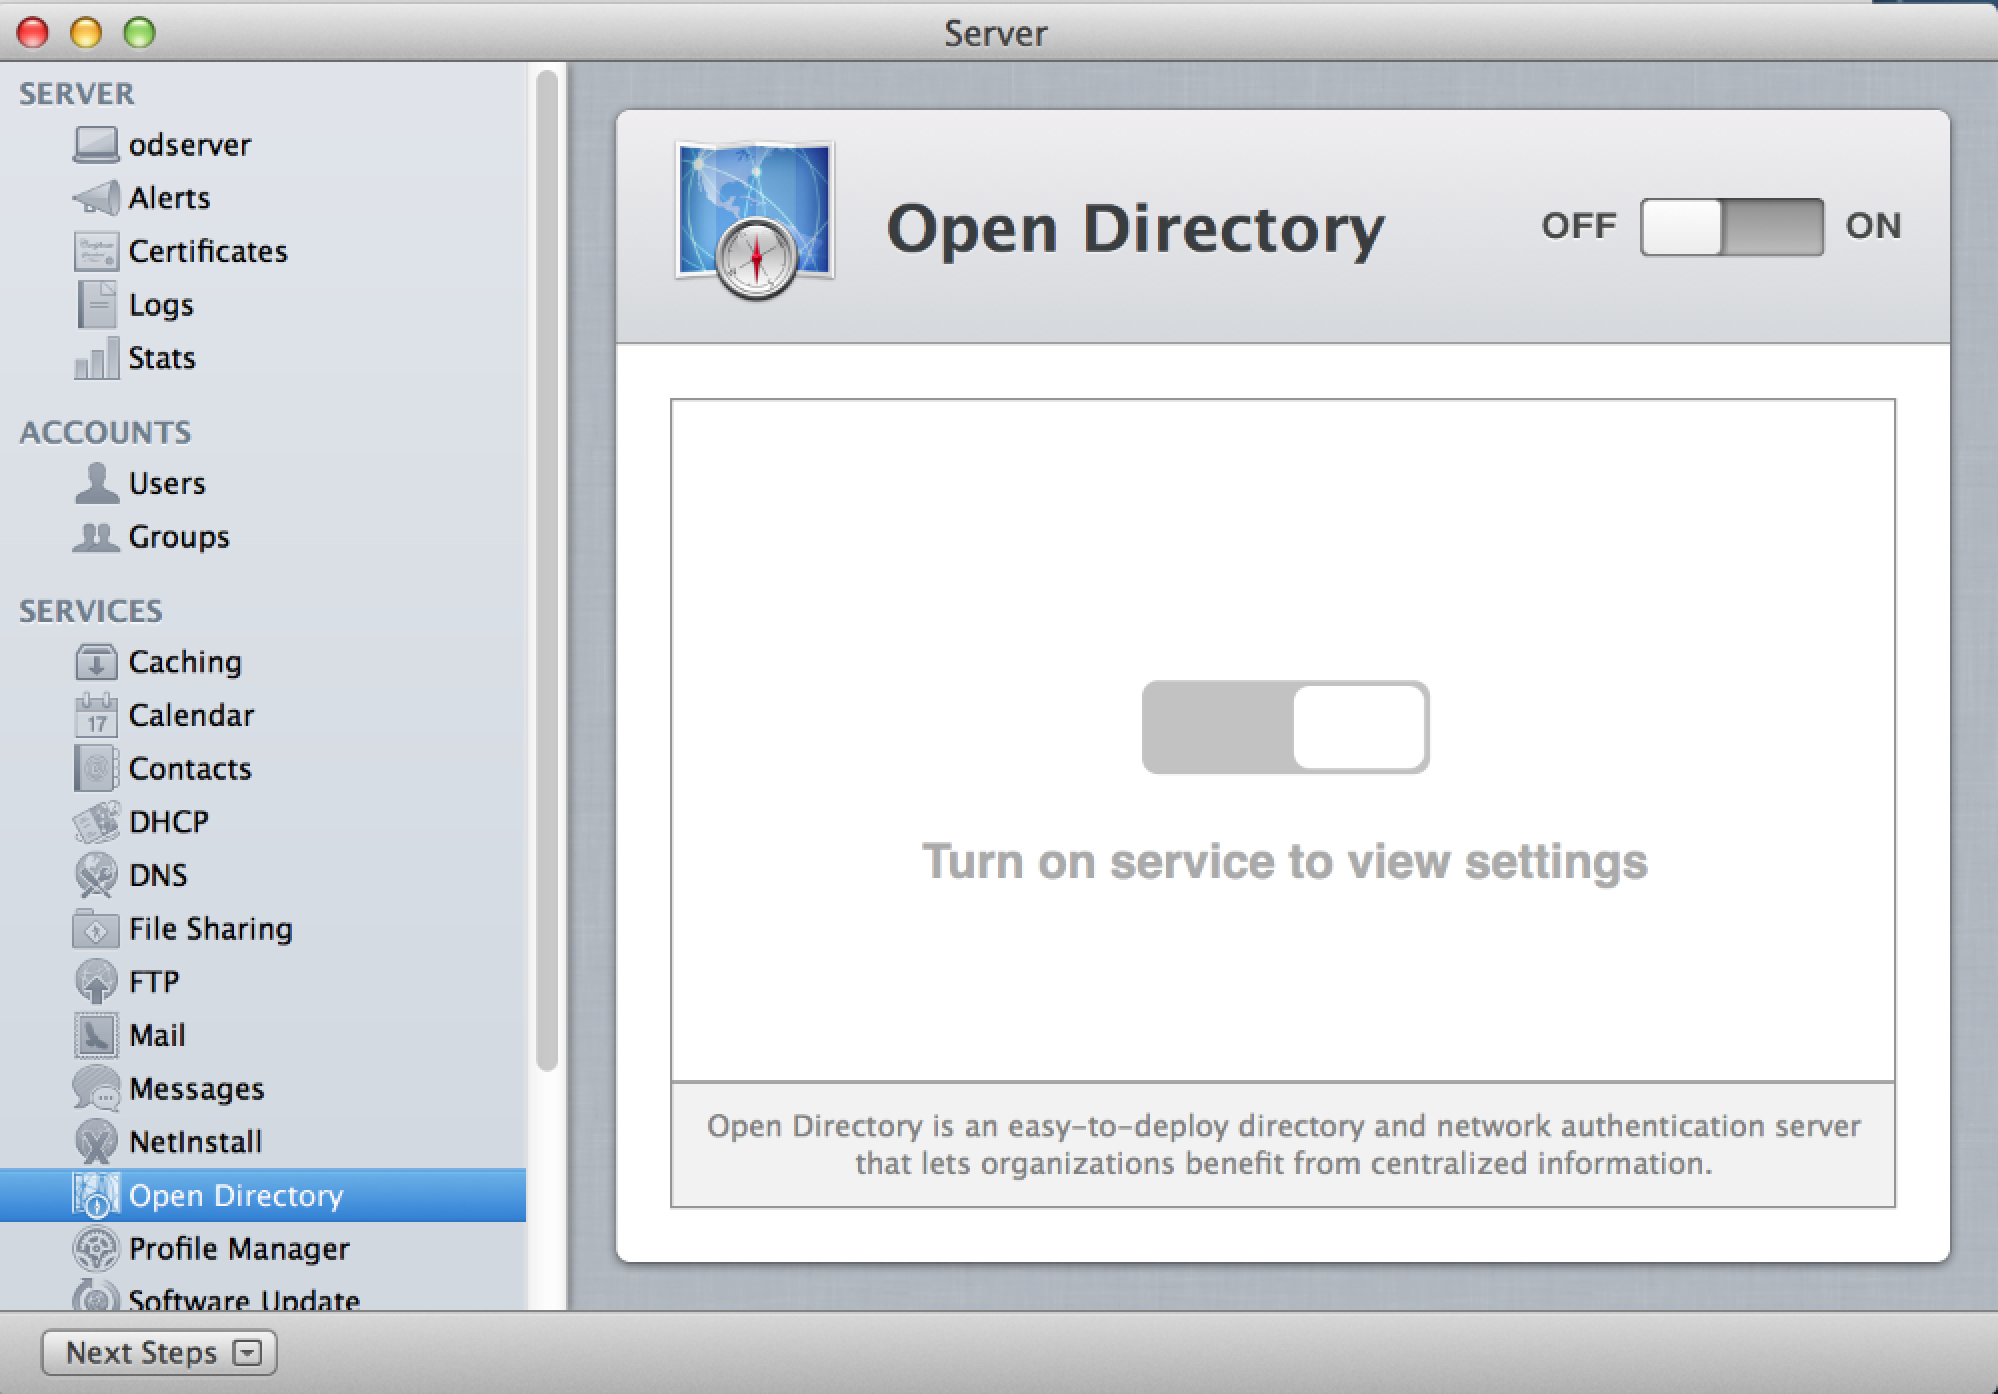
Choose "Open Directory" under "Services" section.
Start the Open Directory setup wizard by clicking on the OFF/ON toggle.
Choose "Create a New Open Directory Domain" and click Next.
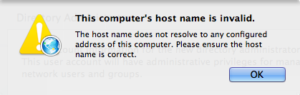
Enter the information for the Directory Administrator account, then click Next. If you get an error regarding the hostname being invalid, you need to make sure the Open
Directory server has a resolvable domain name. You may need to check the PTR (reverse
lookup) record to make sure it is configured correctly. (See troubleshooting section)Enter the organization name and the email address of the server administrator, click
next.Click on "Set Up" to configure and enable Open Directory.
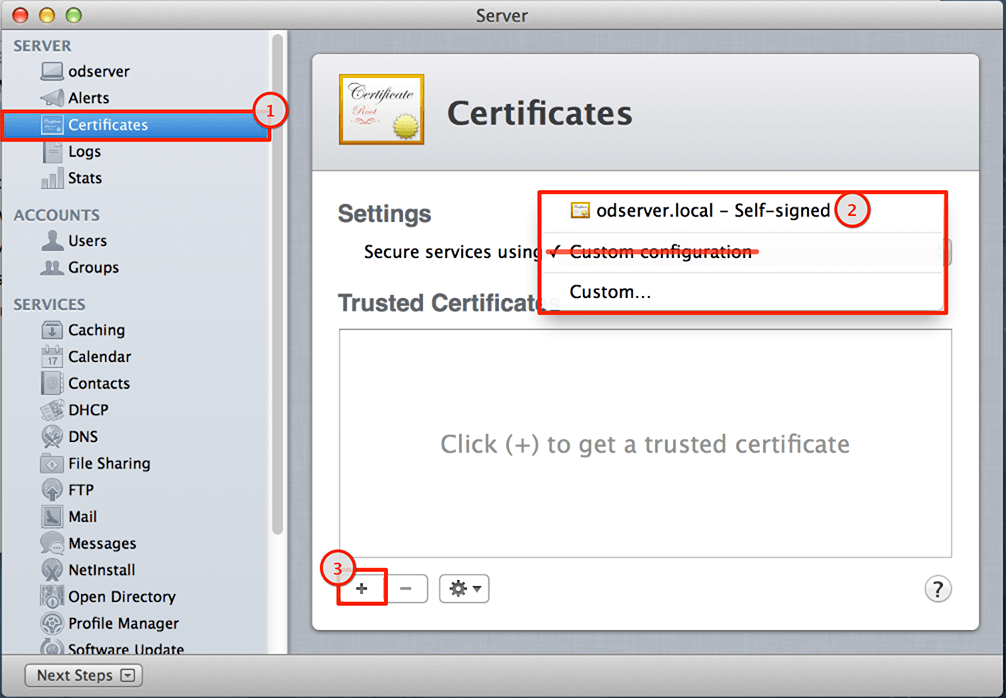
Setup SSL Certificate (1), make sure that "Secure services using:" is set to your SSL
certificate and not "Custom configuration".
Use the existing self-signed certificate (2); or,
Use a third-party certificate, by clicking on the plus sign (3) and generate a CSR for
use with a trusted SSL provider – OS X Server: Configuring clients to use SSL for Open Directory binding
Open Directory Users & Groups
Now that you have a working Open Directory server, you will need to set up users and groups to use for authentication.
Tip
For more control over Users & Groups, you can download Workgroup Manager directly from Apple.
Groups
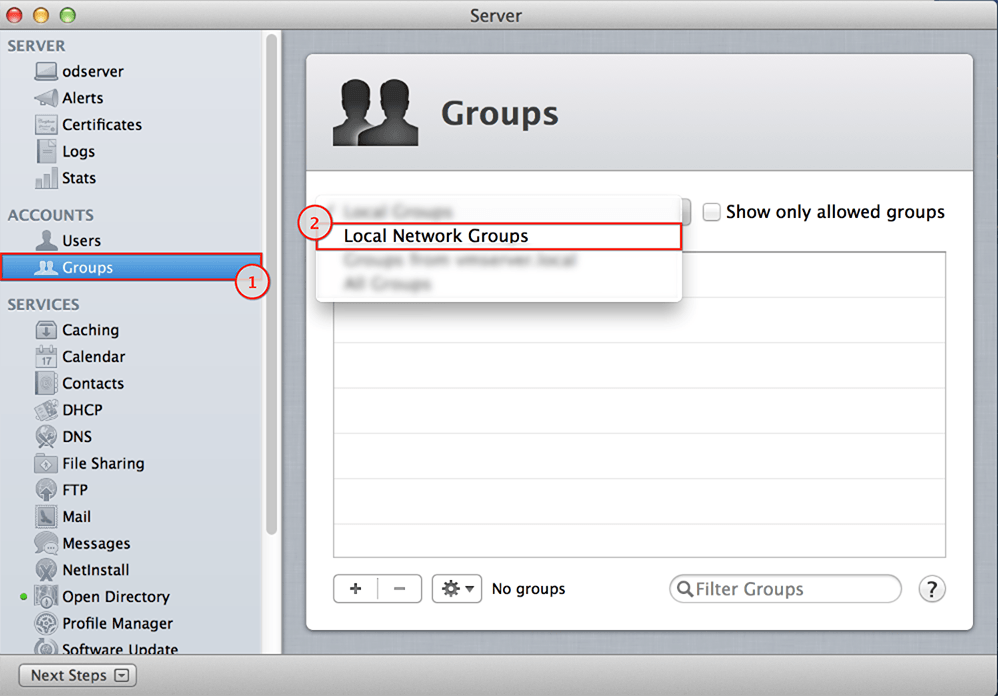
Click on "Groups" (1) under "ACCOUNTS" and then choose "Local Network Groups" from the drop down menu (2).
Click on the plus (+) button to create groups to control access to FileMaker databases.
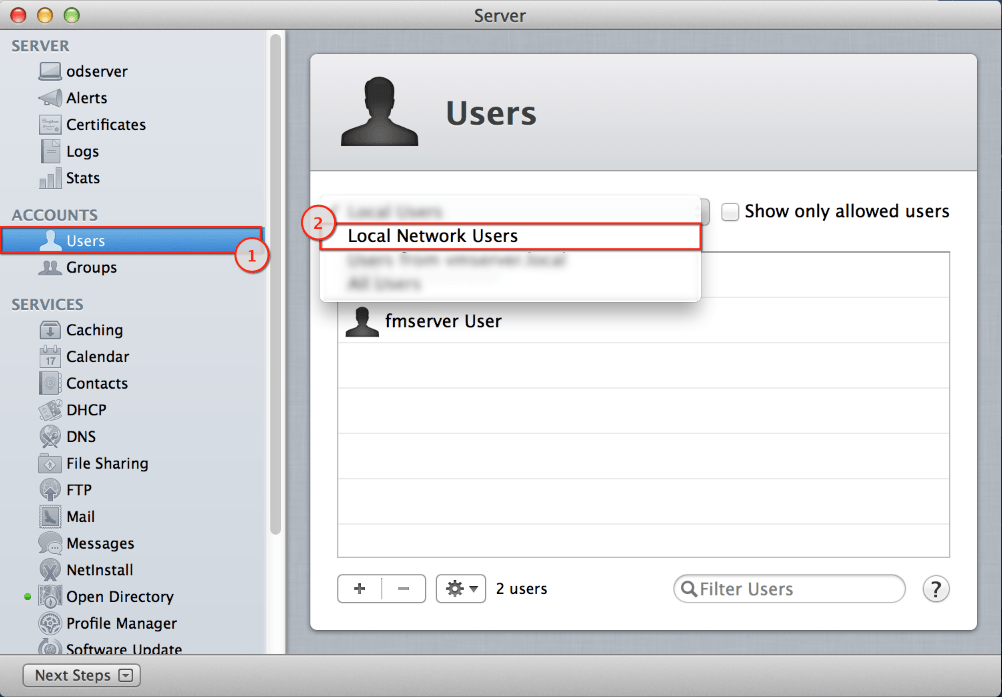
Users
Click on "Users" (1) under "ACCOUNTS" and then choose "Local Network Users" from the drop down menu (2).
Click on the plus (+) button to create a user, enter the user's information and click "Done".
Now right-click the newly created user, and select "Edit User…"
You can assign groups to a user by click in the plus "+" button (1), and then begin typing in the blank Groups line to get the option to browse (2), which will open the Groups floating window. To add groups to the user, just drag the group name into the user Groups list.
Section 3: FileMaker Server Configuration
Bind to Open Directory
These steps only apply if the FileMaker and Open Directory servers are on separate machines.
Step-by-Step
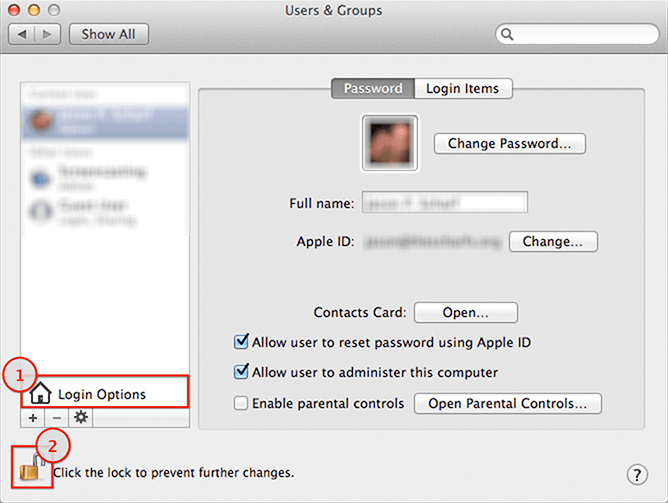
Open System Preferences, and select "Users & Groups".
Click on "Login Options" (1), then click on the lock (2), and enter an administrator's credentials.
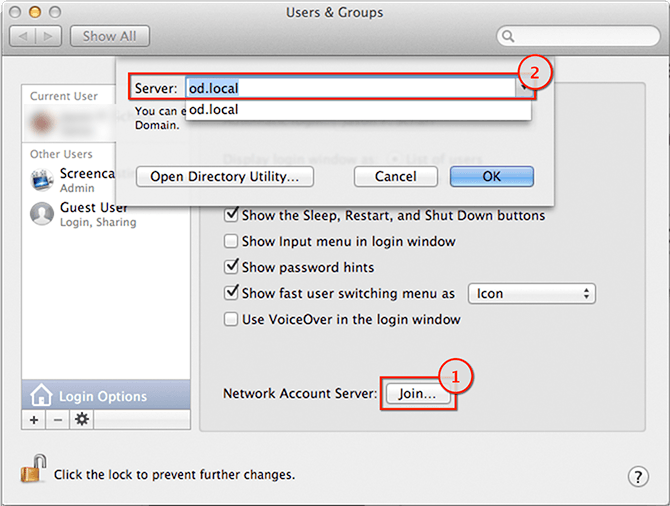
Click on "Join…" (1), then click on the Server drop-down (2). You should see your Open Directory server in the list, if you do not, enter the fully qualified domain (FQDN). Press enter to bind to the directory server.
Configure FileMaker Server
Open the FileMaker Server Admin Console
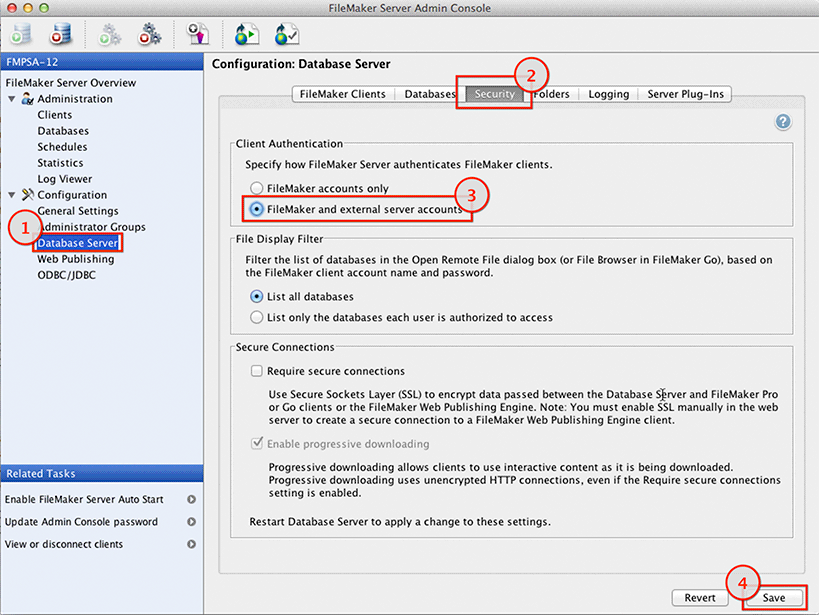
Click on "Database Server" (1), choose "Security" (2), change "Client Authentication" to "FileMaker and external server accounts" (3), then click Save (4)
Optional FileMaker Server Configuration
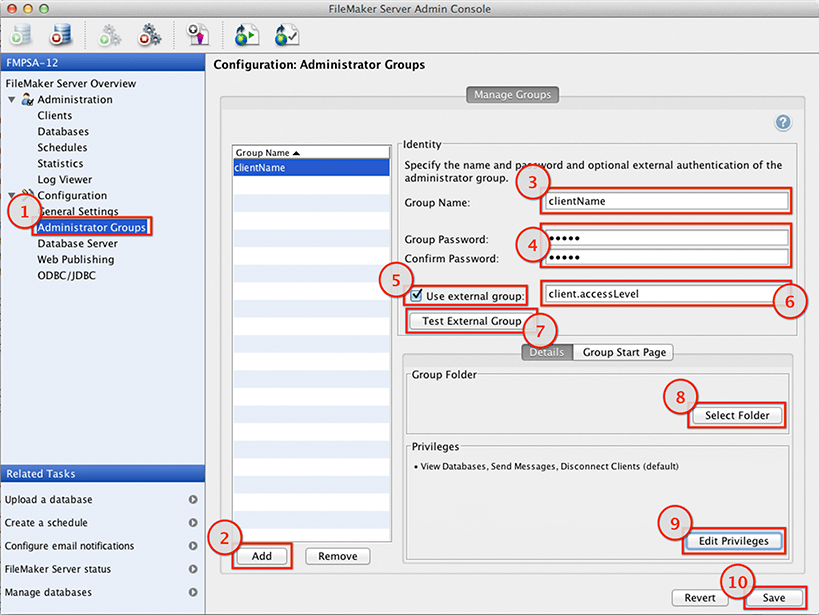
Open Directory authentication may also be used to configure access to the FileMaker Server Admin Console. Click on "Administrator Groups" (1) click Add (2). Configure the group.
Step-by-Step
Click on "Administrator Groups" (1)
Click Add (2)
Enter "Group Name" (3)
Enter "Group Password" (4) (required, but unused)
Check "Use external group" (5)
Enter Open Directory Group (6) to use for authentication.
Click "Test External Group" (7)
Click "Select Folder" (8) and choose a folder, if you would like to limit access to a specific folder.
Click "Edit Privileges" (9), if you would allow privileges beyond the default: View Databases, Send Messages and Disconnect Clients.
Click Save (10)
Open Directory authentication may also be used to provide full access to the admin console.
Click on "General Setting" (1)
Check "Use external group" (2)
Enter Open Directory Group (3) to use for authentication.
Click "Test External Group" (4)
Click Save (5)
Section 4: FileMaker Pro Database Configuration
To use Open Directory for authentication, the database must be hosted on a FileMaker Server configured for Open Directory.
Step-by-Step
Complete the following steps for each FileMaker Pro database you want to authenticate through OpenDirectory.
Open database.
Go to the menu File > Manage > Security
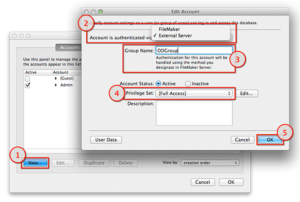
Add Open Directory Group Account
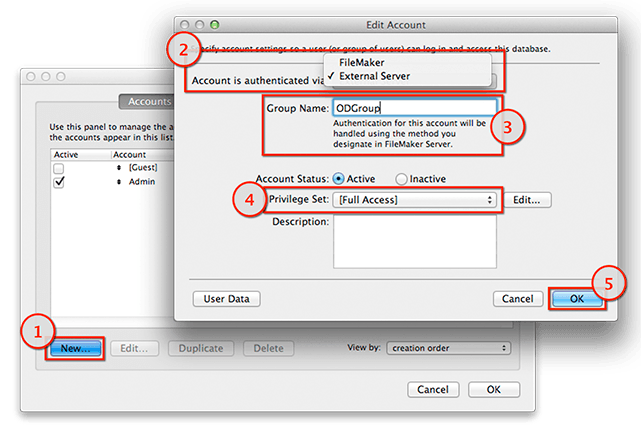
Click "New..." (1)
Select "External Server" from the "Account is authenticated via" menu (2).
For "Group Name" (3), enter the Open Directory Group you would like to use for authentication.
Select a "Privilege Set" (4)
Click OK (5)
Authentication Order
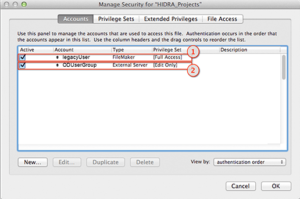
The order matters! If a user has a FileMaker account and an OpenDirectory account, using the same username, the first account/group that accepts the provided username and password will be the one used.
Legacy local user "localUser" (1) [Full Access]
New OD Group "ODUserGroup" (2) [Edit Only]
"localUser" logs in with his old local password and is given [Full Access] even though he is in the group "ODUserGroup" and was expected to have [Edit Only] access.
Section 5: Troubleshooting
What to do if you are getting an "invalid hostname" error, or are unable to connect to the Open Directory server using SSL.
Run the following command from Terminal to check your configuration:
sudo<br>changeip -checkhostnameThe most common issue is that the domain lookup and
reverse lookup (PTR record) do not match, you should contact your network administrator or
internet provider.**If you are unable to login with OpenDirectory Credentials: On the FileMaker server, unbind and rebind to the OpenDirectory server in System Preferences - Users & Groups - Login Options.
Recommended: Install Mac OS X Server on all the machines used, though it is optional for the FileMaker Server machine.
Did you know we are an authorized reseller for Claris FileMaker Licensing?
Contact us to discuss upgrading your Claris FileMaker software.