
Update: There are other, more efficient ways to extract images out of a layout, as long as the image was inserted into the layout as an image object (aka via Insert-->Picture or drag and dropped). This is just one technique that gets you more familiar with the XML DDR. Starting in FileMaker 14 you can now export the graphic on the layout in layout mode by right clicking and selecting 'Export Graphic'.
If you're anything like me, you've had moments where you needed to modify an icon in an inherited FileMaker solution, but didn't have the original file. Like everything in FileMaker, there are a number of ways to get the original file back out. In this article, we'll show you how to extract images in layouts using the XML DDR.
Watch a Demo of using a DDR to extract an image out of a FileMaker layout
1. Create a new FileMaker file and paste image onto layout (Optional)
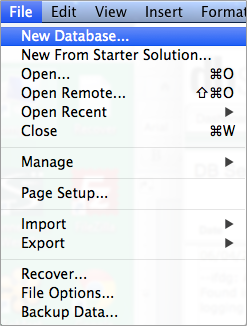 I highly recommend creating a new, blank file and pasting the image you want to extract into the new file's layout. You can get the image onto your clipboard by right-clicking on the image in layout mode in the original FileMaker file and selecting Copy.
The point of this is to make searching the DDR much easier, and much faster, as a new file's DDR is very small compared to an existing FileMaker file with 85 tables and 600 layouts. Not only that, but because the image is the only object on the layout, you'll find the image in the much faster as there will be less objects to wade through under the Layout tag in the DDR.
Alternatively, you could create a new blank layout in the existing FileMaker file, and paste the image onto there. The DDR will take longer to run than a new file, but because the image is the only object on the layout, you'll still find it pretty quickly with a text editor's find.
You'll need FileMaker Pro Advanced to run a DDR. And make sure to run an XML DDR, not an HTML DDR, as the HTML DDR doesn't have the hexadecimal representation of the image, which is the crux of this technique.
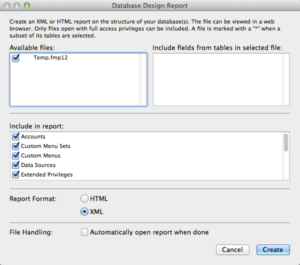 2. Run an XML DDR
You'll need FileMaker Pro Advanced to run a DDR. And make sure to run an XML DDR, not an HTML DDR, as the HTML DDR doesn't have the hexadecimal representation of the image, which is the crux of this technique.
3. Open the file-in-question's DDR in a text editor and search for layout's name
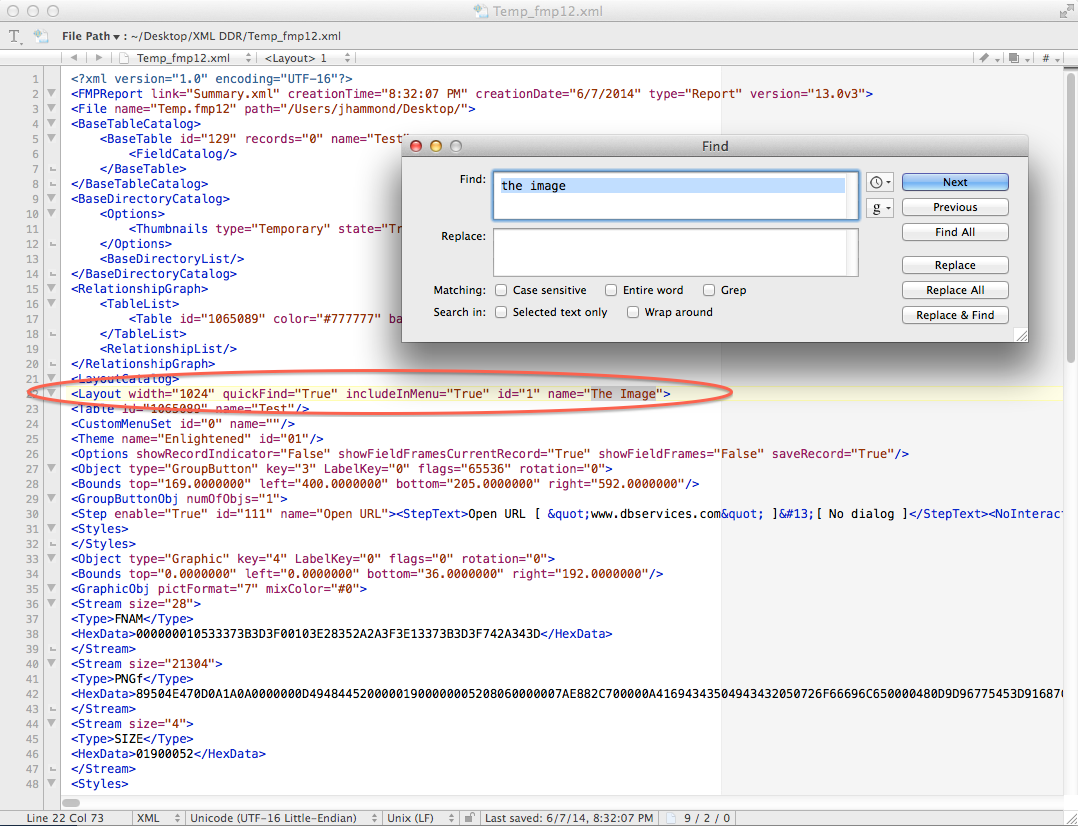
Make sure to open the XML file of the FileMaker file that contains your image, not the Summary.xml file. The name of the layout will be in a name attribute in a Layout tag, to the far right of the tag. Threw me off a little bit when I first started using this technique, as you'd expect the name to be to the far left.
4. Find the hexadecimal representation of the image
You are looking for GraphicObj tags. Luckily they stick out pretty easily: they're marked by HexData tags, one or two of which contain long, random-looking numbers and characters that go off into infinity across your screen. This seemingly random string of characters is the image, in hexadecimal form. The goal is to convert the hexadecimal back to the original file.
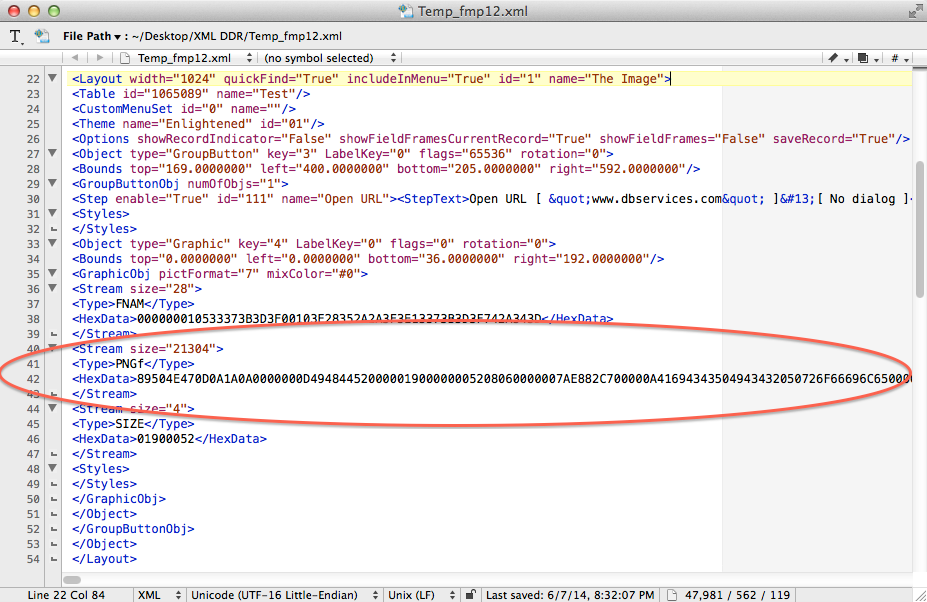
All you need to do now is determine which HexData tag you care about. If FileMaker has stored multiple versions of the original image, you should see multiple stream tags, and within those, a Type tag and a HexData tag. Find the Stream tag with a type that matches the original image's type. In the example above, there's only one stream tag, and its type is PNG. That's our original image's type.
5. Copy the hex onto your clipboard

You should be able to just double-click on any part of the hex representation and it'll select the whole thing (this double-clicking ability does depend on your text editor – ymmv). Right-click, copy and done.
6. Convert the hex to the original image file
Go to any online hex-to-binary converter to convert the hexadecimal representation of the image to a file that you can save to your desktop.
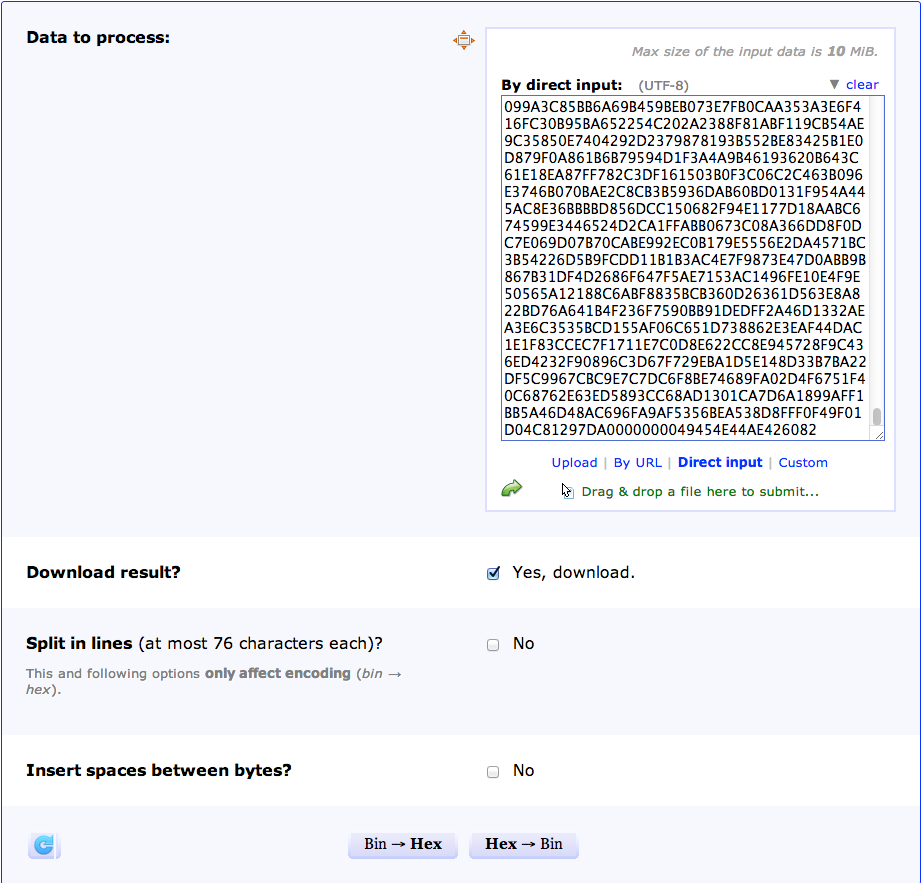
To use the converter, change the input type on the top right of the page to Direct input, paste the hex into the box, check the Download result? checkbox (it should turn to "Yes, download") and then press the Hex>Bin button. The converter will automatically save a bin2hex.data file to your desktop. This is the image file. Rename it to something that makes sense to you, and change the file extension to match the image's type (e.g. png, jpeg, etc.). Double-click on the file to open it and make sure the image looks correct. If so, you're done!
A Few Things to Note
Online hex-to-binary converters have file size limits. Every online hex-to-binary converter that we've come across has a limit on the number of hex characters that you can paste into the converter. In the case of i-tools.org, there's a limit of 10 MBs, which is pretty good. You shouldn't have any issue here as long as you are trying to extract icons.
The original image's file name is lost. There's a stream of type FNAM for each graphic object in the DDR, which suspiciously looks like the words "file name" to me. But to date, we haven't been able to extract the original file name with the hex for the FNAM stream. You end up with le garbage converting the hex to text with an online converter. FileMaker encodes text as UTF-16; that's probably the key to getting back the original name.
Third-party apps that extract the contents of FileMaker's clipboard can save you a couple steps. No need to fuss around with a DDR if you use a third-party product that can extract the XML from FileMaker's private clipboard. All you need to do is copy the image in layout mode, and then use one of these products to paste the XML representation of the image into a text editor. From there you can find the hexadecimal representation of the image and convert it to binary with an online converter. Check out myFMbutler's Clip Manager for FileMaker or 2empowerFM's Clipboard Explorer to get your feet wet in the power of using FileMaker's internal XML to make your life as a developer easier and more efficient.
The Future
If you feel extracting images in layouts should be easier and more intuitive (like a right click-->Export option), feel free to reach out to FileMaker, Inc. and submit a feature request. The more voices requesting a feature, the more likely FileMaker, Inc. will put it in the product line.
In the meantime, give the technique a spin and become a little more acquainted with the XML DDR. We'll dive into how to extract an image that was inserted as the background of an object in part 2! If you need any assistance, please contact us and we'd be happy to help.
Did you know we are an authorized reseller for Claris FileMaker Licensing?
Contact us to discuss upgrading your Claris FileMaker software.