Documents are often needed in multiple programs, but the lack of integration can result in having to enter the same files in different applications. Microsoft Graph is a powerful tool that provides a unified API interface for many of Microsoft’s most popular Cloud programs, including the popular web-based application SharePoint.
Integration between SharePoint and FileMaker is even possible using Microsoft Graph. This example will demonstrate how to upload files from a FileMaker solution to your SharePoint site and download files from SharePoint to your FileMaker solution.
There are three main steps to the integration. Allowing access to your Microsoft Application, setting up OAuth 2.0 authentication, and uploading and downloading documents to and from SharePoint.
Setting Up Your Microsoft Application
In order to allow FileMaker to talk to your SharePoint solution using Microsoft Graph, you will first need to set up a Microsoft Application to allow access using OAuth 2.0. If you go to Microsoft Entra ID in Microsoft Azure, you can either edit an existing application or create a new one under App Registrations. (If you don’t have a site already, you will need to create a site in SharePoint prior to this).
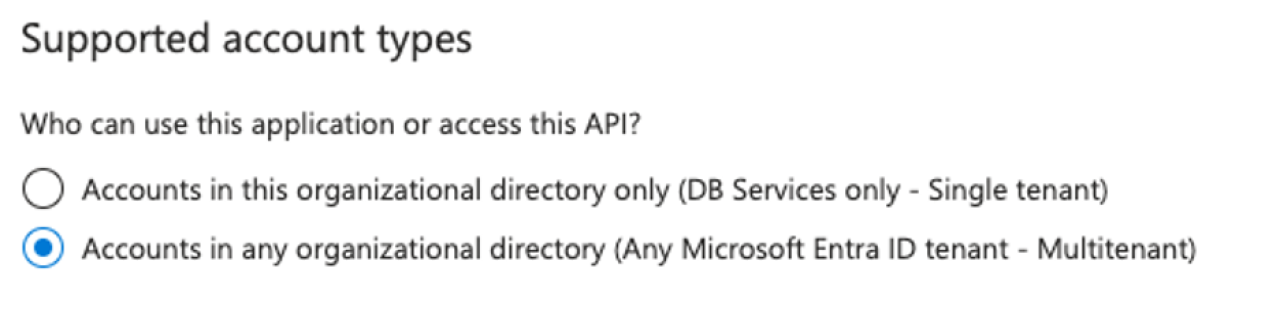
If you are creating a new app, you will want to set your “supported account types” to be “Accounts in any organizational directory (Any Microsoft Entra ID tenant - Multitenant).” This will allow any user within your organization to sign into their Microsoft account for the organization and use this integration. If you are editing an existing application, this setting can be changed by going to “Manage” -> “Authentication” within your chosen app.
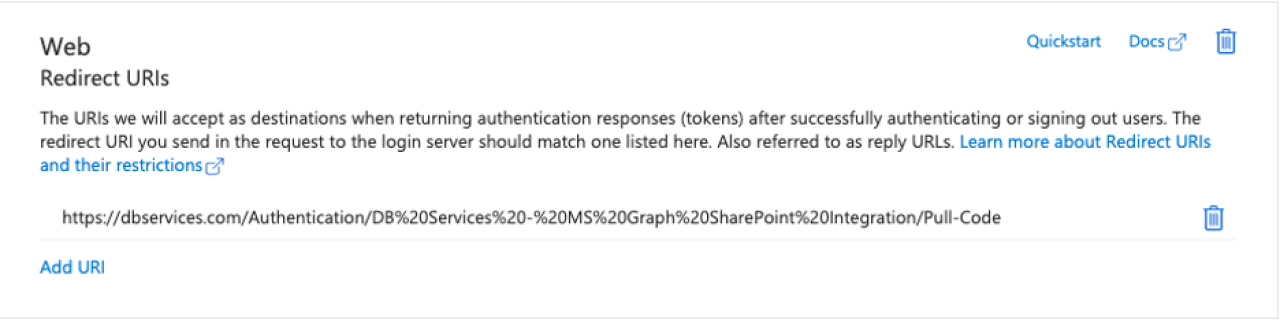
The next step is to add a web redirect URI. The Redirect URI is just the web page the user will go to after they allow access to the SharePoint application. If you are creating a new application, you will be able to paste the Redirect URI directly into the setup. If you are editing an existing application, this setting can be changed by going to “Manage” -> “Authentication” within your chosen app. Keep in mind that your URL must be valid and encoded—For example, it will not allow you to enter a URL with spaces.
Ensure that you have saved all your changes thus far. Now, you should have either created or successfully edited an application with most of its required settings.
On the “Overview” page of your application, make note of your Application ID (sometimes called a Client ID). You’ll need this in your FileMaker solution. From there, you will want to generate a new Application Secret (sometimes called a Client Secret). You can do this by going to “Manage” -> “Certificates & secrets” for your specific application. When generating an application secret, it is important to consider the expiration date as the integration will stop working once this expires. Generate and copy the value. This is the only time you will be able to copy this key, so be sure to document it somewhere, or you will have to generate a new secret once you leave the page.

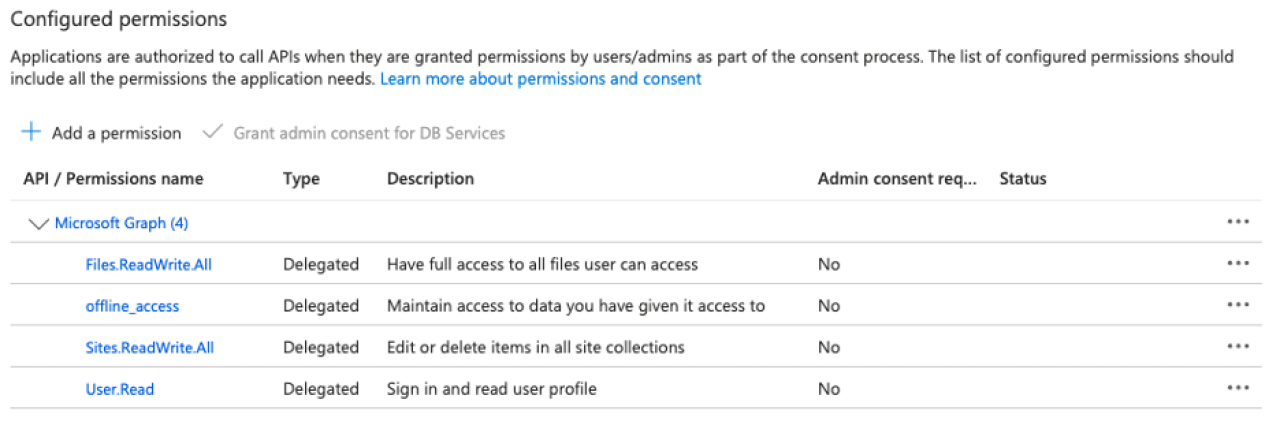
Now, you can set up your API Permissions. By going to “Manage” -> “API Permissions,” you can now add the required Delegated Permissions for Microsoft Graph in your application. You will want to allow Microsoft Graph the following delegated permissions:
· Files.ReadWrite.All
· Sites.ReadWrite.All
· User.Read
· offline_access
Setting Up OAuth 2.0 Connection
Now that we have our Microsoft Application set up, using the Application ID, Application Secret, Redirect URI, and Site Name we can talk to our SharePoint solution! The first step is getting the access code. You will need to call this in a web browser or Web Viewer in FileMaker using a URL.
Once you accept, you can grab the access code in the URL. Then using this, you can request a token to access your SharePoint site. A JSON-encoded response will bring you the account and refresh tokens, which you can then use to talk to your SharePoint solution.
For more about how OAuth 2.0 works, reference the OAuth 2.0 Authorization Code Flow.
Uploading Documents to SharePoint through FileMaker
With everything set in place, we can now upload documents through FileMaker into your SharePoint site. In order to upload files, we will need to use them to grab your Site ID in SharePoint. You can use the following as your URL template:
https://graph.microsoft.com/v1.0/sharepoint:/YOUR_SITE_NAME_HERE
You can either use the BE_HTTP_Set_Custom_Header function from BaseElements or a cURL step to set your authorization before performing your GET call. An example cURL header would be the following:

Once you’ve authenticated and obtained your site ID, the next step is to use that site ID to grab the drive ID where the document will be uploaded. Here’s the URL template to obtain the drive ID:
https://graph.microsoft.com/v1.0/sharepoint/sites/YOUR_SITE_ID_HERE/drive
Again, be sure to set your authorization header with the access token. Then using the drive ID, you can use a PUT call to create the file in SharePoint! If it is successfully created, you will receive a JSON-response code with the information about the newly created item.
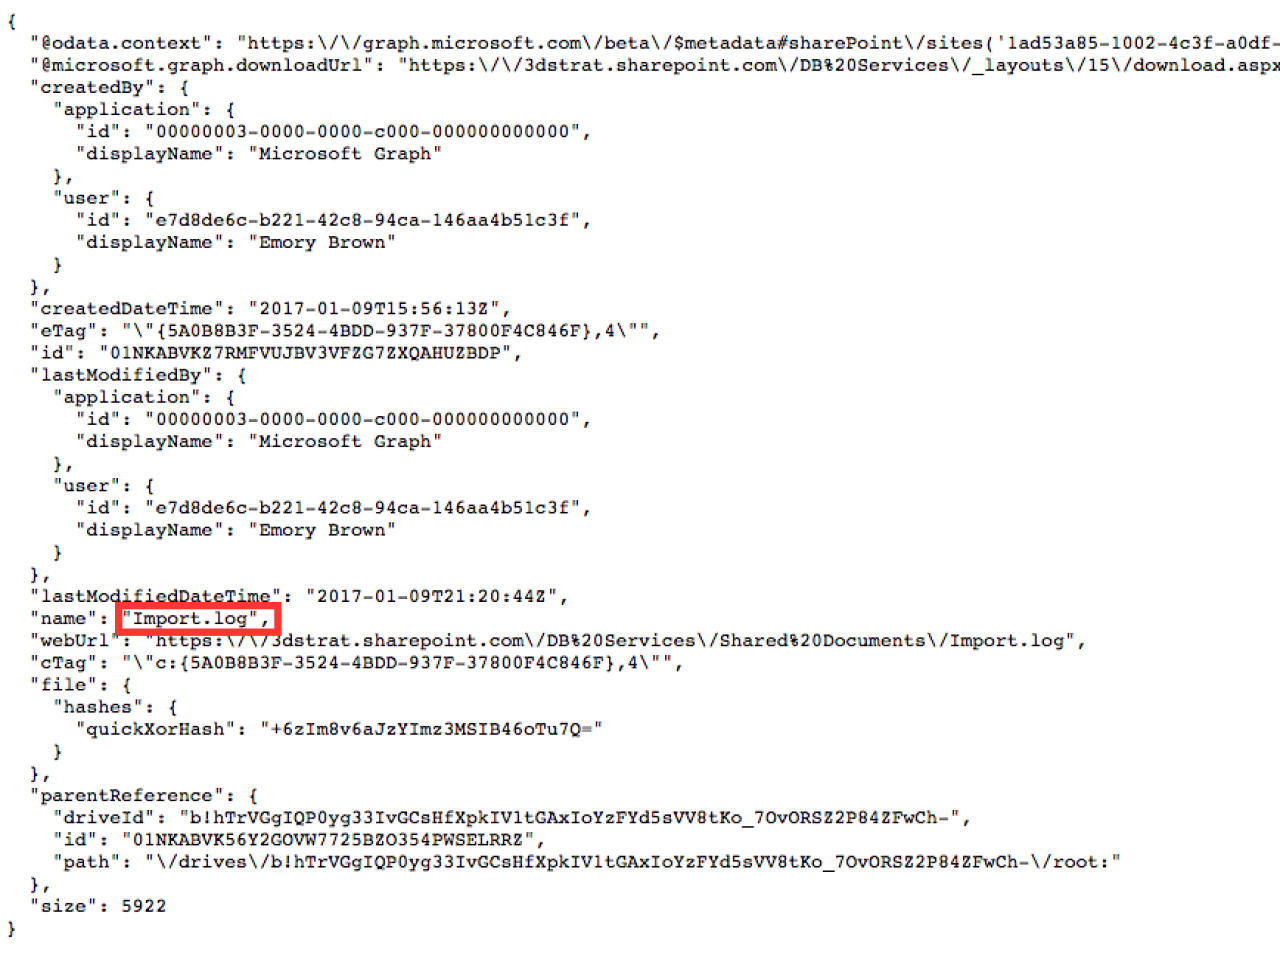
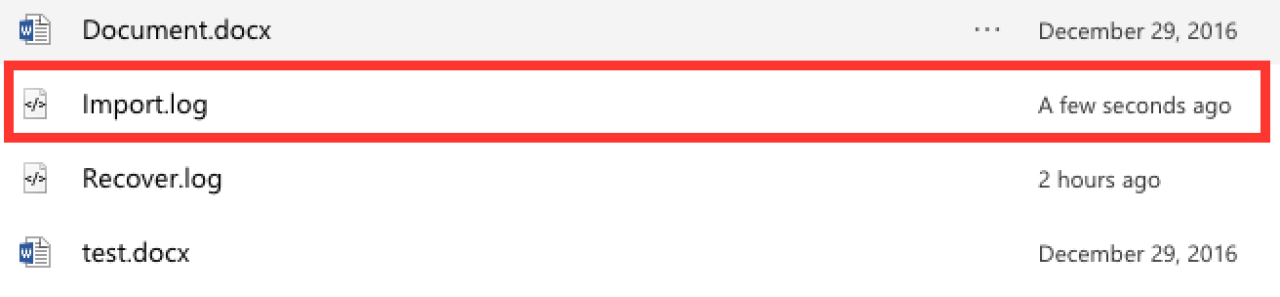
And in the documents in SharePoint, the new document is created!
Downloading Documents to FileMaker through SharePoint
Just as it is possible to upload documents through SharePoint, you can also leverage this integration to download SharePoint files into FileMaker. Because you have already configured the connection between FileMaker and SharePoint, all you will now need to do is define what documents you want to download into FileMaker.
Using the drive ID that you got earlier in the article, you can then look at all the items in a drive. If you want to view all the items in the root directory of your SharePoint site, you can use the following URL template:
https://graph.microsoft.com/v1.0/drives/YOUR_DRIVE_ID_HERE/root/children
As a note, the above will show any folders in your root directory but will not show the items inside of that folder. If you want to look inside of a specific folder, you can use the following URL template:
https://graph.microsoft.com/v1.0/drives/YOUR_DRIVE_ID_HERE/items/YOUR_FOLDER_ID_HERE/children
The result of either of these URLs will be a JSON block of all of your documents for your specified path that looks like the following:
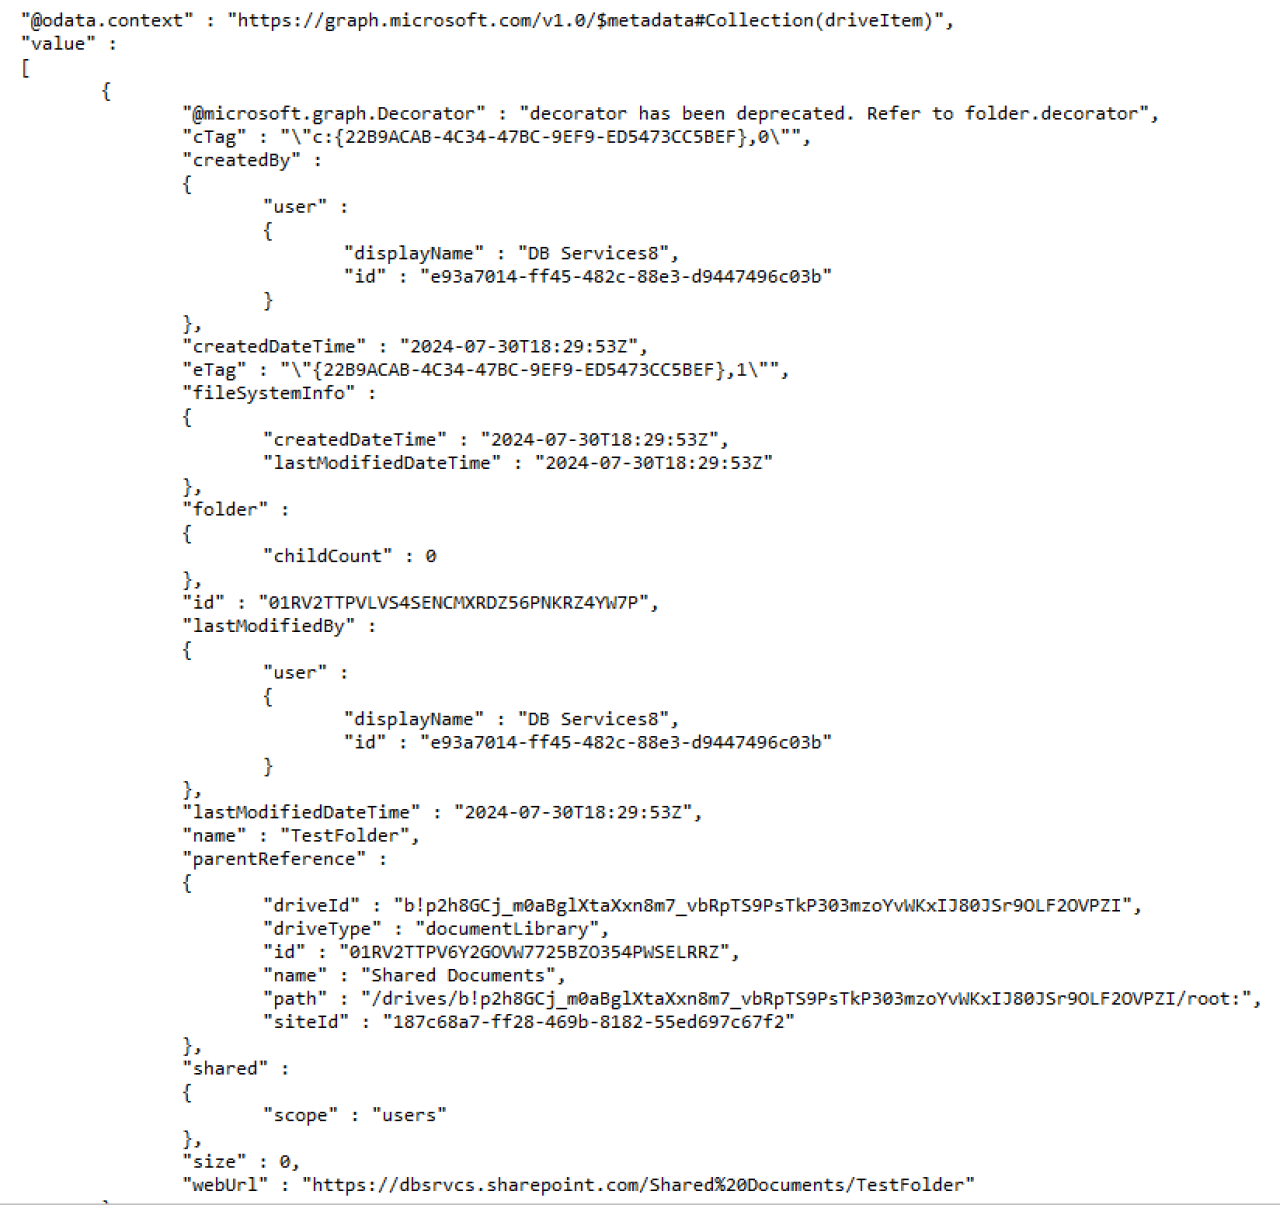
To take this JSON data and use it to import a file into FileMaker, it’s important to extract only the pieces of information you will want to save. To do this, you can take advantage of FileMaker’s JSON functions. Using the JSONGetElement function, we can get the file ID, name, size, and web URL of each item.

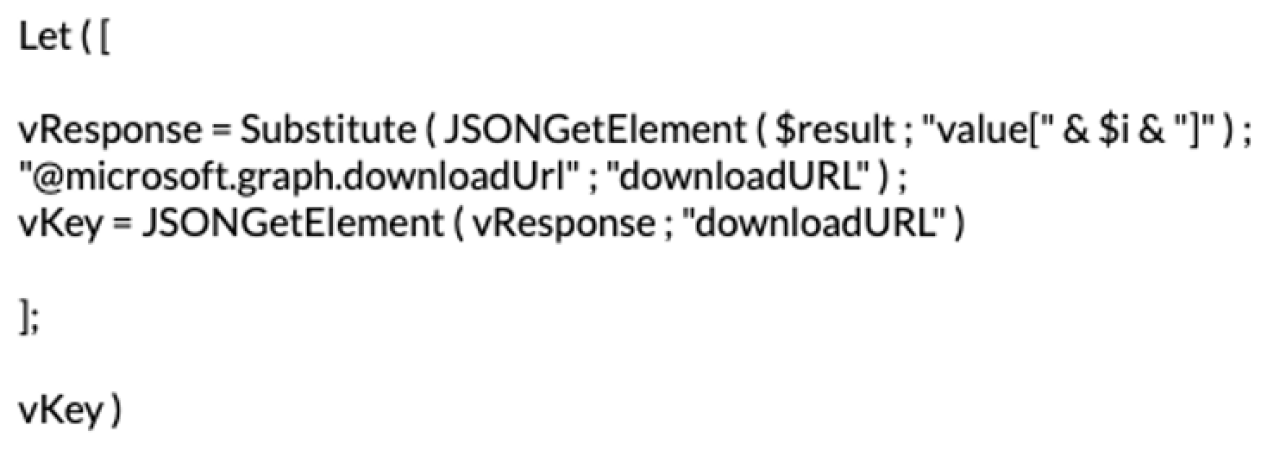
There is an additional parameter we will want to get from our result JSON to be able to import our files into FileMaker. Each document or folder inside of the result JSON is an object in the “value” array, and the parameter of interest has the key of “@microsoft.graph.downloadUrl.” Because of how FileMaker formats JSON, this key name makes it inaccessible. However, using a “Let” statement to substitute the value, we can replace the name of the key to save the download URL to a variable.
Once we have this information, we can then use the stored download URL and Filemaker’s “Insert from URL” script step to save the file into a variable. It is important to note that if you have any folders in the directory that you are saving, they will still get uploaded into FileMaker as an unusable file unless you parse them out of your code. Additionally, when specifying your cURL headers to download this document, you will need to add the “--FM-return-container-variable” header. This ensures that you will get an actual FileMaker container data.
Once you have that variable saved, you can use the “Set Field” script step to save the document directly into the container you wish for it to be stored in FileMaker.
The potential of SharePoint and FileMaker integration using Microsoft Graph goes beyond this. You can reference all the functionality on their API Documentation. Even more Microsoft programs, such as Excel, Outlook, and Webhooks, can be integrated with FileMaker using Microsoft Graph.
Conclusion
With those three steps, documents added into FileMaker can easily be uploaded automatically into SharePoint. This integration allows documents to quickly and easily be uploaded and viewable in both applications. Microsoft Graph’s ever-expanding capabilities continue to allow for further integrations with Microsoft and other programs using a unified API interface. If you would like further assistance integrating FileMaker and SharePoint using Microsoft Graph, feel free to contact us today.
Did you know we are an authorized reseller for Claris FileMaker Licensing?
Contact us to discuss upgrading your Claris FileMaker software.
Download the Integrating FileMaker And SharePoint File
Please complete the form below to download your FREE FileMaker file.