Integrating third-party platforms into your software solution to ensure data flow is integral to most businesses' day-to-day operations today. Claris has a large selection of third-party services you can connect to through Claris Connect, but these connectors only allow for pre-defined actions. Claris’ new Custom Connectors introduce a low code solution to connect your system to third-party services and take any action a third-party service provides. These actions can be easily reproduced and shared across systems. In this article, we’ll go into detail about Claris’ new Custom Connectors and walk you through an example of how they can be created and utilized using the payment platform Stripe.
What are Custom Connectors?
The strength of Custom Connectors is the ability for users to connect to any third-party platform of their choice using the standardized syntax that Claris has provided, without having to worry about the authentication process. For this demonstration, we will be integrating with Stripe, a popular payment processing platform. Claris Connect allows for the easy and fast creation of these Custom Connectors. Let's take a look at what Custom Connectors look like inside Claris Connect.
Integrating with Stripe
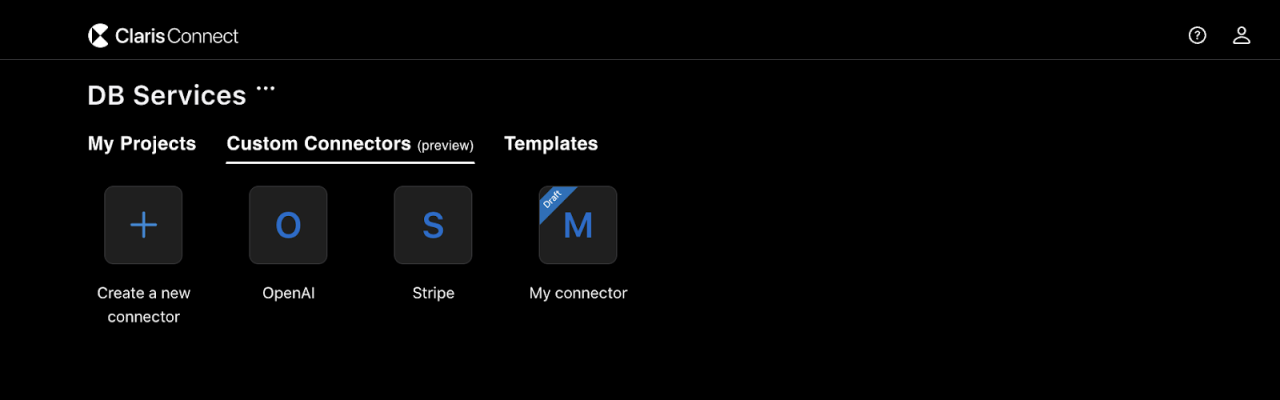
To get started, you will have to obtain or log in to your Claris Connect account and then navigate to the Custom Connectors tab.
Let’s discuss the schema, or how the JSON is defined for Claris Connect’s Custom Connectors. The JSON begins by defining the properties of the connector used to find and give information about the connector in Claris Connect.
Next are the requiredSettings and then auth_request keys which define the authentication process with a service. Two important notes for authentication are that Custom Connectors currently only service one-way authentication and do not support complicated authentication like OAuth and that the auth_request.token key is only referencing the authFields key string and does not contain an API key in plain text.
Next are the endpoints and actions, which allow specific requests to be made to the service. The endpoints will contain the method and URL for the HTTP request, and the actions will define which endpoint to use and the information passed to the endpoint.
Finally, you will need a test connection defining an endpoint for authentication testing. As this connection is for test purposes, it should likely be a GET request that returns a small package.

Note: Endpoints must have an extra forward slash at the end of their URLs to build out the custom endpoints defined in a Custom Connector.
Claris Connect’s Custom Connectors are a contained in-platform browser tool, so the schema is defined in the text editor for the JSON. This means that when creating or modifying a Custom Connector, you will get messages about errors in the JSON and autocomplete and autofill will be enabled. This also means that authentication and testing all take place in the browser. When copying a Custom Connector, all you have to do is replace one of the sample’s texts with JSON defined. For this example, you can copy and paste the JSON provided in the demo file into the area shown above.
Let's begin verifying and testing your Custom Connector for Stripe now!
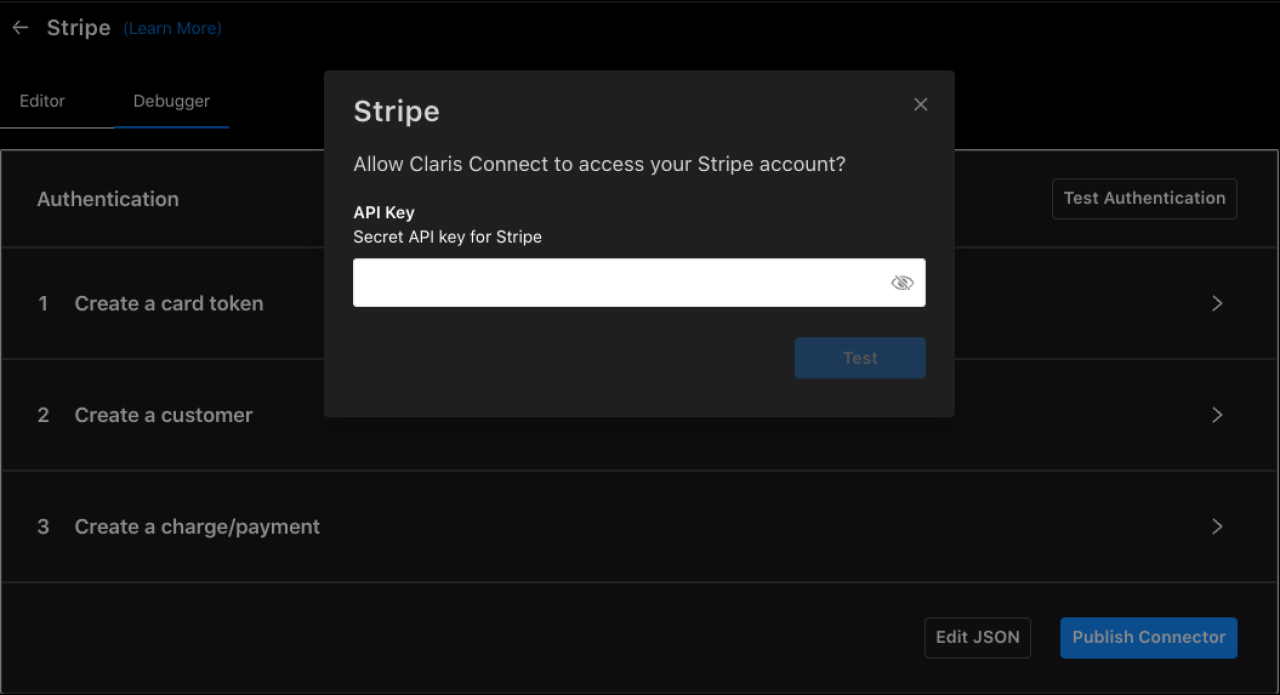
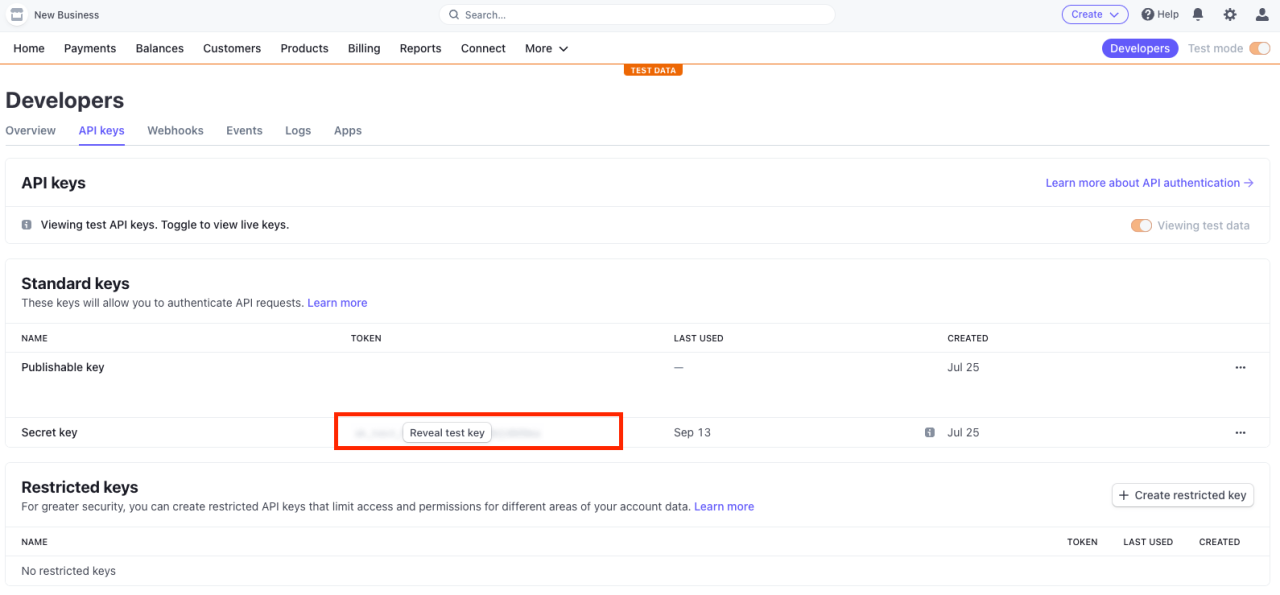
Let’s start by testing the authentication. To do this, we’ll need to make a Stripe account if you don’t already have one and obtain access to a secret key. Now we can finish testing the authentication and any other defined actions, such as creating a card token, creating a customer, and creating a charge/payment by inserting your new API key into the location shown above. As previously mentioned, this one instance of authentication is all we will have to worry about, as Claris Connect will take care of future authentication when making calls to this connector!
Note: Please do not insert any real card information into the Claris Connect testing or the demo application. Stripe currently does not allow card tokens to be made with card information for testing accounts, so we will skip the card token creation process for this demo and use a pre-defined testing token from Stripe.
Communication Between FileMaker and Claris Connect Using Flows
In this example, the demo file will be initiating communication with Claris Connect, allowing our Custom Connector to generate our API requests, and then return information to the FileMaker client. This process is defined by flows in Claris Connect, a low-code way to define a series of steps for a system to take.
Begin by creating a flow in a Claris Connect project. Below is an overview of the steps we will take to define the flow for the demo application. You can find even more information in the video at the top of this article.
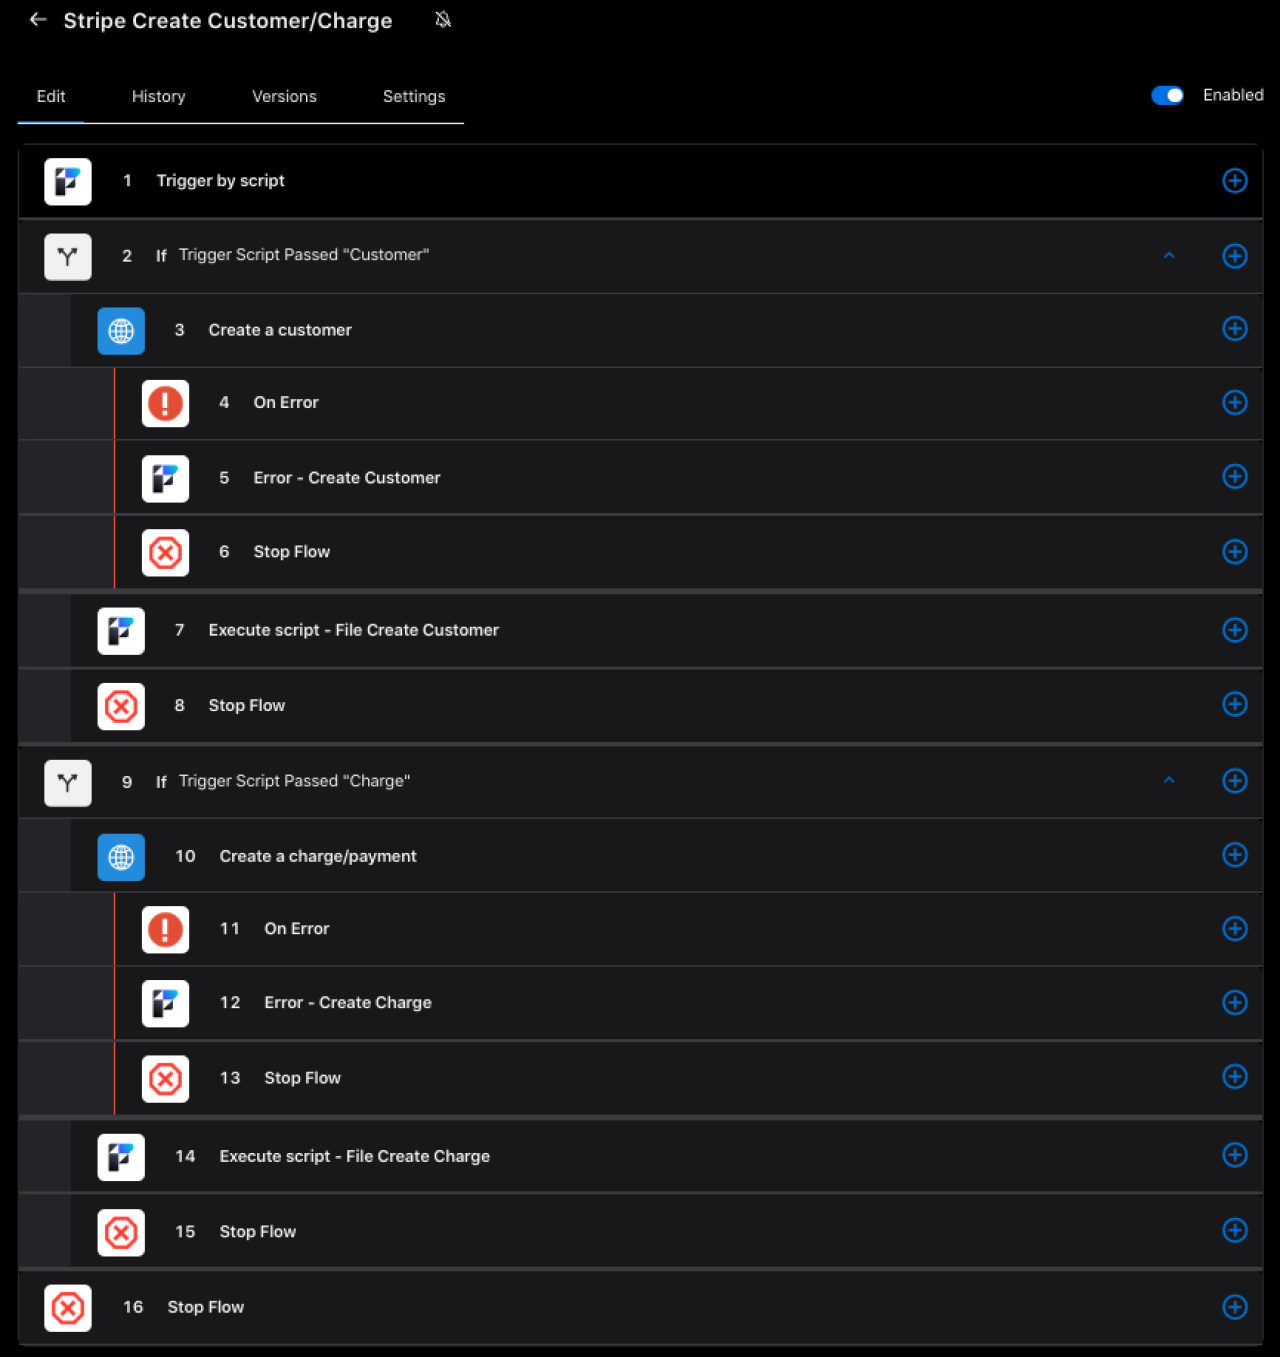
Use the information from our article about Claris Connect to get your trigger by script action, which begins the process of this flow, working correctly. Above is the flow we created with the additional Custom Connectors flow step actions that are available after the creation of our Custom Connector. These Custom Connector flow steps will replicate the selected action or API call from the Custom Connector with parameters that can use variables from the flow process to change the request being made. Claris Connect will then make the request with authentication and return a valid result or error which we can later parse and use in the flow or Filemaker.
Important notes for Claris Connect/Flows:
If you are adding this to a different solution, ensure the user provided to the FileMaker Server action has the “fmrest” extended privilege enabled in FileMaker.
While testing the flow, you must pass all potential data upfront so other flow steps can view the possible body fields when created.
Initiating and Viewing Claris Connect Information in FileMaker
Let’s inspect how FileMaker is handling this process. As discussed previously, using script triggers of buttons, we can make a call to the FileMaker Server action of the flow. By passing in fields from a layout in FileMaker, we can pass the data needed for the API request to Stripe. For example, we can pass a person’s name to the flow, which is passed into the Custom Connector, processed by Stripe, and returned to FileMaker by calling a specific Filemaker script from the flow action. A detailed view of these scripts can be found in the provided video.
So now all we need are some scripts to handle the sending of data and the retrieval of data, but where does this data go? In the demo file, we have created the CUSTOMER and CHARGE tables, so when a retrieval of data from Claris Connect is triggered, we can add new records and set fields to store important information, like customer data, charge amounts, as well as statuses if the request failed or not. Creating new tables and fields gives us a way to view and parse the information in the future, and using portals is a good way to view this information easily. The demo file uses two portals for each process that show all previous actions taken through requests and important information related to them.
Note: While the flow uses JSON objects throughout its process, be aware that the response from Custom Connectors is currently just plain text status messages, so using JSON to parse these responses will not work as intended.
Conclusion
Claris Connect’s new custom connectors allow for the easy definition of API integrations into FileMaker solutions. Its ability to customize different actions and requests of an API, complete authentication automatically, and the ability to copy and paste from other sources allows for a fast and easy way to retrieve and use online information in new ways. Although Claris Connect is required for this feature, it provides the many benefits described and has the potential to function like a native integration. Feel free to contact us for any questions, need assistance, or to discuss getting help setting up Custom Connectors or API integration with FileMaker.
Did you know we are an authorized reseller for Claris FileMaker Licensing?
Contact us to discuss upgrading your Claris FileMaker software.
Download the Claris Custom Connectors File
Please complete the form below to download your FREE FileMaker file.