When you decide to implement Marketing Cloud Connect in your Salesforce org, one of the first considerations will be how to handle Subscriber Keys from Sales or Service Cloud. In our last article in this series, we discussed the fact that Marketing Cloud Connect uses Sales and Service Cloud IDs as Subscriber Keys. If you already have contacts from Sales or Service Cloud in Marketing Cloud, you are likely to end up with duplicate subscribers and subscriber preference information that doesn’t match. Preparing Marketing Cloud to handle this is a critical first step. One of the best solutions is to institute a subscriber key migration process to remove duplicates and preserve data.

Why Use a Subscriber Key Migration
Migrating subscriber keys allows us to remove duplicate subscribers while minimizing data loss. Most importantly, this method allows us to retain the subscription preferences for your subscribers. This is especially critical for organizations needing to comply with regulations like GDPR, but also ensures clients who have opted out or have custom email preferences don't receive emails they shouldn't.
Salesforce offers a service to migrate the data from Sales Cloud for you, but the process is expensive. If your organization plans to add or update contacts in both Sales and Marketing Cloud in the future, it makes sense to build this process and ensure your data is kept clean over time.
Implementing the Solution
Add Synchronized Data Sources
After configuring Marketing Cloud Connect, you’ll want to set up the synchronized data extensions needed to get the information from Sales or Service Cloud into Marketing Cloud.
To do this, navigate to Contact Builder and go to Synchronized under Data Sources.
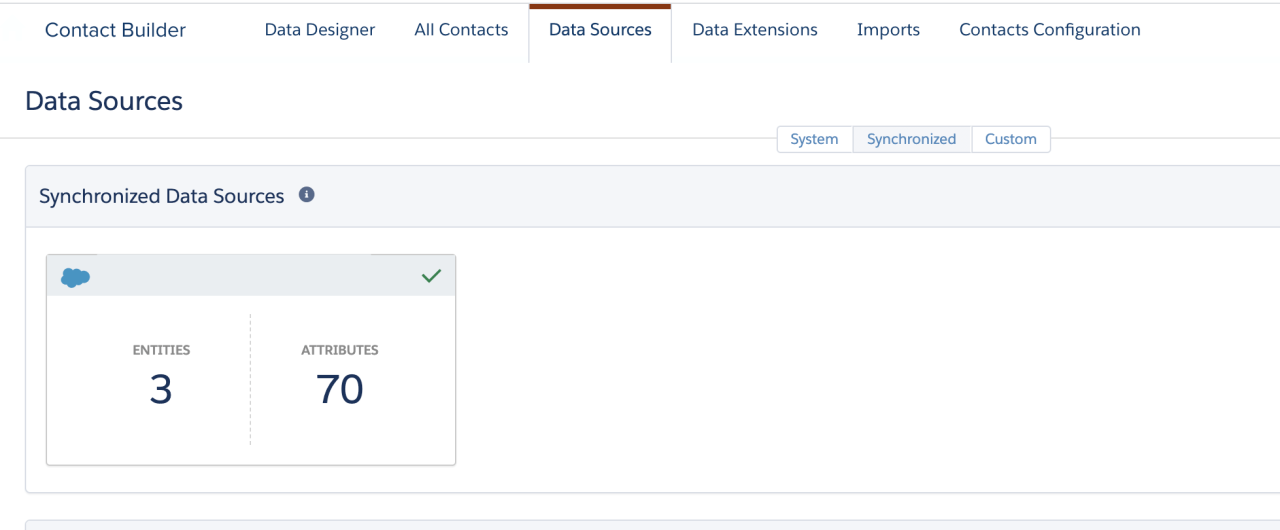
Add a new data extension (DE) by selecting from the Sales or Service Cloud objects you want to sync. For most organizations, this will be Contacts but may include any related objects you want data from, like Accounts or a custom object. Marketing Cloud Connect allows some filtering on synchronized objects. As a best practice, only include the contacts and fields you need in the Synchronized extension to keep the synchronization process quick and efficient. Limiting the number of contacts that come from Sales or Service Cloud also prevents All Contacts from bloating unnecessarily.

Import and Deduplicate Subscribers
To begin building the deduplication process, set up a new automation in Automation Studio. The first step will be an SQL query into a custom DE. Importing into a custom DE enables us to further filter out contacts we don't want to import into the All Subscriber List.
You may find multiple Sales or Service Cloud contacts sharing the same email address. In this case, a leader should be selected whose ID will represent the group in Marketing Cloud. This allows us to keep subscription preferences associated with an email address (because there is no practical way to separate out preferences for a contact without a separate email address).
Once we have our contacts in the custom DE, we will then add/update to the All Subscribers list as the second set of steps in the automation.
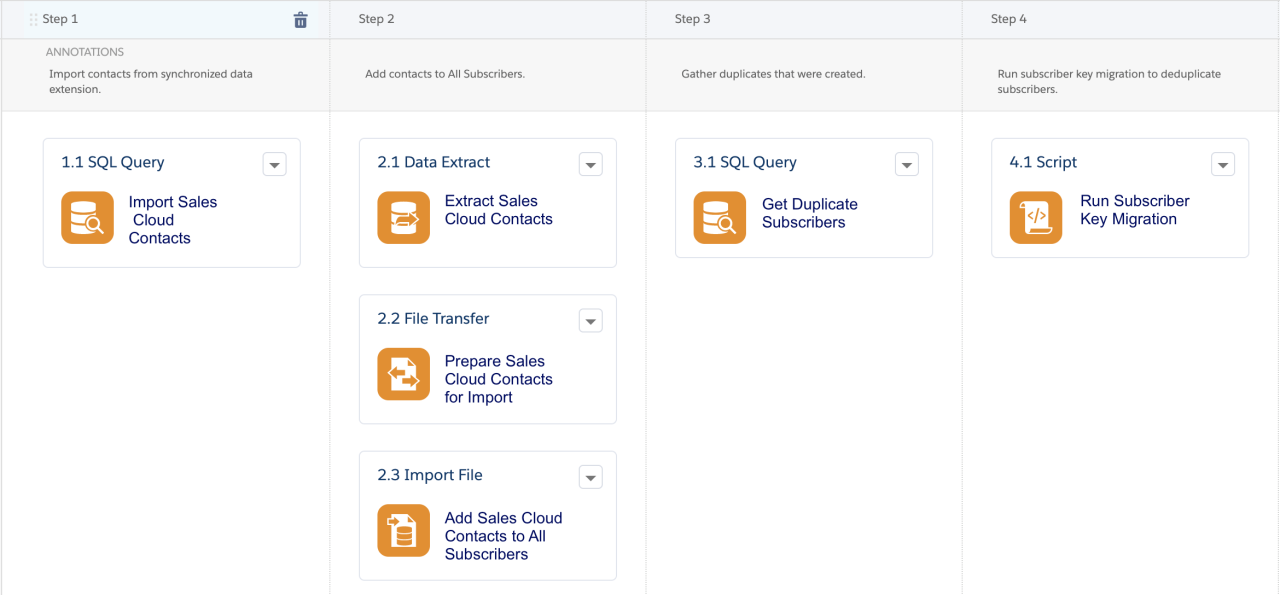
At this point, you will likely have duplicates. A second SQL query will gather the details about those duplicate subscribers into a second custom data extension for processing. Now we can begin the subscriber key migration and removing duplicates.
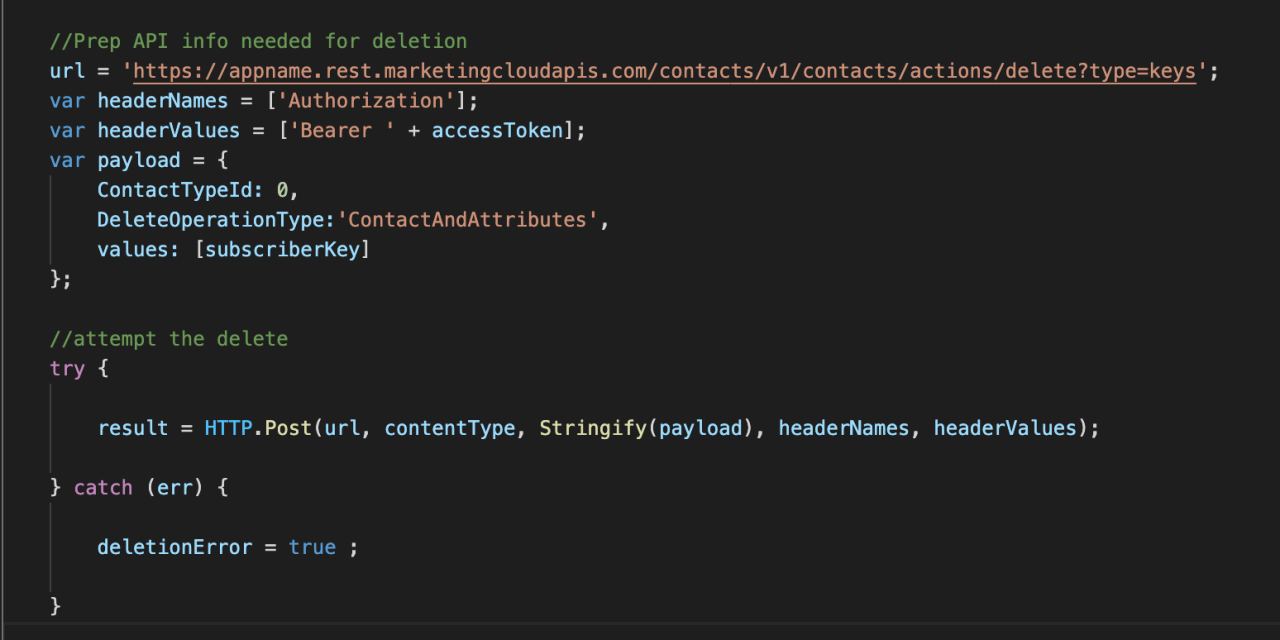
The fourth automation step is an SSJS script. Deleting a subscriber will delete them from any sendable data extension they match with. For any sendable data extensions where that subscriber could have data you want to retain, you need to update it with the new subscriber key from Sales Cloud. The SSJS will loop over each duplicate contact and begin updating the subscriber key in those data extensions from the previous key to the new Sales Cloud ID.
Once this is done, make sure to update the subscriber status in the surviving subscriber record (note that you cannot mark a subscriber as Held or Bounced). Finally, use the Rest API to delete the duplicate subscriber.
It is best practice to record the tracking information from the tracking data views in custom DEs and to run reports from those instead of the data views. This will prevent data loss when deleting duplicates and will retain tracking data for a longer period of time.
If you are attempting to delete many contacts and update information for them across a larger number of sendable extensions, you may experience timeouts that would prevent all duplicates from being removed. Running the SSJS again manually may be necessary during the initial rollout or during a large influx of duplicates.
Eliminate the Email Address Assumption
Once the deduplication process is built, you also need to consider the fact that existing automations may rely on the assumption that the subscriber key will be an email address. Any places where this is true need to be updated to accommodate the fact that Sales and Service Cloud contacts will have Sales or Service Cloud IDs, not email addresses.
It is also important to make sure that all sendable data extensions that relied on that same assumption connect correctly to All Subscribers. This means linking each sendable data extension to All Subscribers with the subscriber key instead of email address. The subscriber key field in the DE will also need to be populated if it is not already.

Conclusion
Ultimately, migrating subscriber keys allows organizations to use Marketing Cloud Connect the way it was intended to be used. Duplicates are eliminated, preference data is retained, and data can flow between Sales or Service Cloud and Marketing Cloud. We'll discuss flowing that data back to Sales or Service cloud in our next article in this series. Contact us for help migrating your subscriber keys with a certified team of Marketing Cloud experts.
Need help with your Salesforce digital transformation? Contact us today to discuss Salesforce consulting, implementation, development, and support!
Download the Delete Subscriber SSJS Function
Please complete the form below to download your FREE Salesforce file.


