Congrats on choosing Claris FileMaker as your low-code platform! You've made a great decision in choosing a platform that offers unparalleled flexibility and power. Now it's time for the implementation. As you embark on this journey, it's crucial that you approach it with careful planning and strategy. FileMaker has the potential to revolutionize the way you manage data and processes, but unlocking its capabilities requires a well-thought-out implementation. We've created this 9-step checklist to help guide you along your FileMaker implementation. Whether you decide to hire a consultancy like DB Services or take on the challenge on your own, this checklist will serve as your trusted guide, ensuring a seamless and successful FileMaker implementation!
Step 1: Build Your Team
Building the right team is critical for the success of any project. You must identify your guiding coalition: key stakeholders, including project sponsors, project managers, decision-makers, end-users, and IT personnel who will contribute to the success of your project. Establish clear roles and responsibilities for each team member, ensuring alignment with project objectives and expertise in relevant areas such as database design, development, and user experience.
Step 2: Define Your Vision and Metrics for Success
Now that you have your team put together, you can discuss and outline the goals of your project. Clearly articulate and thoroughly discuss the project's purpose, what a successful implementation looks like, and how you will measure that success. During this process, your team should be able to identify objective metrics for success with specific and measurable goals.
Step 3: Gather and Prioritize Requirements
Speak with your stakeholders and end-users to understand their needs, workflows, and pain points. Prioritize requirements based on business impact, feasibility, and alignment with your project goals. Using techniques such as stakeholder interviews, surveys, and workshops can help you gather a comprehensive list of requirements. You should also document the requirements in a systematic manner to ensure clarity and alignment with your project goals.
Step 4: Establish the Project Timeline
Develop a timeline that outlines key milestones, deliverables, and dependencies. When doing this, you should consider factors like resource availability, budget constraints, and project complexity. Break down the project into manageable phases or iterations that allow for incremental development and feedback from those involved. Note: If you are developing this solution for a client, it's important to ship features in batches throughout the project (instead of all at the end) in order to provide immediate value to the client.
Step 5: Start Building
Here is where you will start building your project using FileMaker. There are a few essential, core elements of FileMaker that you need to know about before you can begin building your project.
Database
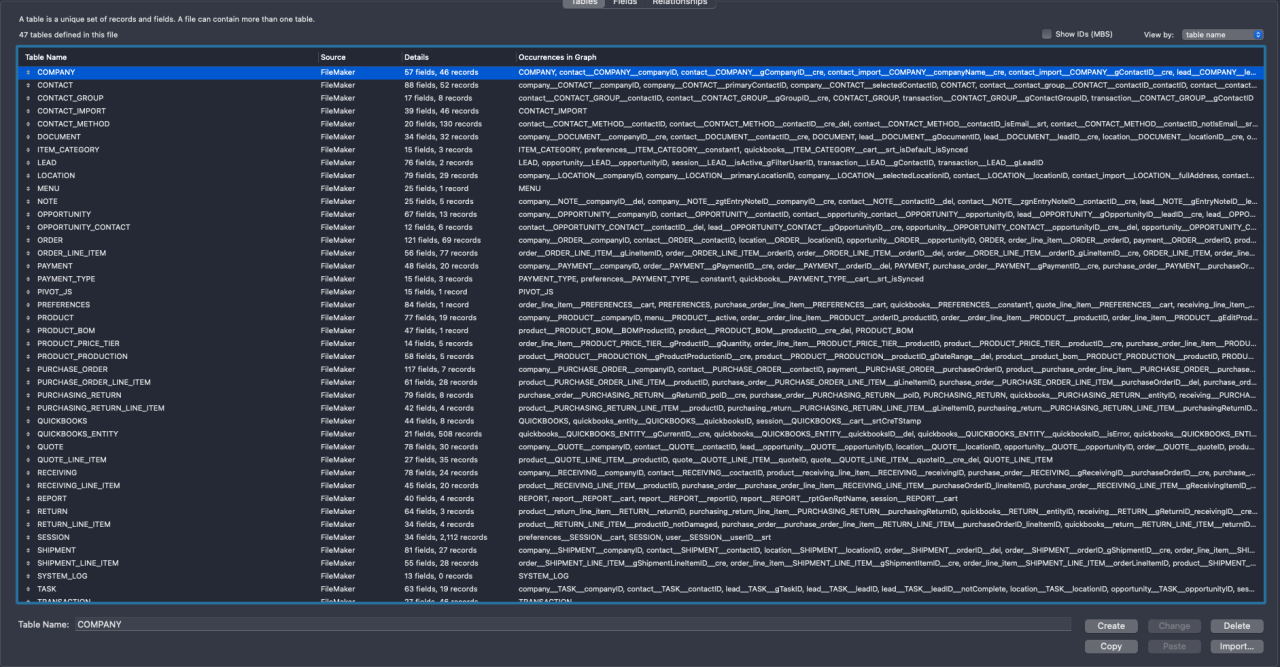
Tables
Tables are an essential element in FileMaker and they serve as the foundational structure for organizing and storing data within the database solution. You can think of them as containers that hold related information, similar to sheets in a traditional spreadsheet. Each table represents a distinct category of data, like customers, products, orders, etc.
Fields
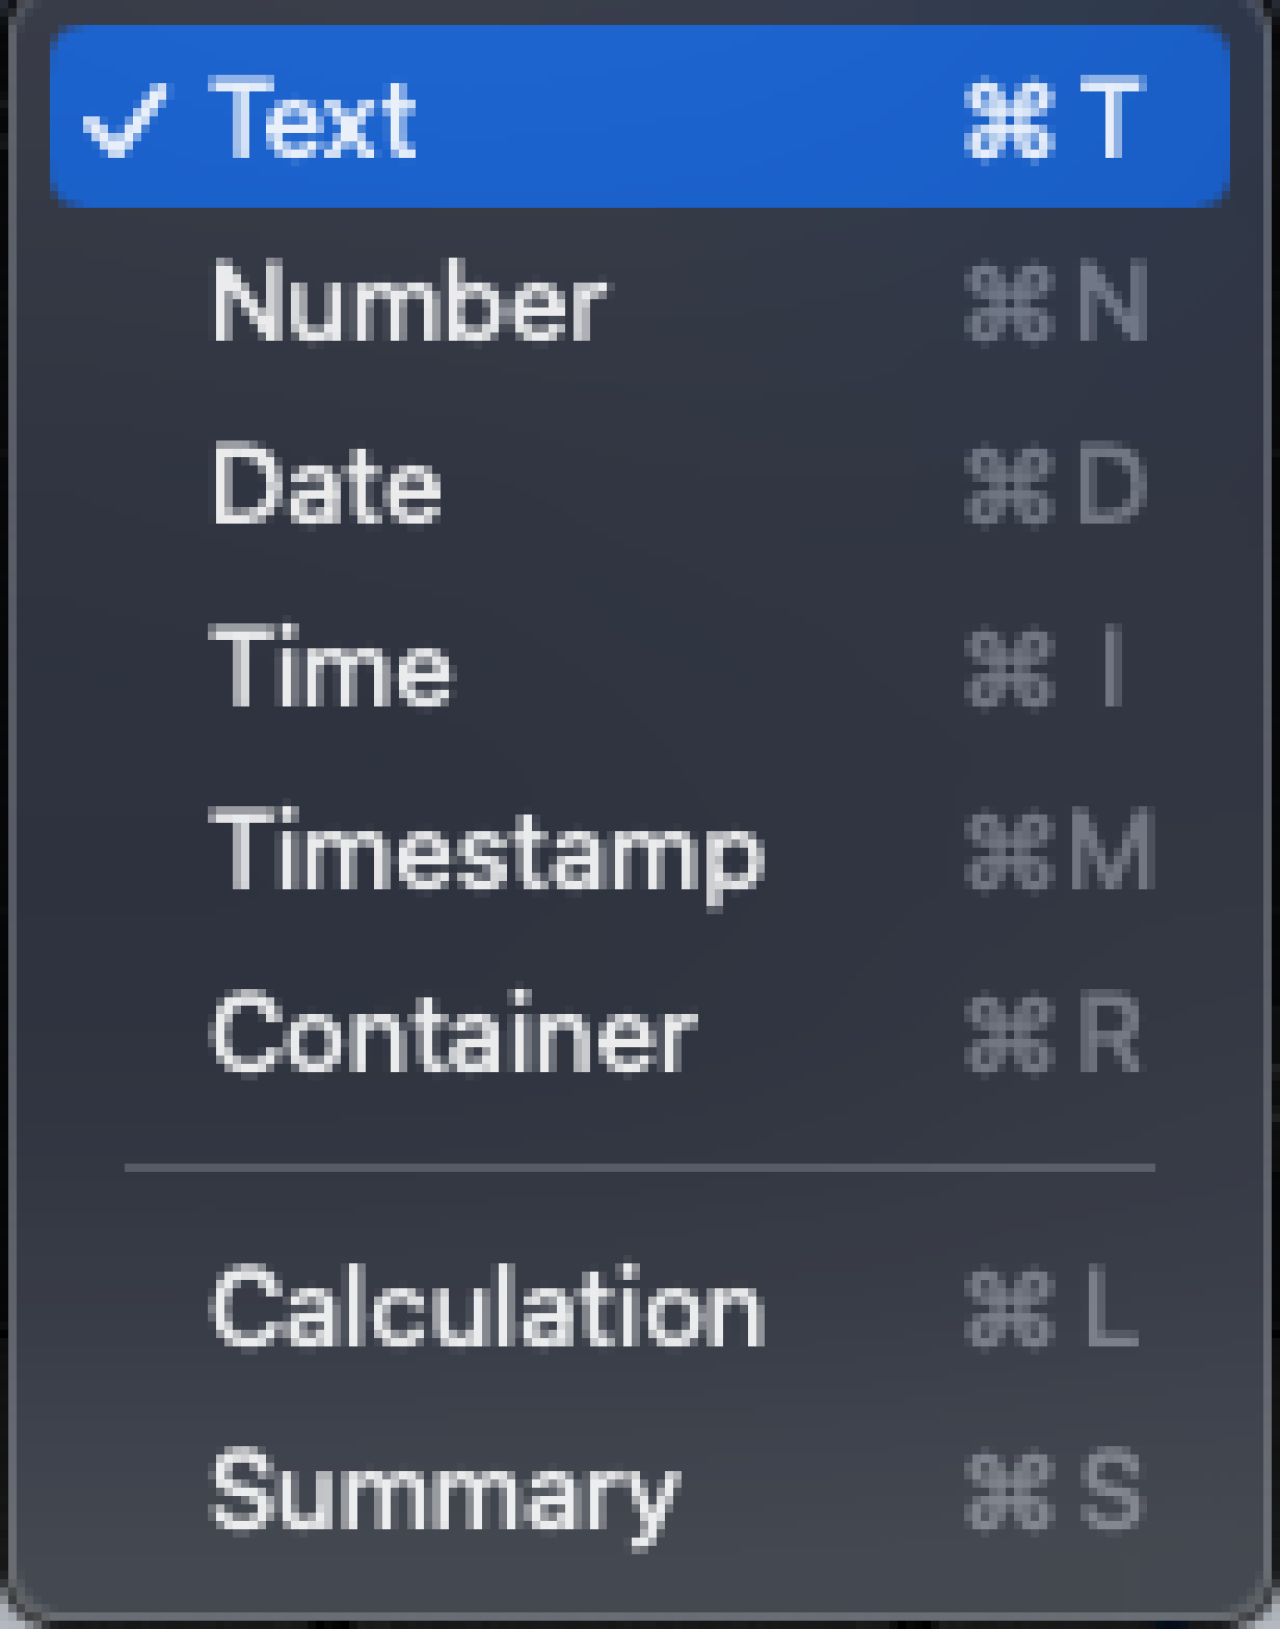
Each table in FileMaker is composed of fields, which define and store various types of data in the table. There are several field-type definitions in FileMaker:
Text fields are used to store text/string data
Number fields are used to store integers or decimals
Date fields are used to store calendar dates in the MM/DD/YYYY format. The separators in date fields and the order in which the date parts appear depend on the system formats set for the file and the display format for the field.
Time fields are used to store times in the format of HH:MM:SS. The separators in time fields and the order in which the time parts appear depend on the system formats set for the file and the display format for the field.
Timestamp fields are used to store timestamps in the format of MM/DD/YYYY HH:MM:SS. The order in which the date and time parts appear and the separators used depend on the system formats set for the file and the display format for the field.
Container fields are used to store various files such as photos, movies, sounds, and documents (including Microsoft Word, Excel Files, PDFs, etc.)
Calculation fields are used to store the result of a formula (i.e., a calculation) performed on text, number, date, time, or container data.
Summary fields are used to calculate values such as subtotals, average, and grand totals across multiple records in a table. They are associated with groups of records, and the values can change depending on where the field is placed on a layout, how many records are in the found set, and whether the records are sorted or not. When making a summary field, you are presented with various options for the summary that are based on a field of your choice by which to group the data. The following options are the calculations that can be used for a summary field option:
Total of → Calculates the total of values in a field
Average of → Calculates the average of values in a field
Count of → Counts the number of records that contain a value in a field
Minimum → Finds the lowest number or earliest date, time, or timestamp for a field
Maximum → Finds the highest number or latest date, time, or timestamp for a field
Standard Deviation of → Finds how widely the values in a field differ from each other. This calculates the standard deviation from the mean of the values in a field
Fraction of Total of → Calculates the ratio of the value in the field to the total of all the values in that field
List of → Creates a return-delimited list of values in a field
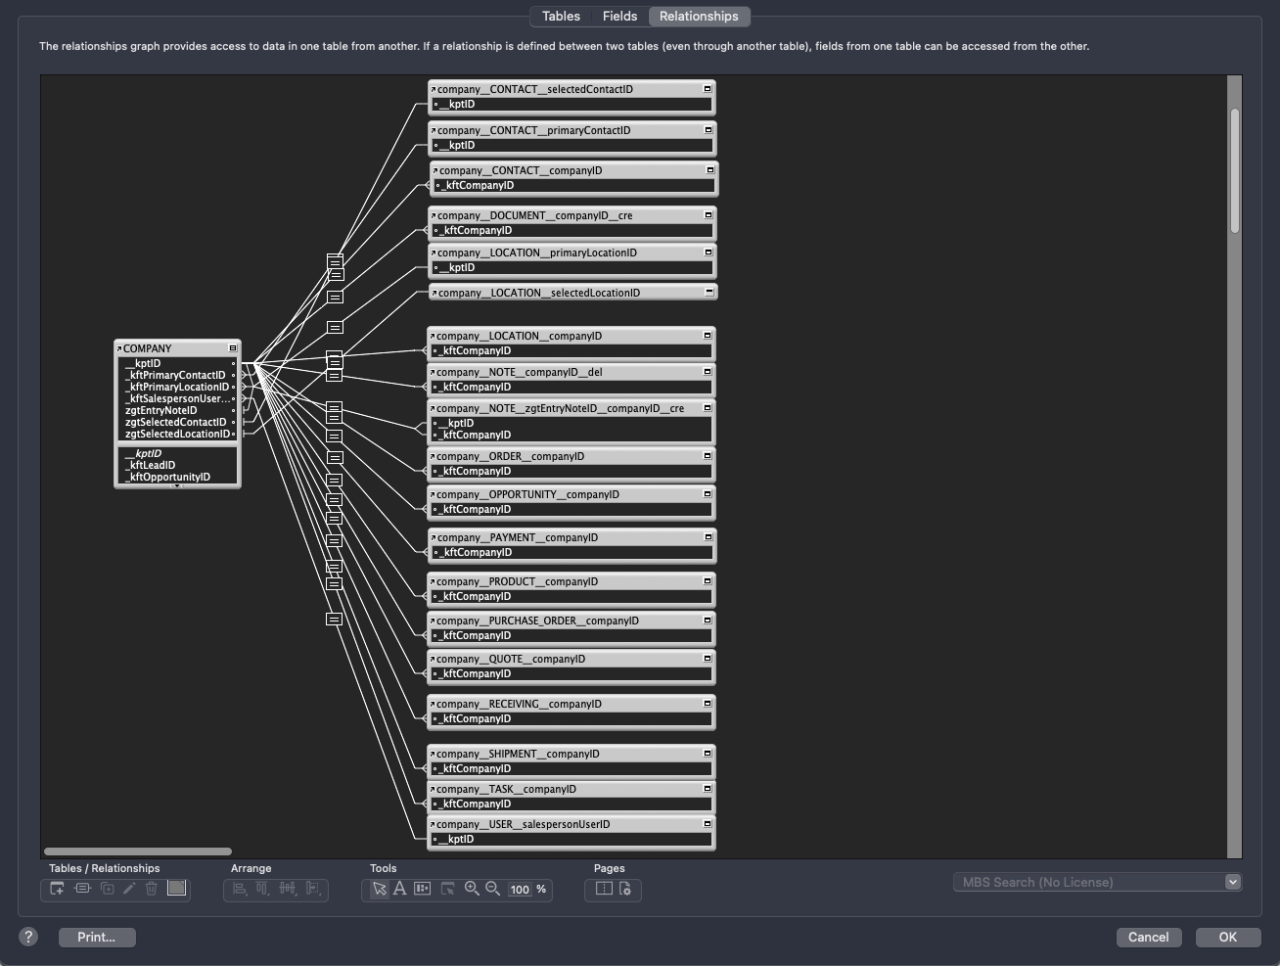
Relationships
Relationships are the third crucial element of the database structure. Tables in FileMaker can be related to each other through defined relationships. Relationships establish connections between tables in the database based on common fields, allowing you to access related data across multiple tables.
Scripting
Scripting is the backbone of functionality in your database solution. Each script can accept passed-in parameters and will perform actions based on specified script steps. FileMaker has its own unique scripting language which allows you to set variables, create conditional and looping logic, manipulate data stored in the database, and so much more! Learning a new programming syntax can seem daunting, but fear not! FileMaker's scripting language is user-friendly and you can pick it up and begin building scripts in no time!
You can create scripts by opening the script workspace and clicking the "+" button in the upper left corner. From there, you can name your script and build your script's logic. You can call your scripts in your FileMaker solution in a variety of ways. You can assign it to a button, you can add a script trigger to a layout or a layout object, you can create a server schedule (if your database is hosted on a server) that will call your script at a specified time or interval, or you can call it from the scripts menu (if you checked the box for "Include the script in the scripts menu" in the script workspace) which is under "Scripts" in your toolbar.

Security
Security is extremely important when building a FileMaker solution. After all, no one wants unauthorized users poking around in their system. Luckily, FileMaker handles many security components such as user authentication, privilege sets, and encryption to help you safeguard your data and protect sensitive information.
Adding an authorized user to your FileMaker solution is easy and allows for plenty of security customization options.
Open the manage security dialog box by clicking on "File," then "Manage," and lastly "Security."
Add a new user and assign them an account name and password (you can also assign the user a temporary password by clicking "Required password change on next sign-in" which will allow users to change their password to one of their choosing when they next sign-in).
Optionally, add a description for each user, mark them as active or inactive (inactive users cannot access the database), set their authentication method, and assign a user privilege set.
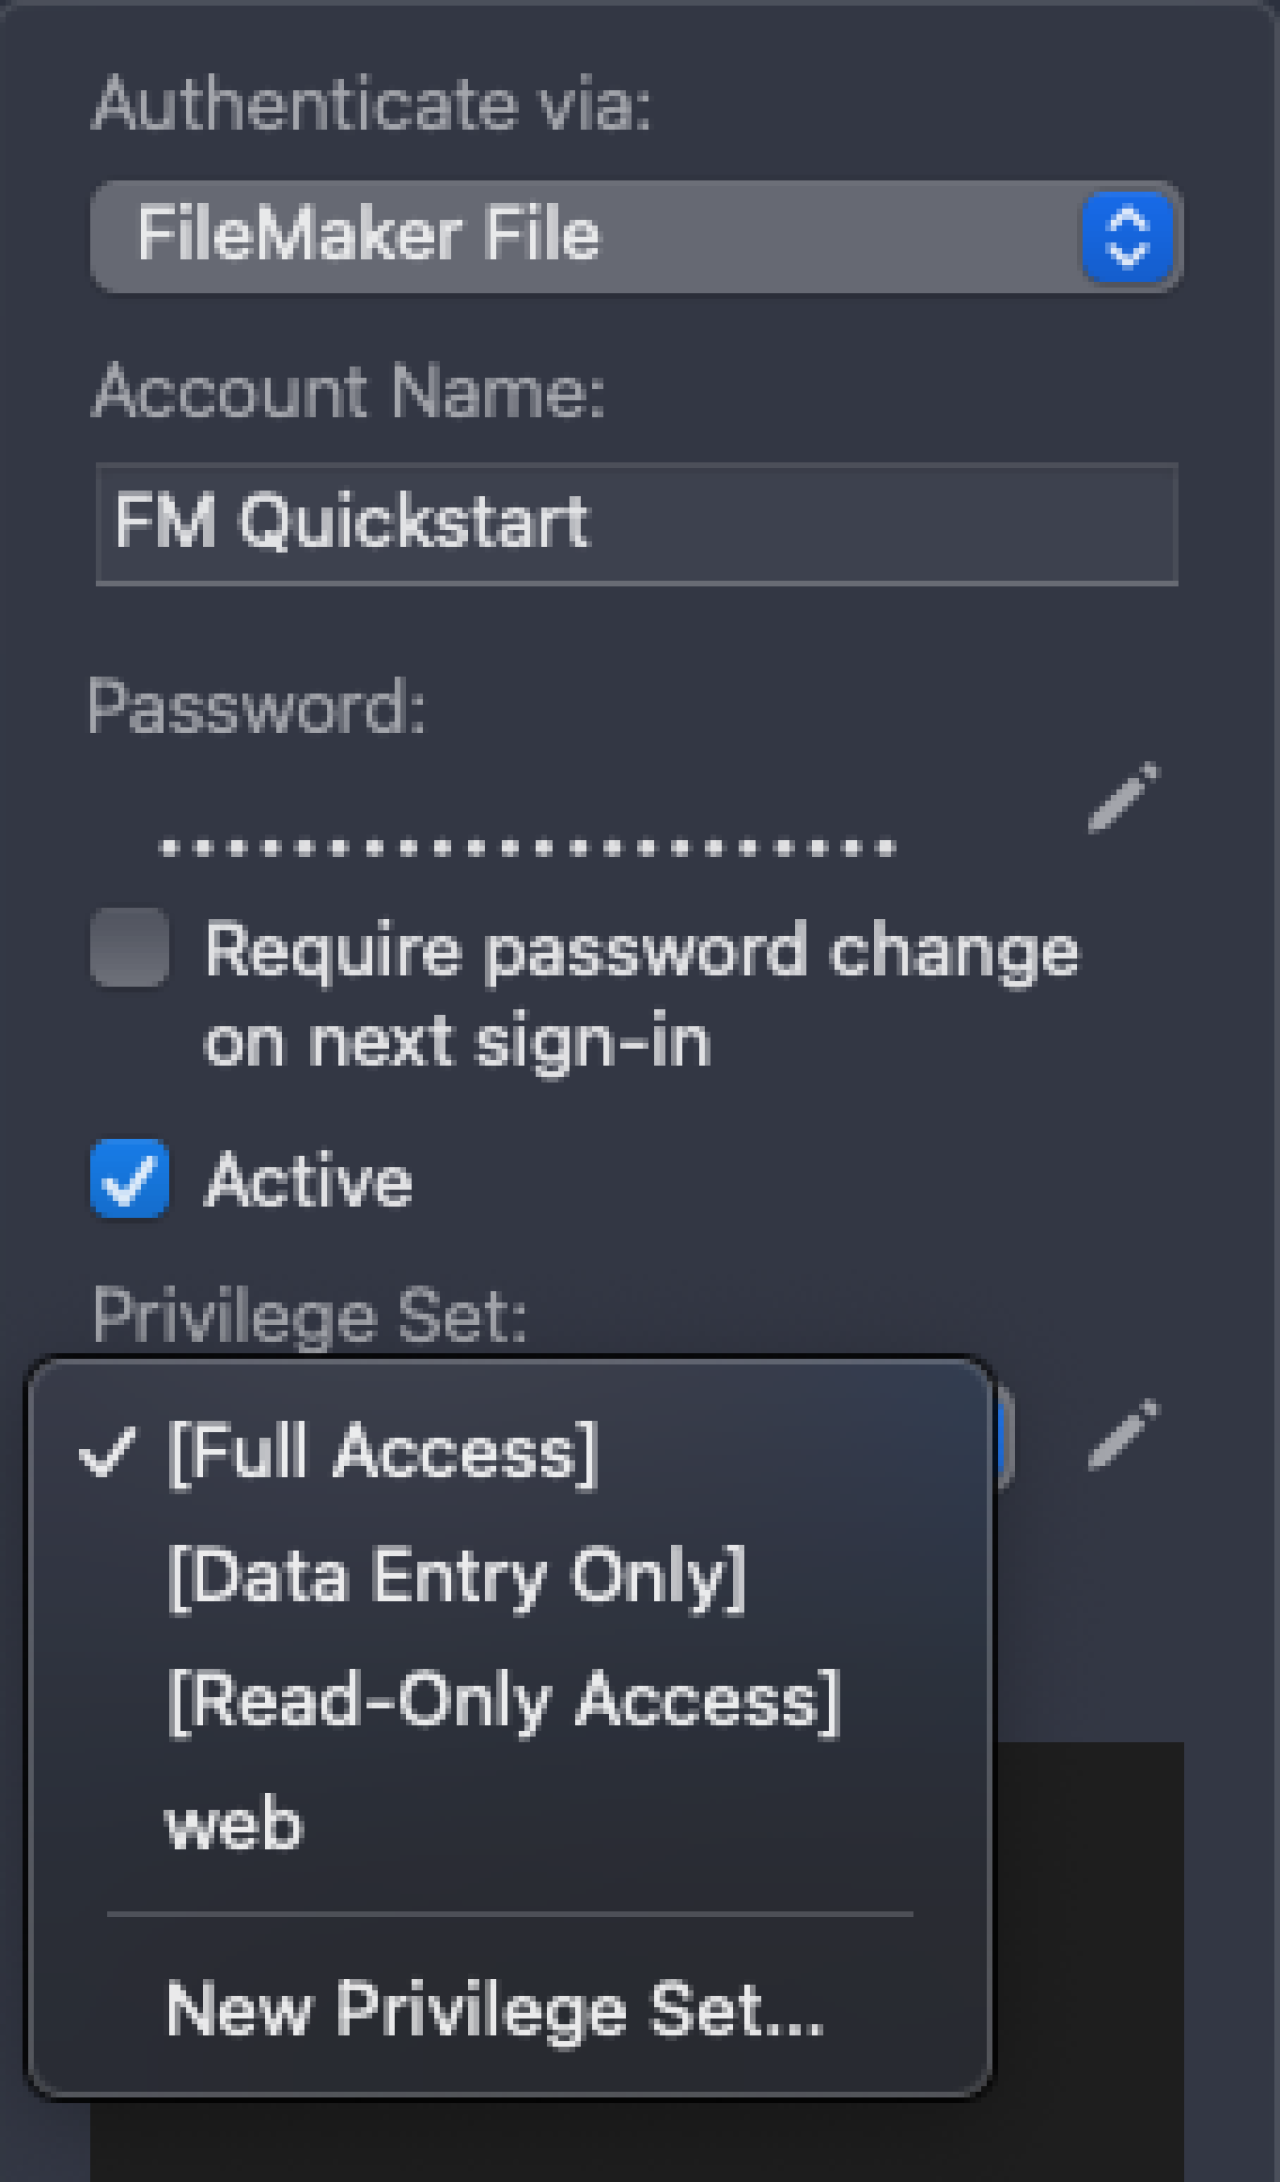
There are various authentication methods that you can assign users such as "FileMaker File" (username and password method) or "External Server," "Apple ID", "Amazon," "Google," "Microsoft Azure AD," or "Custom OAuth."
There are three default privilege sets for each FileMaker solution.
Full-Access allow users with this privilege set to have complete control of the system. This includes layout modification, script modification, database structure modification, security modification, etc.
Data Entry Only users can manipulate data within the system, however, they do not have full control and cannot do things like modify layouts, make database structure changes, modify scripts, update security, etc.
Read Only users only have access to view data. They cannot do any kind of manipulation in the system, including data manipulation.
On top of the three default privilege sets, you can create custom privilege sets for users where you can choose what privileges users do and do not have access to.

Mobile Solutions
FileMaker Pro is a very powerful tool and is excellent for desktop computer and laptop use, but what if you need FileMaker on your mobile device? Claris has you covered! Using FileMaker Go or FileMaker WebDirect, you can access your FileMaker solution on your mobile device just as you would on your desktop computer or laptop. These are two excellent products that make FileMaker even more robust!
Additional Products
FileMaker is a very powerful tool, but it isn't the only solution to your business needs. Claris offers many other software products that can enhance your FileMaker solution such as Claris Connect and Claris Studio!
DB Services also offers our own free FileMaker ERP template, FM Quickstart, that allows you to quickly and easily create a custom app for your organization.
Hosting
When you are ready, you can host your FileMaker solution either on-premise on your own local servers, or you can host it on the cloud. We offer several different hosting plans for those wanting to safely keep their FileMaker data in the cloud, including FileMaker Cloud and our own DB Services Managed Cloud. For more information on hosting, read more about our FileMaker hosting plans.
Download a Free FileMaker Demo
If you would like to download a FileMaker demo to familiarize yourself before beginning development, Claris offers a free FileMaker demo to help you get started.
Step 6: Testing, Demos, Feedback
Testing, demos, and feedback are critical stages in a project's development lifecycle. Conduct thorough testing of your FileMaker solution to identify and address any issues or bugs. Keep in mind that testing should be done throughout the entire project, not just at the end! Provide demos to stakeholders and end-users to gather feedback, validate requirements, and incorporate that feedback iteratively, while making adjustments to the FileMaker solution as needed. Ensure your stakeholders and end-users are engaged in the testing process to align with the project goals and user expectations. Repeat this process until all project goals have been met or a development cutoff date has been determined.
Step 7: Prepare for a Go-Live
In preparation for a successful Go-Live, you should finalize documentation, training materials, and support resources. You should also send notices or reminders to end-users of the upcoming and expected changes, the transition date, and information about systems that will be offline or decommissioned. Conduct user training sessions to familiarize users with the new FileMaker solution and address any questions or concerns that may arise. Lastly, support channels and procedures should be established to effectively address any post-Go-Live issues.
Step 8: Go Live
The day has finally come, and all your hard work is about to come to fruition. It's Go-Live day! Execute the Go-Live plan according to the established timeline and procedures. Monitor the deployment process closely and address any issues or challenges that come up. Communicate updates and status reports to those involved throughout the process, and finally, celebrate the successful launch of your FileMaker project!
Step 9: Post Go-Live
After the Go-Live date has passed, continue to monitor the FileMaker solution and address any issues that appear. Gather feedback from stakeholders and end-users for areas of improvement or optimization, and implement regular maintenance and support processes to keep the FileMaker solution running smoothly and efficiently. Congrats! You have successfully designed, built, and deployed a successful FileMaker project!
Conclusion
There you have it! Your Claris FileMaker solution is ready to rock. Following this checklist has brought you from the starting line to the finish line with confidence, but remember, it's not just about the launch, it's about what comes after. Keep listening to your team, keep refining, and keep adapting. With FileMaker in your toolkit, there's no limit to what you can achieve. If you're looking for guidance or support in this journey, feel free to contact us at DB Services. We're here to turn your vision into a reality!
Did you know we are an authorized reseller for Claris FileMaker Licensing?
Contact us to discuss upgrading your Claris FileMaker software.