FileMaker's custom IdP authentication is a great way to extend your organization's security. FileMaker has used Amazon, Google, and Microsoft with an easy configuration since version 16. Now, we have the ability to configure a custom provider using industry-standard OAuth2 or OpenID protocols. We will be showing you how to configure your Salesforce instance as an authentication source for your FileMaker applications.
Using an identity provider is a great way to manage and secure your application.
Preparing the Salesforce Organization
Let's start by preparing the Salesforce organization. Every identity provider will require configuration. We will need information from this process when configuring the FileMaker Server Custom IdP settings.
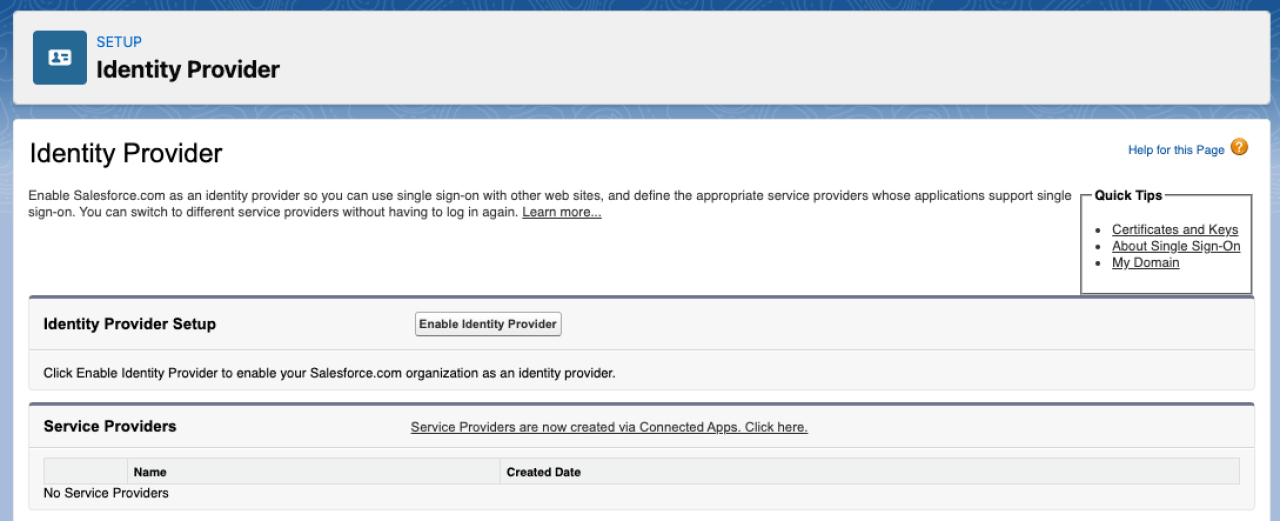
Identity Provider
In your Salesforce setup, search for "Identity Provider." This page allows you to enable Salesforce as a single sign-on provider. Once enabled, it will prompt you to choose the certificate used when communicating. For the purpose of this article, we will use the default self-signed certificate.
Save your certificate and document your Issuer on the following screen. For example, in my test org, it is https://dbservices-b-dev-ed.my.salesforce.com, which we will use to configure our FileMaker Server below.
Connected Apps
After your Identity Provider is enabled, you will need to create a Connected Application. At the bottom, you will find the Service Providers section. Click the link to create a new Connected App: "Service Providers are now created via Connected Apps. Click here."
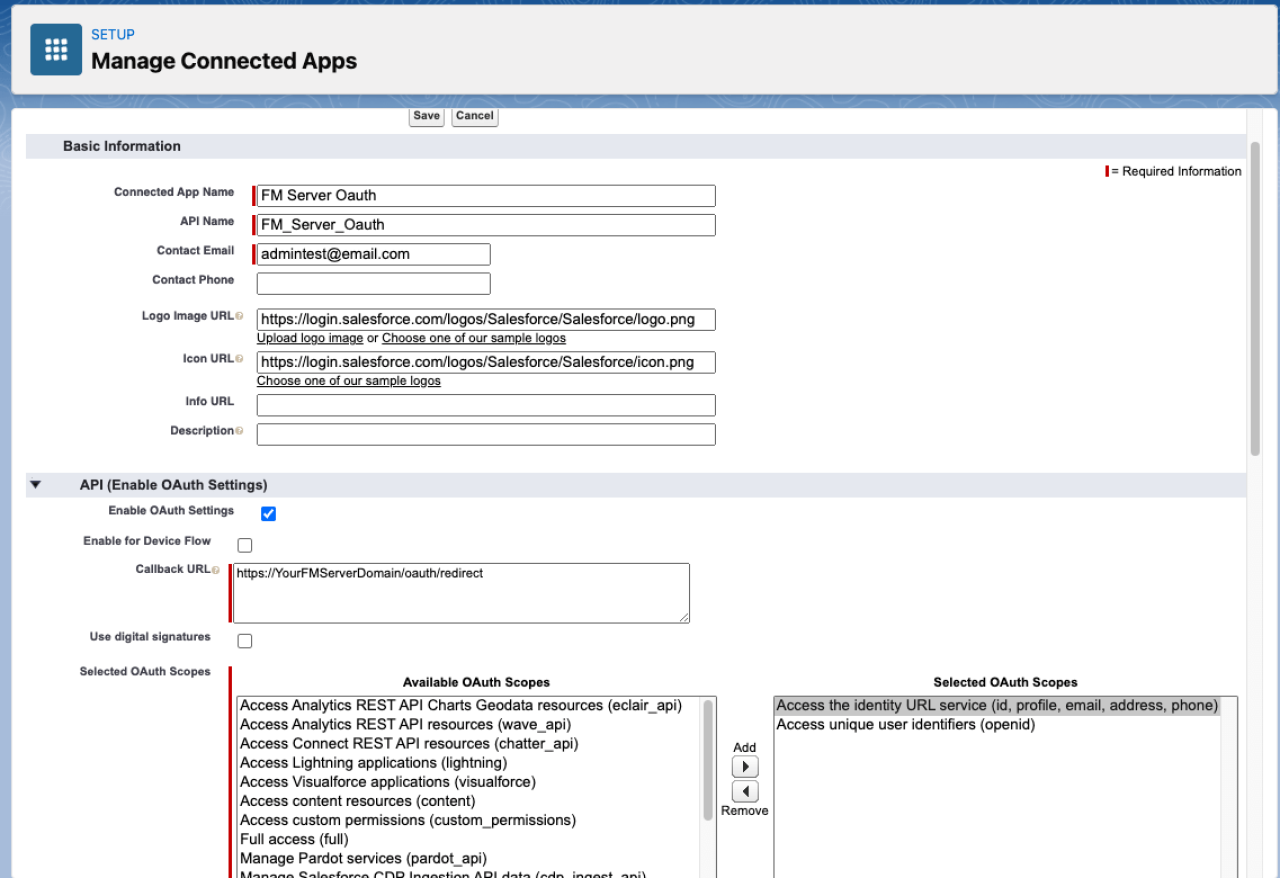
Fill in (at a minimum) the required basic information at the top of the form.
App Name
API Name- Default to the app name.
A contact email
Logo URLs- You can use their default logos or upload your own.
Next, check the box to Enable OAuth Settings.
Callback URL - This is the URL the app will call when a sign-on is successful. It is the same for every FileMaker server, just replace YourFMServerDomain, with the public address of your FileMaker Server.
OAuth scopes - You will need to include two scopes in order for the app to authenticate properly.
Access the identity URL service (id, profile, email, address, phone)
Access unique identifiers (OpenID)
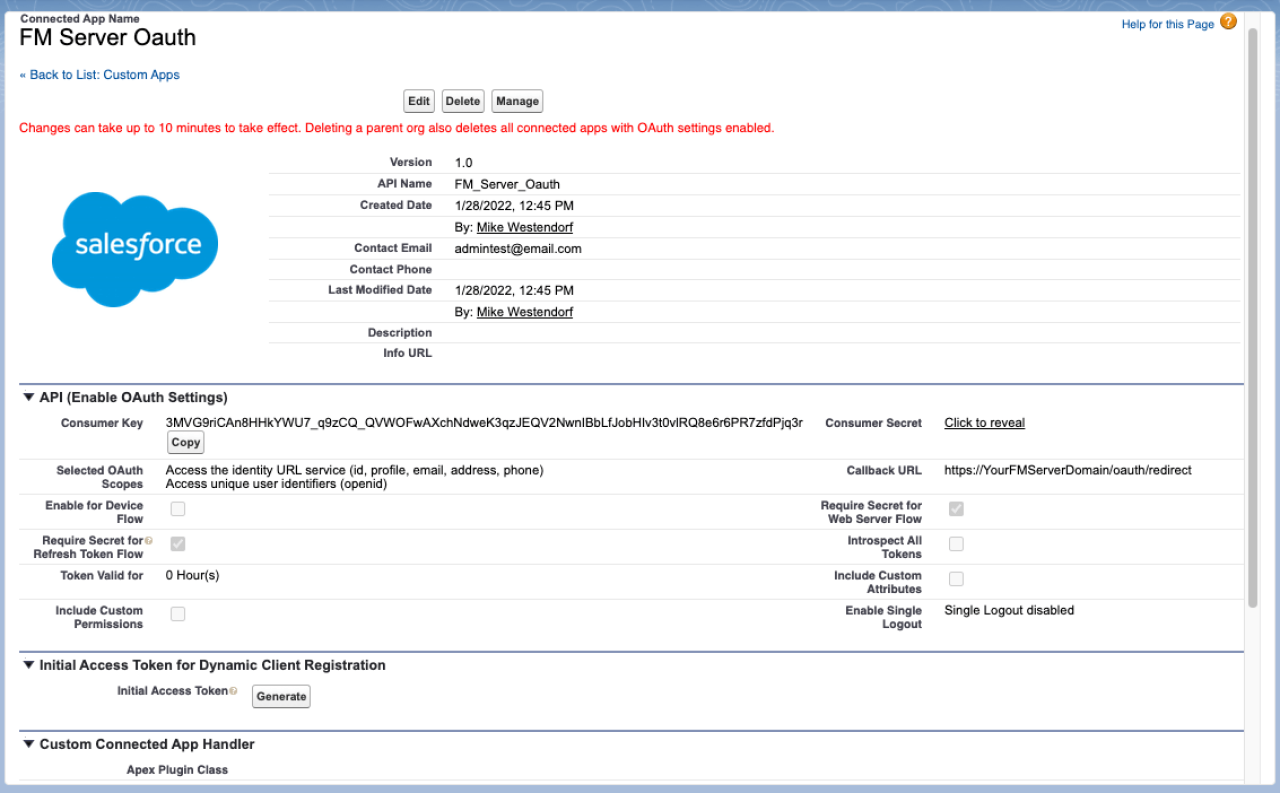
Save your changes, the confirmation screen will have additional information we need to document for the implementation.
Confirmation Page
Before leaving this page, be sure to copy and document both the Consumer Key and the Consumer Secret. Keep this information in a safe place; we will use it later.
Configuring FileMaker Server
Next, we will configure our FileMaker Server. This is where all the information we've collected will be put to use. Along with the information we collected, we will also need the endpoints our OAuth provider uses to make the necessary calls. The required endpoints are for the authorization code, authorization token, and authorization profile. The paths for Salesforce all begin with the Issuer path we documented above in our case, https://dbservices-b-dev-ed.my.salesforce.com. The endpoints for our server would be:
Authorization Code → https://dbservices-b-dev-ed.my.salesforce.com/services/oauth2/authorize
Authorization Token → https://dbservices-b-dev-ed.my.salesforce.com/services/oauth2/token
Authorization Profile → https://dbservices-b-dev-ed.my.salesforce.com/services/oauth2/userinfo
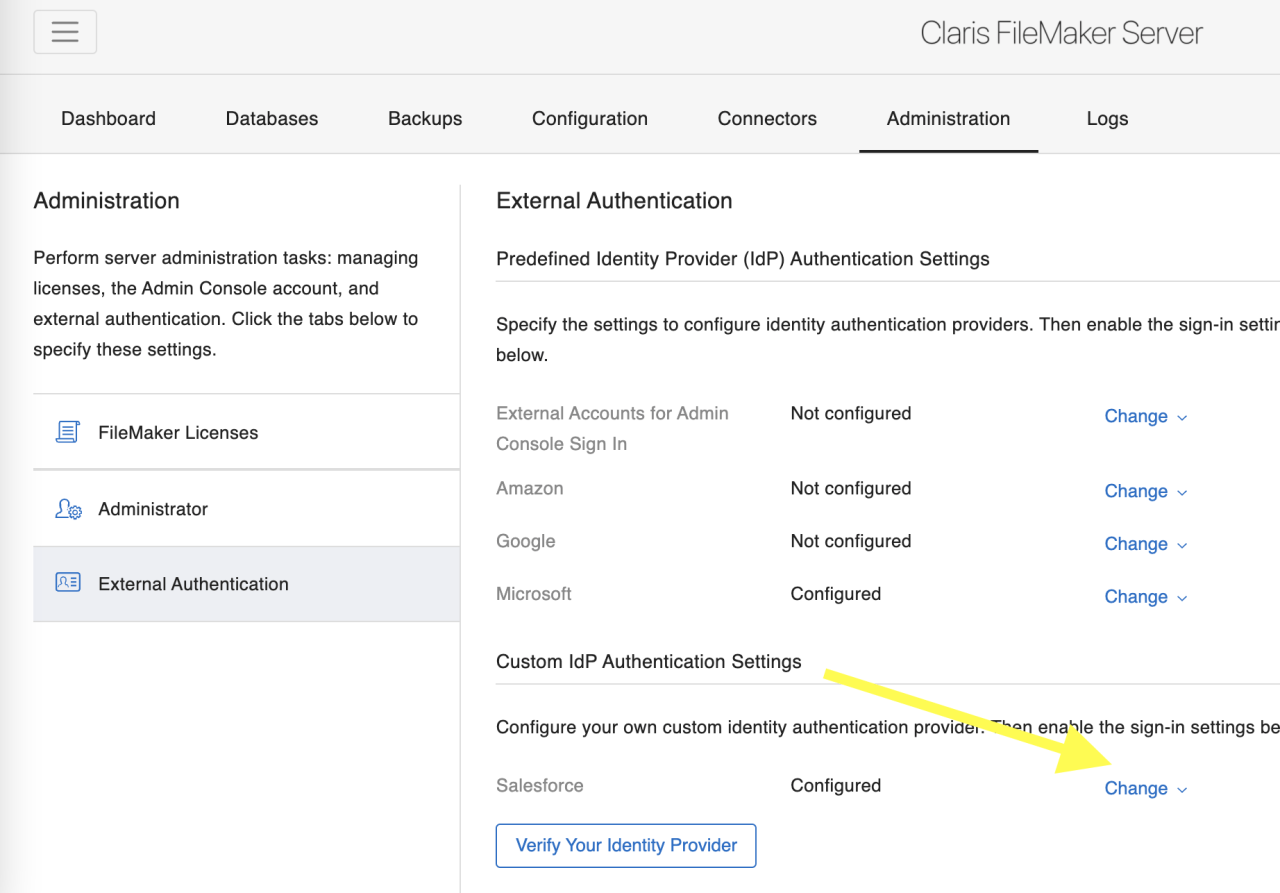
After logging into your FileMaker Server Admin Console, navigate to the Administration tab and then to the External Authentication area on the sidebar. Now, we'll expand the Custom IdP Authentication Settings.
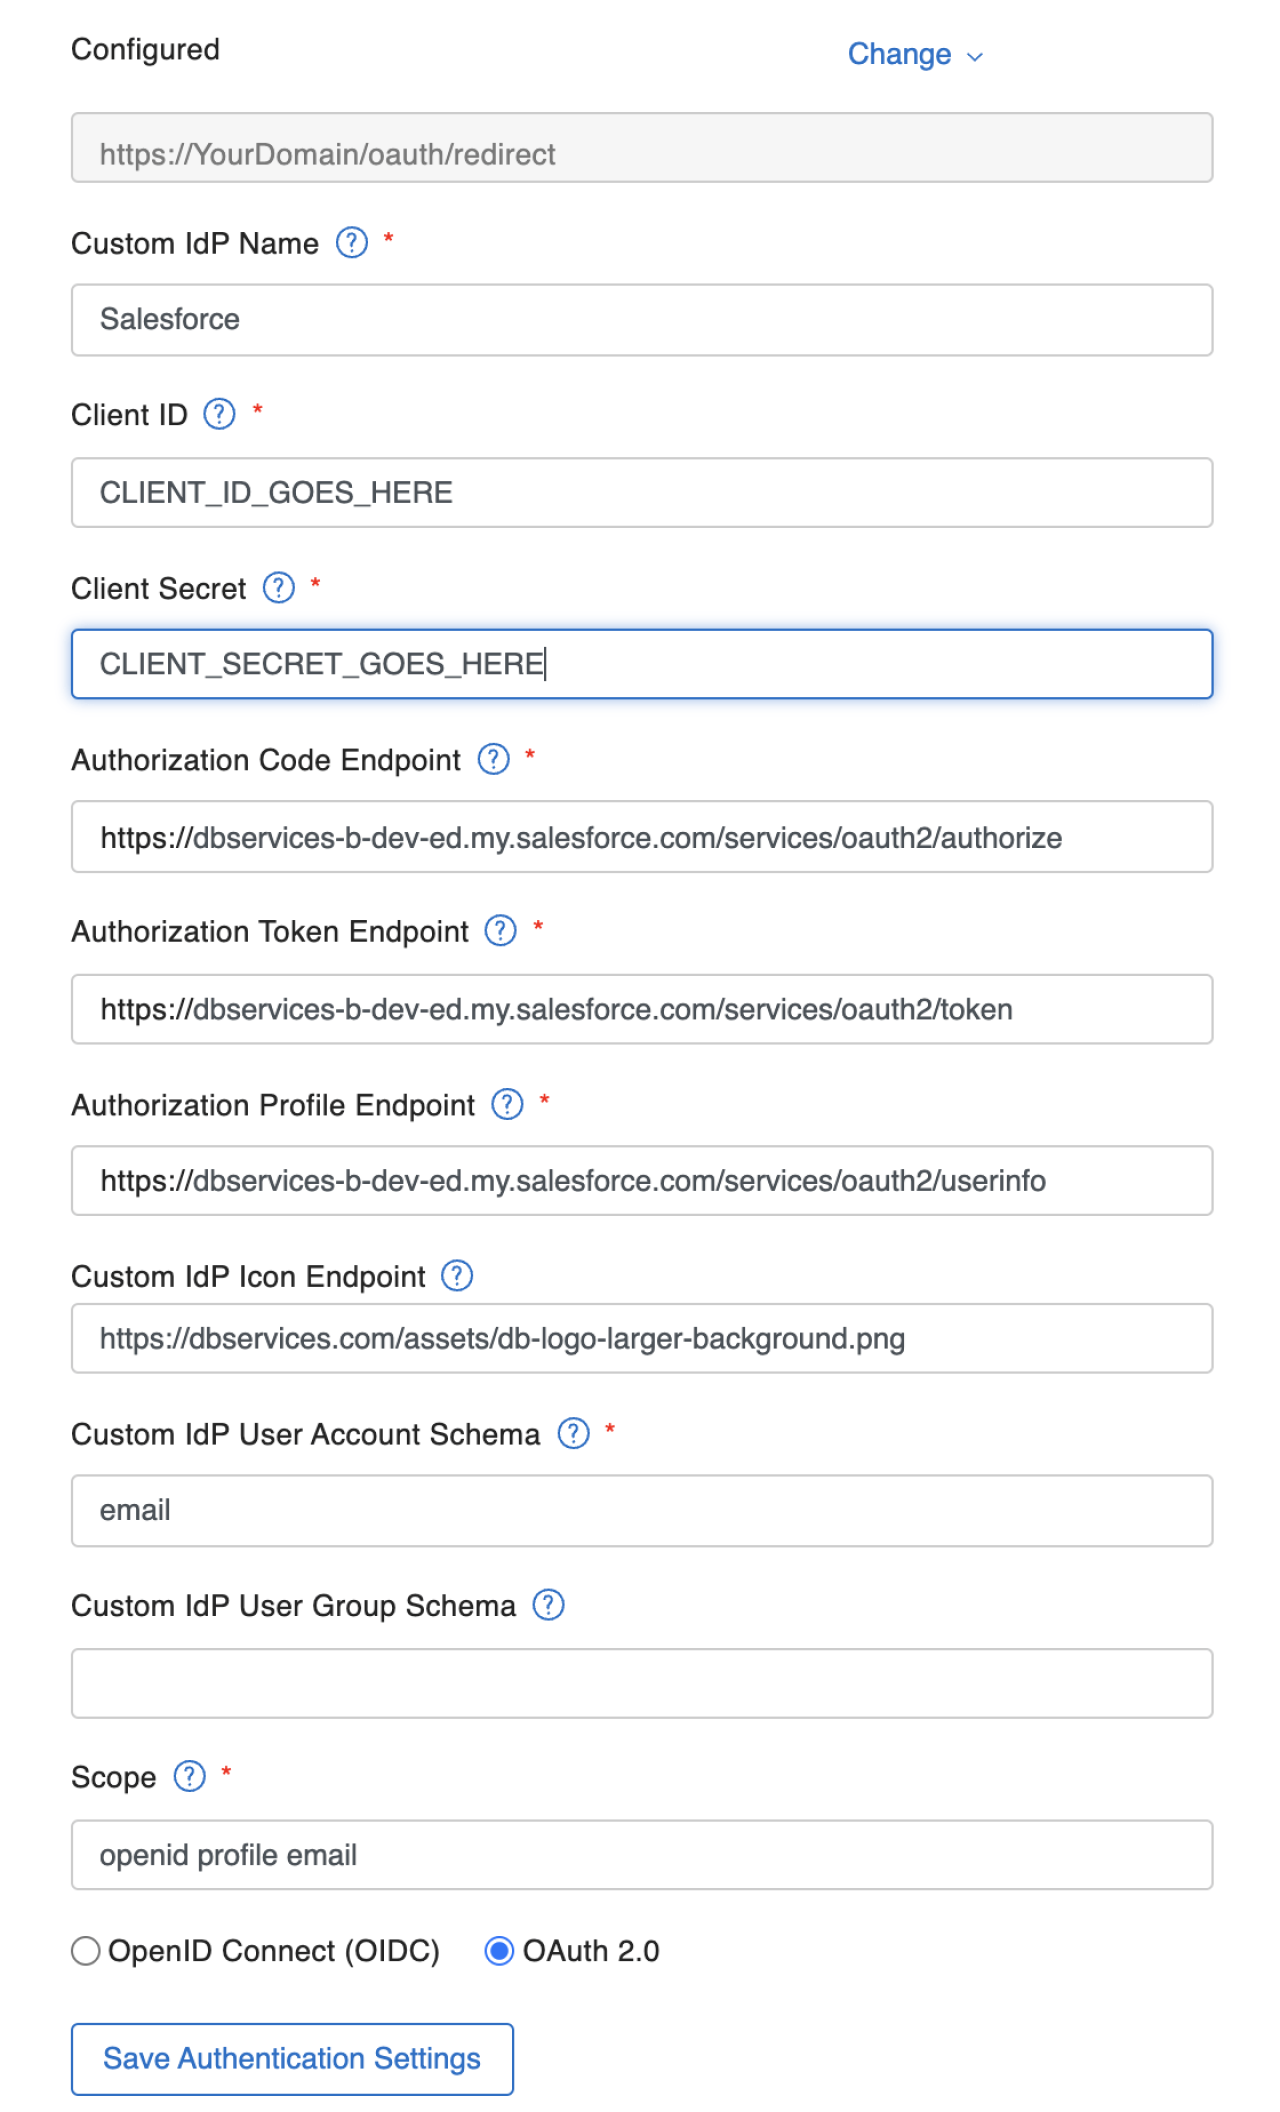
Now that we have all the required information, we will enter it into the server settings. As you can see, everything we collected fits into the FileMaker settings page in the first set of fields. Along with this information, we need to let FileMaker Server know the user account schema and scope. The standard for these is:
Schema: email
Scopes: OpenID, profile, email
These let FileMaker identify the user account information when logging into the server. Finally, choose the authentication type you are using and save your settings - in our case, that is OAuth 2.0.
Verify Your Identity Provider
FileMaker provides a way to verify your settings, and we recommend you test your settings and confirm you can authenticate correctly before moving on to configuring your FileMaker files.
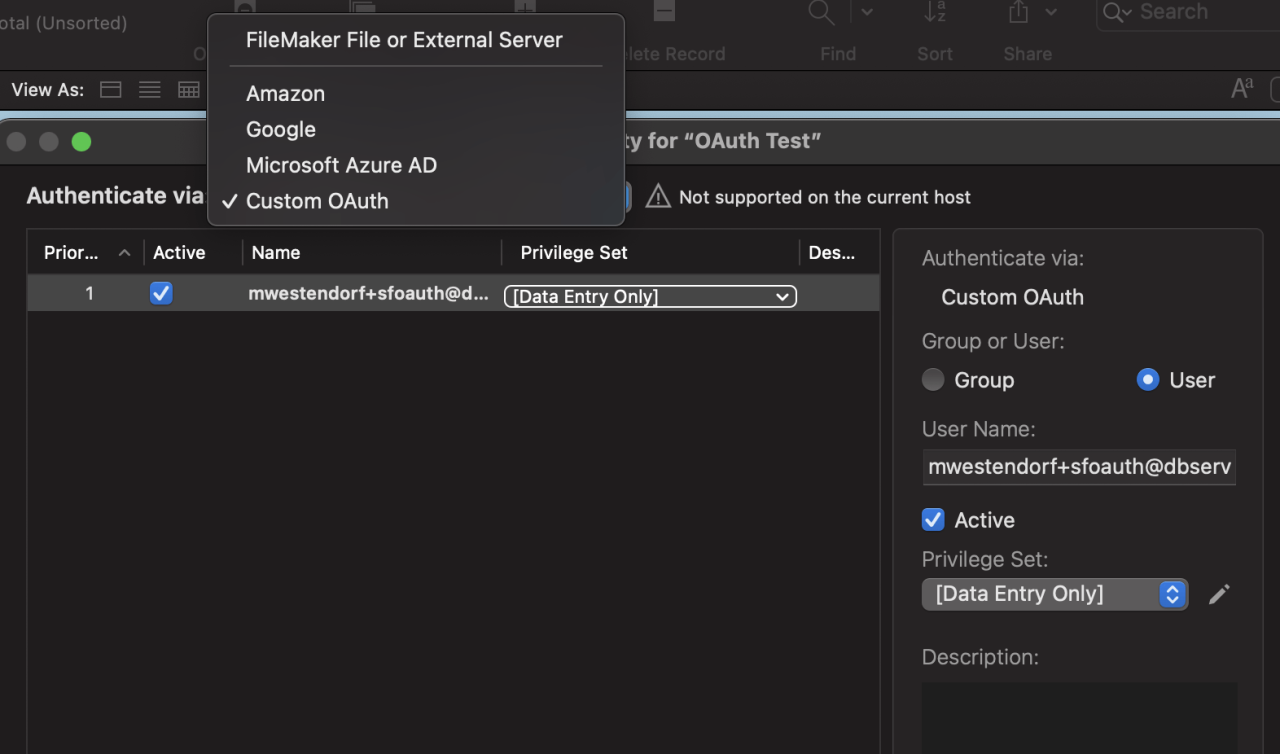
Configure FileMaker Pro Security
As the last step, add your users under FileMaker Security. You will find a Custom OAuth from the list of configured providers. Add any authorized users and choose a privilege set for them.
Conclusion
This custom configuration with Salesforce is a great way to manage and secure your FileMaker application. If you have any questions or need help using Salesforce as an authentication source for FileMaker, contact our team at DB Services and we will be happy to assist you.
Did you know we are an authorized reseller for Claris FileMaker Licensing?
Contact us to discuss upgrading your Claris FileMaker software.