Sometimes you need to send a document to be signed virtually. Integrating PandaDoc with your FileMaker solution makes this an easy task. PandaDoc has a robust API that allows you to create, send, and receive documents digitally using the functionality of your FileMaker system to manage the process. Our guide will show you how you can begin sending documents quickly and easily, streamlining your e-signature process.

PandaDoc Setup
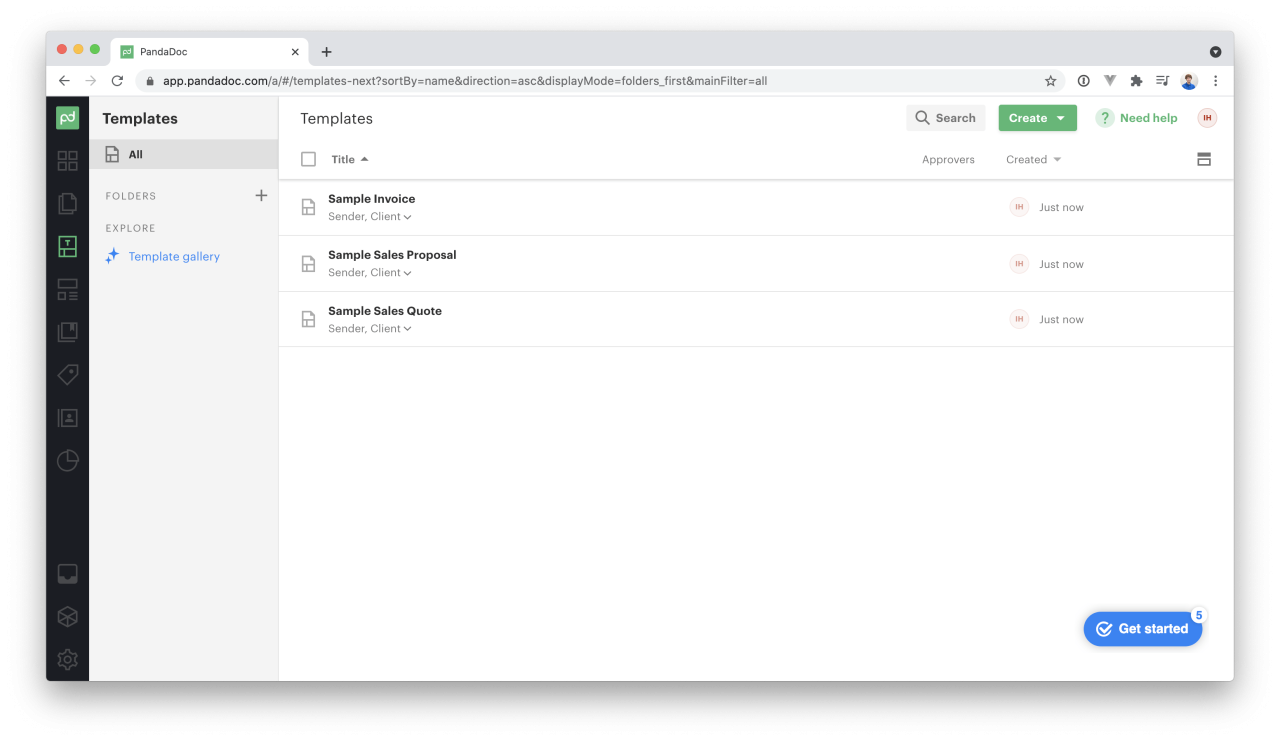
Before you start sending documents, you will need to create a PandaDoc account. You can visit their webpage to create an account. Once logged in, PandaDoc will have templates you can use or you can create your own custom templates.
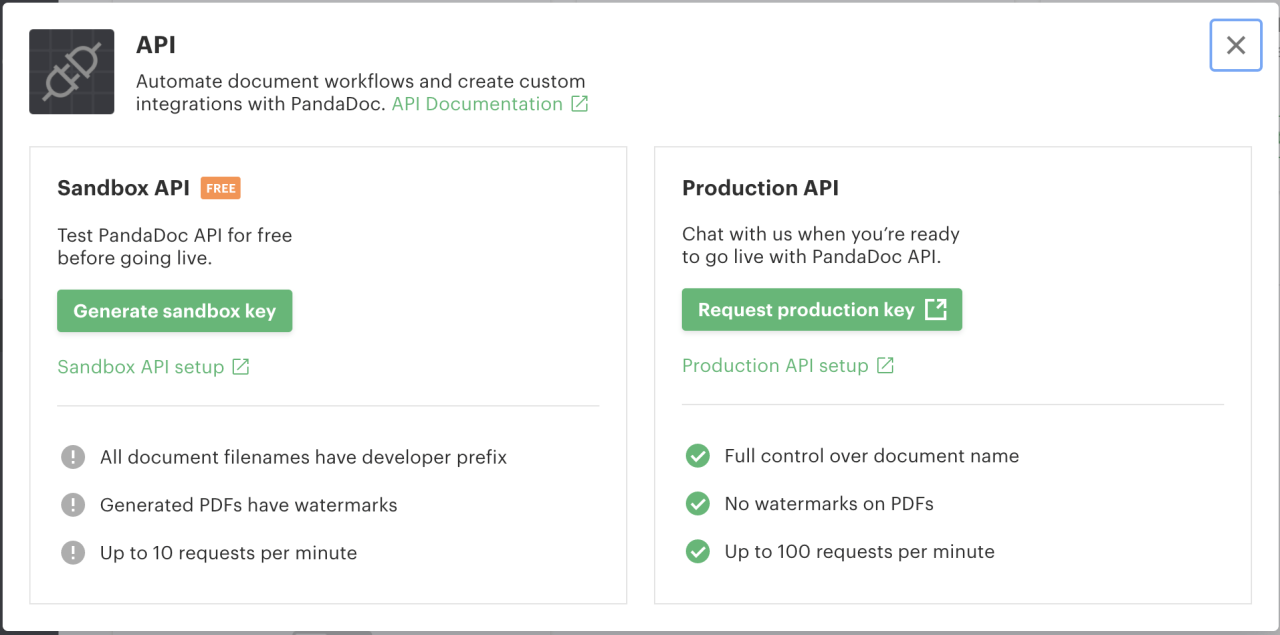
From here, you will want to go to the PandaDoc settings and navigate to the Integrations section. Scroll to the bottom of this page and find the API settings. Click the toggle to turn on the API and choose between a sandbox or production environment. For this example, you will be using a sandbox environment to test the integration and send a sample document. Click on the green "Generate Sandbox Key" button to get your API key.
Listing Templates
Now that you have your keys you can pull your PandaDoc templates and create records for them in FileMaker. You will use PandaDoc's API documentation as a reference. To list templates, you will use a GET call to the following address: https://api.pandadoc.com/public/v1/templates. You need to include your authorization in the cURL.
"-X GET" & ¶ &
"--header \"Content-Type: application/json\"" & ¶ &
"--header \"Authorization: API-Key " & $apiKey & "\"" & ¶ &
"-d @$body"
From there, you get your results in JSON that you can parse and use to get your template and role information. Each template will have a template id, which is used to create documents from the template, and roles, which are used to assign people to sign or fill information on the document.
Creating Documents
Now that you have template and role information in FIleMaker you can use that to create documents from your templates. PandaDoc makes this easy. All you need to do is make a POST call to https://api.pandadoc.com/public/v1/documents. Your cURL will be similar but you need to pass parameters. You will need the template name and uuid you got from PandaDoc when you listed your templates. You will also need to send a recipient's object with the first name, last name, and email for each role.
{
	"name" : "Sample Sales Proposal",
	"recipients" :
	[
		{
			"email" : "JohnDoe@gmail.com",
			"first_name" : "John",
			"last_name" : "Doe",
			"role" : "Sender"
		},
		{
			"email" : "AWhite@gmail.com",
			"first_name" : "Alice",
			"last_name" : "White",
			"role" : "Client"
		}
	],
	"template_uuid" : "F4jTJWr3kB46nYJwAkCMrH"
}
Listing Documents
Now that you have created documents in PandaDoc you can list your documents by making a GET call to https://api.pandadoc.com/public/v1/documents. Your cURL will be the same as when you listed your templates.
Sending Documents
You can also send documents with the PandaDoc API. You can use a POST call to https://api.pandadoc.com/public/v1/documents/id/send where "id" is the id of the document you want to send. That's it! The document will be sent to the email addresses you assigned to the role(s) for that document.
Conclusion
Integrating PandaDoc with your FileMaker system can reduce the costs of sending documents while also streamlining the process and allowing for automation. PandaDoc also allows you to use information you may already have in FileMaker to fill document tokens and create unique documents quickly. Sending documents virtually makes the process faster and easier for all parties. Being able to integrate that process with FileMaker makes creating and sending the documents even easier. Contact us today for assistance integrating PandaDoc with your FileMaker system.
Did you know we are an authorized reseller for Claris FileMaker Licensing?
Contact us to discuss upgrading your Claris FileMaker software.
Download the DB Services - FileMaker PandaDoc Integration File
Please complete the form below to download your FREE FileMaker file.


