Have you ever wanted your FileMaker Go app to send messages when a tech arrives onsite for a service request, or to notify management when that very same tech leaves? How about guiding potential customers at a show to the booths they would be interested in? As of FileMaker 16, you can have your FileMaker Go app automatically perform actions based on the user's location. This is made possible by two new features: a new script step named "Configure Region Monitor Script" and a new function named "Get ( RegionMonitorEvents )"
Below is how you can set up and use these new features in your solutions.
1. Configure Regions to Monitor
The first step is to set up the regions that we want to monitor and track the resulting actions when a user enters or exits the specified regions. The Configure Region Monitor Script script step allows FileMaker to monitor up to 20 regions at a time.
Let's look at options you need to specify when using this script step.
1. 1 General Options
Monitor: allows you to specify which method (iBeacon or geofence) you want to use for monitoring a user's location. A third option, "Clear," is used to stop monitoring a certain region.
Name: sets the name of the region that you are monitoring. Keep in mind each region you are monitoring must have a unique name. If you run this script step with a name that's already being monitored, the previous setting will be overwritten. If the Monitor option is "Clear" then your iOS device will stop monitoring the region with the name specified.
Script: sets the script you want to run when your iOS device enters or exits the monitored region.
1.2 Geofence specific options
The geofence option utilizes GPS to locate iOS devices. It can monitor locations in a much larger area but tends to be less accurate, making it a great choice for outdoor use.
Latitude: specifies the latitude of the center for the region.
Longitude: specifies the longitude of the center for the region.
Radius: specifies the radius (in km) of the region.
Visually, think about a geofence region as something like this:
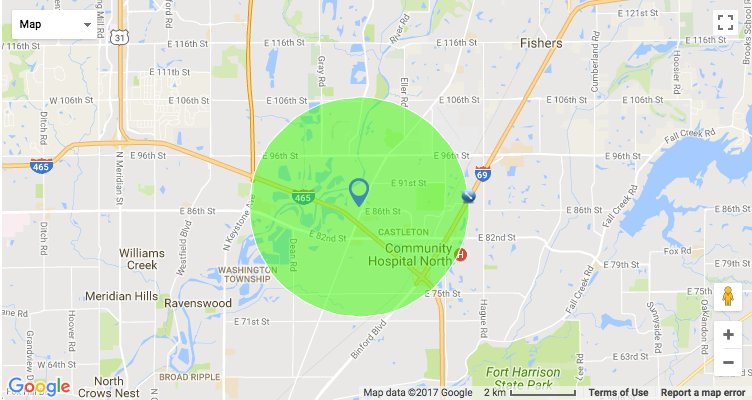
The latitude and longitude will mark the center of the circle, whereas the radius will set the size of the circle.
1.3 iBeacon specific options
The iBeacon option uses a bluetooth low energy (BLE) signal to communicate with beacons (iBeacon devices) around you, monitoring your location. They have high accuracy but relatively small coverage compared to Geofence, making it very useful for indoor use.
UUID: specifies the unique identifier of the beacon(s) you want to monitor. If you want to monitor a fleet of beacons in your store, then all the beacons should use the same UUID.
Major (optional): specifies the major value of the beacon(s) you want to monitor. Helps you narrow down the number of beacons you want to keep track of.
Minor (optional): specifies the minor value of the specific beacon you want to monitor.
1.4 Tips and Notes
It's important to note that values specified in the script parameter will be evaluated when the specified script runs, not when the region is configured. If you want to pass data from fields as parameters, keep in mind it will be the values on the current record when the script runs, not those when the region was first configured.
Also, similar to the OnTimer trigger, regions configured are tied to the window in display when the specified script runs. So if this window is closed, all configured monitors will be cleared out.
2. React To Region Monitor Events
Now that we have our monitored regions configured, the attached scripts will run whenever the user enters or exits the area. But how do we know if the user is entering or leaving a region, and what if we want different actions for each? The Get ( RegionMonitorEvents ) function will help with that.
In the script that you set the Configure Region Monitor Script step, you can use Get ( RegionMonitorEvents ) function to return the action that caused this script to run. This will list all the events associated with that region in chronological order in the following format:
<region name>
<timestamp>;<1 or 0>
<timestamp>;<1 or 0>
<timestamp>;<1 or 0>
1 means the iOS devices entered the monitored region, and 0 means it has left it.
For example, if I entered a region named "Job site 1" at 9:00 am on March 31st 2017, this function will return:
Job site 13/31/2017 9:00:00 AM;1
If I left the site at 5:00 pm the same day, the function will return:
Job site 13/31/2017 9:00:00 AM;13/31/2017 5:00:00 PM;0
Using this, we can tell whether the user is entering or exiting the named region and have the script perform differently as needed.
3. Possible iBeacon and Geofence Use Cases
Since iBeacon and geofence offer different coverage and accuracy, let's look at which option is more suitable for certain use cases.
3.1 Retail Stores & Trade Shows - iBeacon
When customers walk into a store, the store can greet them on their iOS device.
Contextualized promotion and product information can be sent to customers when they enter a certain area of a store.
Indoor navigation information can be pushed to customers based on their location.
You can even merge the online and offline shopping experience. Customers can purchase products online and your app can help guide them to pick it up in the store.
3.2 Employee Location Tracking - Geofence & iBeacon
You can use this feature to build a fully automated location based timecard system. Wonder whether your employee is working hard onsite or off doing something else? This can help you determine their location.
3.3 Tour & Educational Apps - Geofence & iBeacon
Depending on the size of the site you can use geofence, iBeacon, or both to push information to tourists when they arrive at a certain location. Have your app tell guests a beautiful story about a lake in the park, play a song about a heroic historical event where they stand, or play a video to give art lovers a deeper understanding of a masterpiece hanging on the museum wall.
You can also work with local vendors to add promotional material in your app.
You can even make games by combining the two ideas together. Imagine traveling the freedom trail and receiving a 25% discount on a lobster roll after visiting all the sites.
3.4 Location-Based Reminder - Geofence & iBeacon
Driving toward a client for a big proposal meeting? You can have your app push the client's information (including pictures and videos), your contact history and all the documents they sent you before you arrive at the client-site to help you seal the deal.
You can automatically play safety instruction videos when someone is about to operate something dangerous. This could be in a warehouse, a lab or wherever safety comes first.
Ever get home from the grocery store only to suddenly remember something you forgot? You can build an app that will send your shopping list when walking by a grocery store.
Conclusion
FileMaker 16 has introduced new location monitoring features that truly give FileMaker Go the edge by enhancing your app’s ability to take on any location-specific needs. Whether you’re indoors, outdoors, coming, or going, FileMaker can monitor it all. If you need further assistance taking advantage of the new location monitoring features in FileMaker Go, contact us today and we would be happy to assist you.
Did you know we are an authorized reseller for Claris FileMaker Licensing?
Contact us to discuss upgrading your Claris FileMaker software.
Download the Location Monitoring in FileMaker Go File
Please complete the form below to download your FREE FileMaker file.