
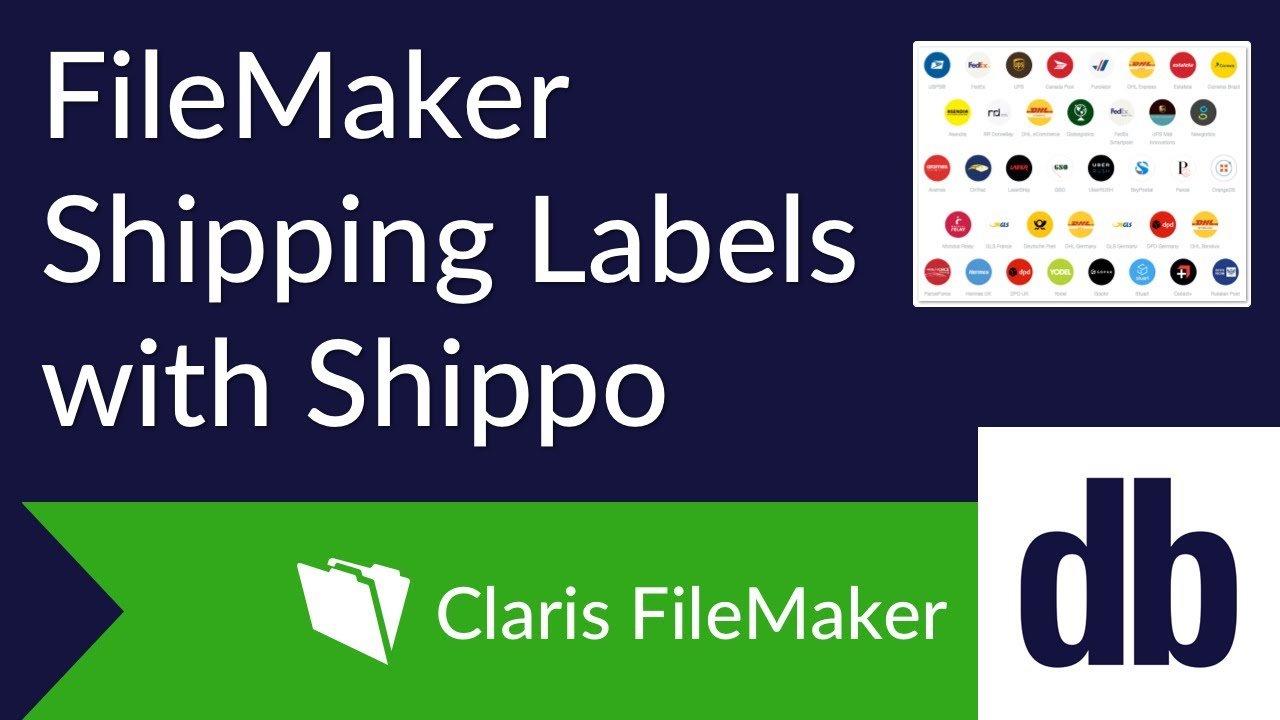
The global market for parcels is on pace to be over $300 billion dollars in 2017 according to Apex Insight with sales continuing to rise via e-commerce. There are many carriers across the globe and having nearly all to your disposal from a single company is advantageous. Many businesses want the ability to ship orders directly out of FileMaker. We commonly recommend Shippo, an all-in-one web API that allows you to pay for and generate shipping labels and tracking numbers on the fly.
But why do we want to integrate with Shippo in the first place? Can't we just create shipping labels all online?
The Problem
We find that many customers are managing all of their orders inside of FileMaker and all of their shipments in a third-party (sometimes online) solution. This is a very resource intensive workflow and causes a big time waster: double-data entry. Just imagine entering in every single customer's information into FileMaker and then into a third-party solution. Typing (or copy-pasting) two pairs of shipping and billing addresses just seems barbaric, right? If you are in a similar situation right now, we have a solution (keep reading)!
The Solution
In a perfect world, you would be able to create an order and generate a shipping label all from one screen within FileMaker and only type the customer's information once. Well, we like to think that this perfect world already exists! That's where Shippo and it's powerful and robust API comes in. With built-in JSON and cURL functions in FileMaker, we can natively integrate with Shippo. All you need to do to get started is sign up for Shippo, set up your shipping options, grab your API keys, and then integrate with FileMaker. It's super easy and we will show you how to do it below.
Benefits of using Shippo
Shipping Fees: Need to save money and ship all over the world? Cha-ching! Shippo is very affordable and only charges you for shipping cost + $0.05.
Tracking Numbers: Want to provide tracking numbers and links to your customers? You can do it! Shippo provides tracking numbers at no charge.
Shipping Carriers: USPS? FedEx? UPS? No problem! Shippo allows you to integrate with a long list of providers at no charge.
eCommerce: Have an existing eCommerce website? Good news! Shippo integrates with today's popular eCommerce platforms.
Integration: Itching to start generating shipping labels today? Get to work! Shippo is a very lightweight implementation and uses only native FileMaker with 6 scripts.
Getting Started
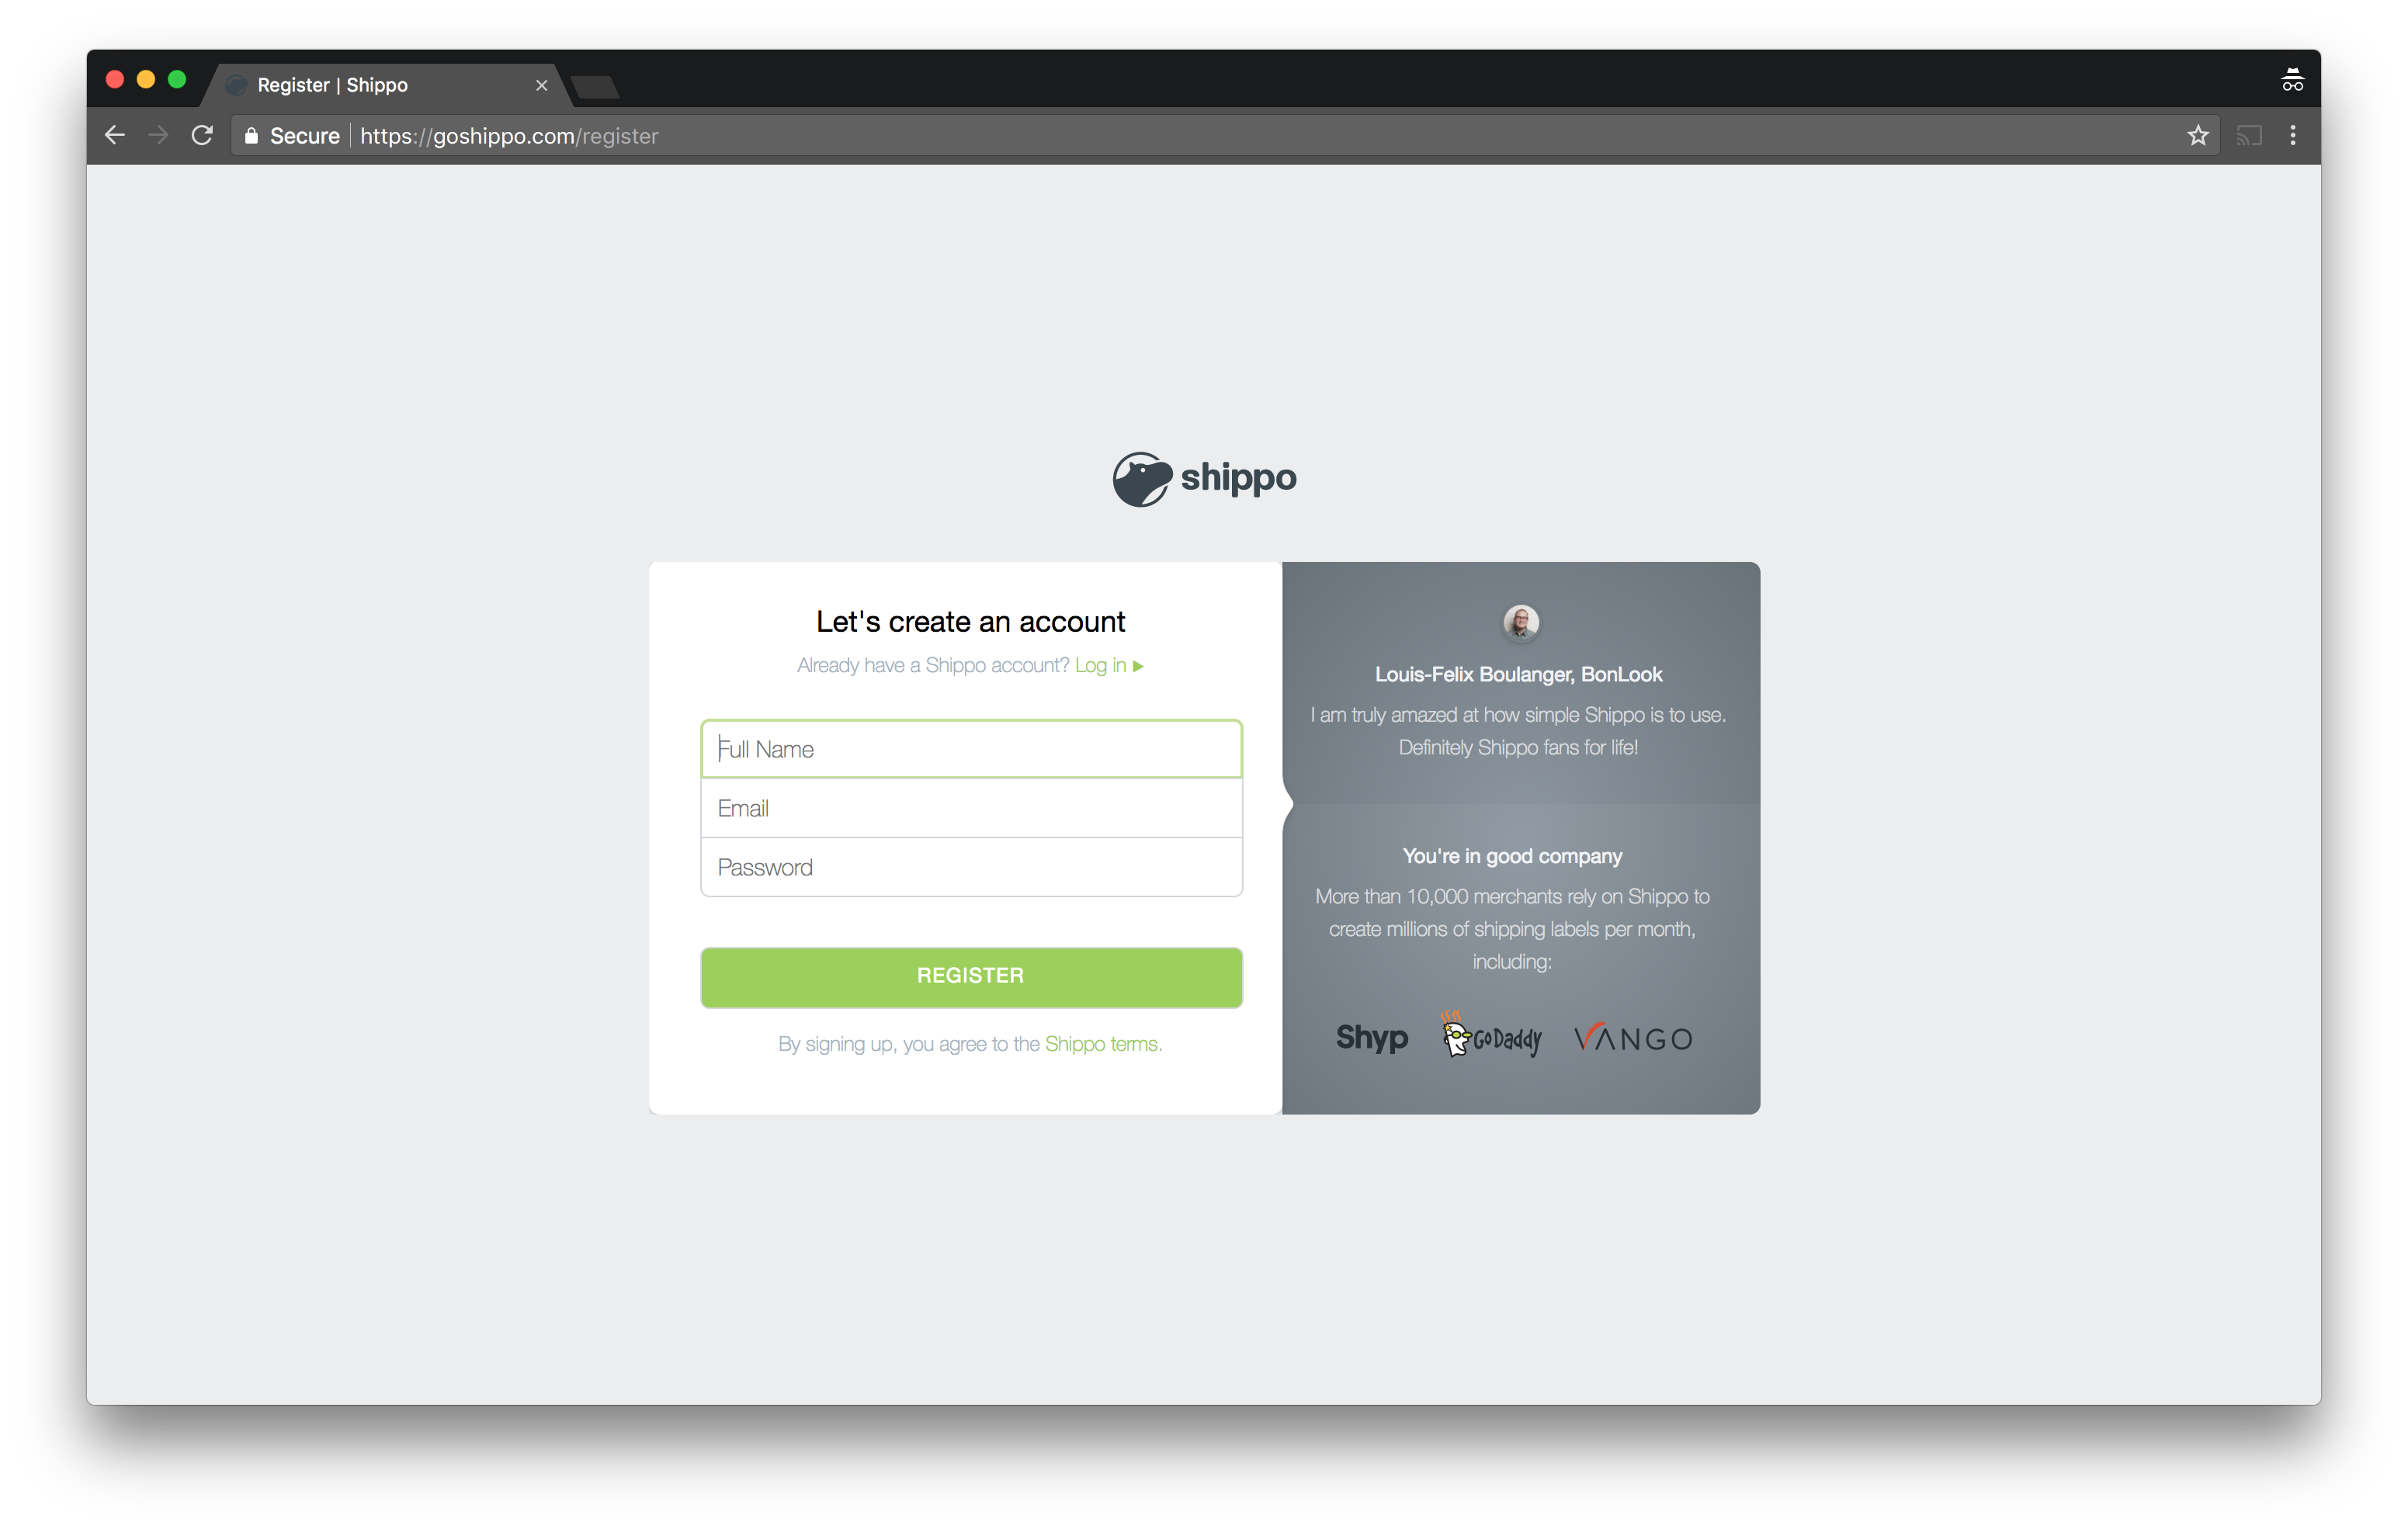
Sign up for Shippo
Shippo makes it very easy to get started. The first step is to sign up for an account.
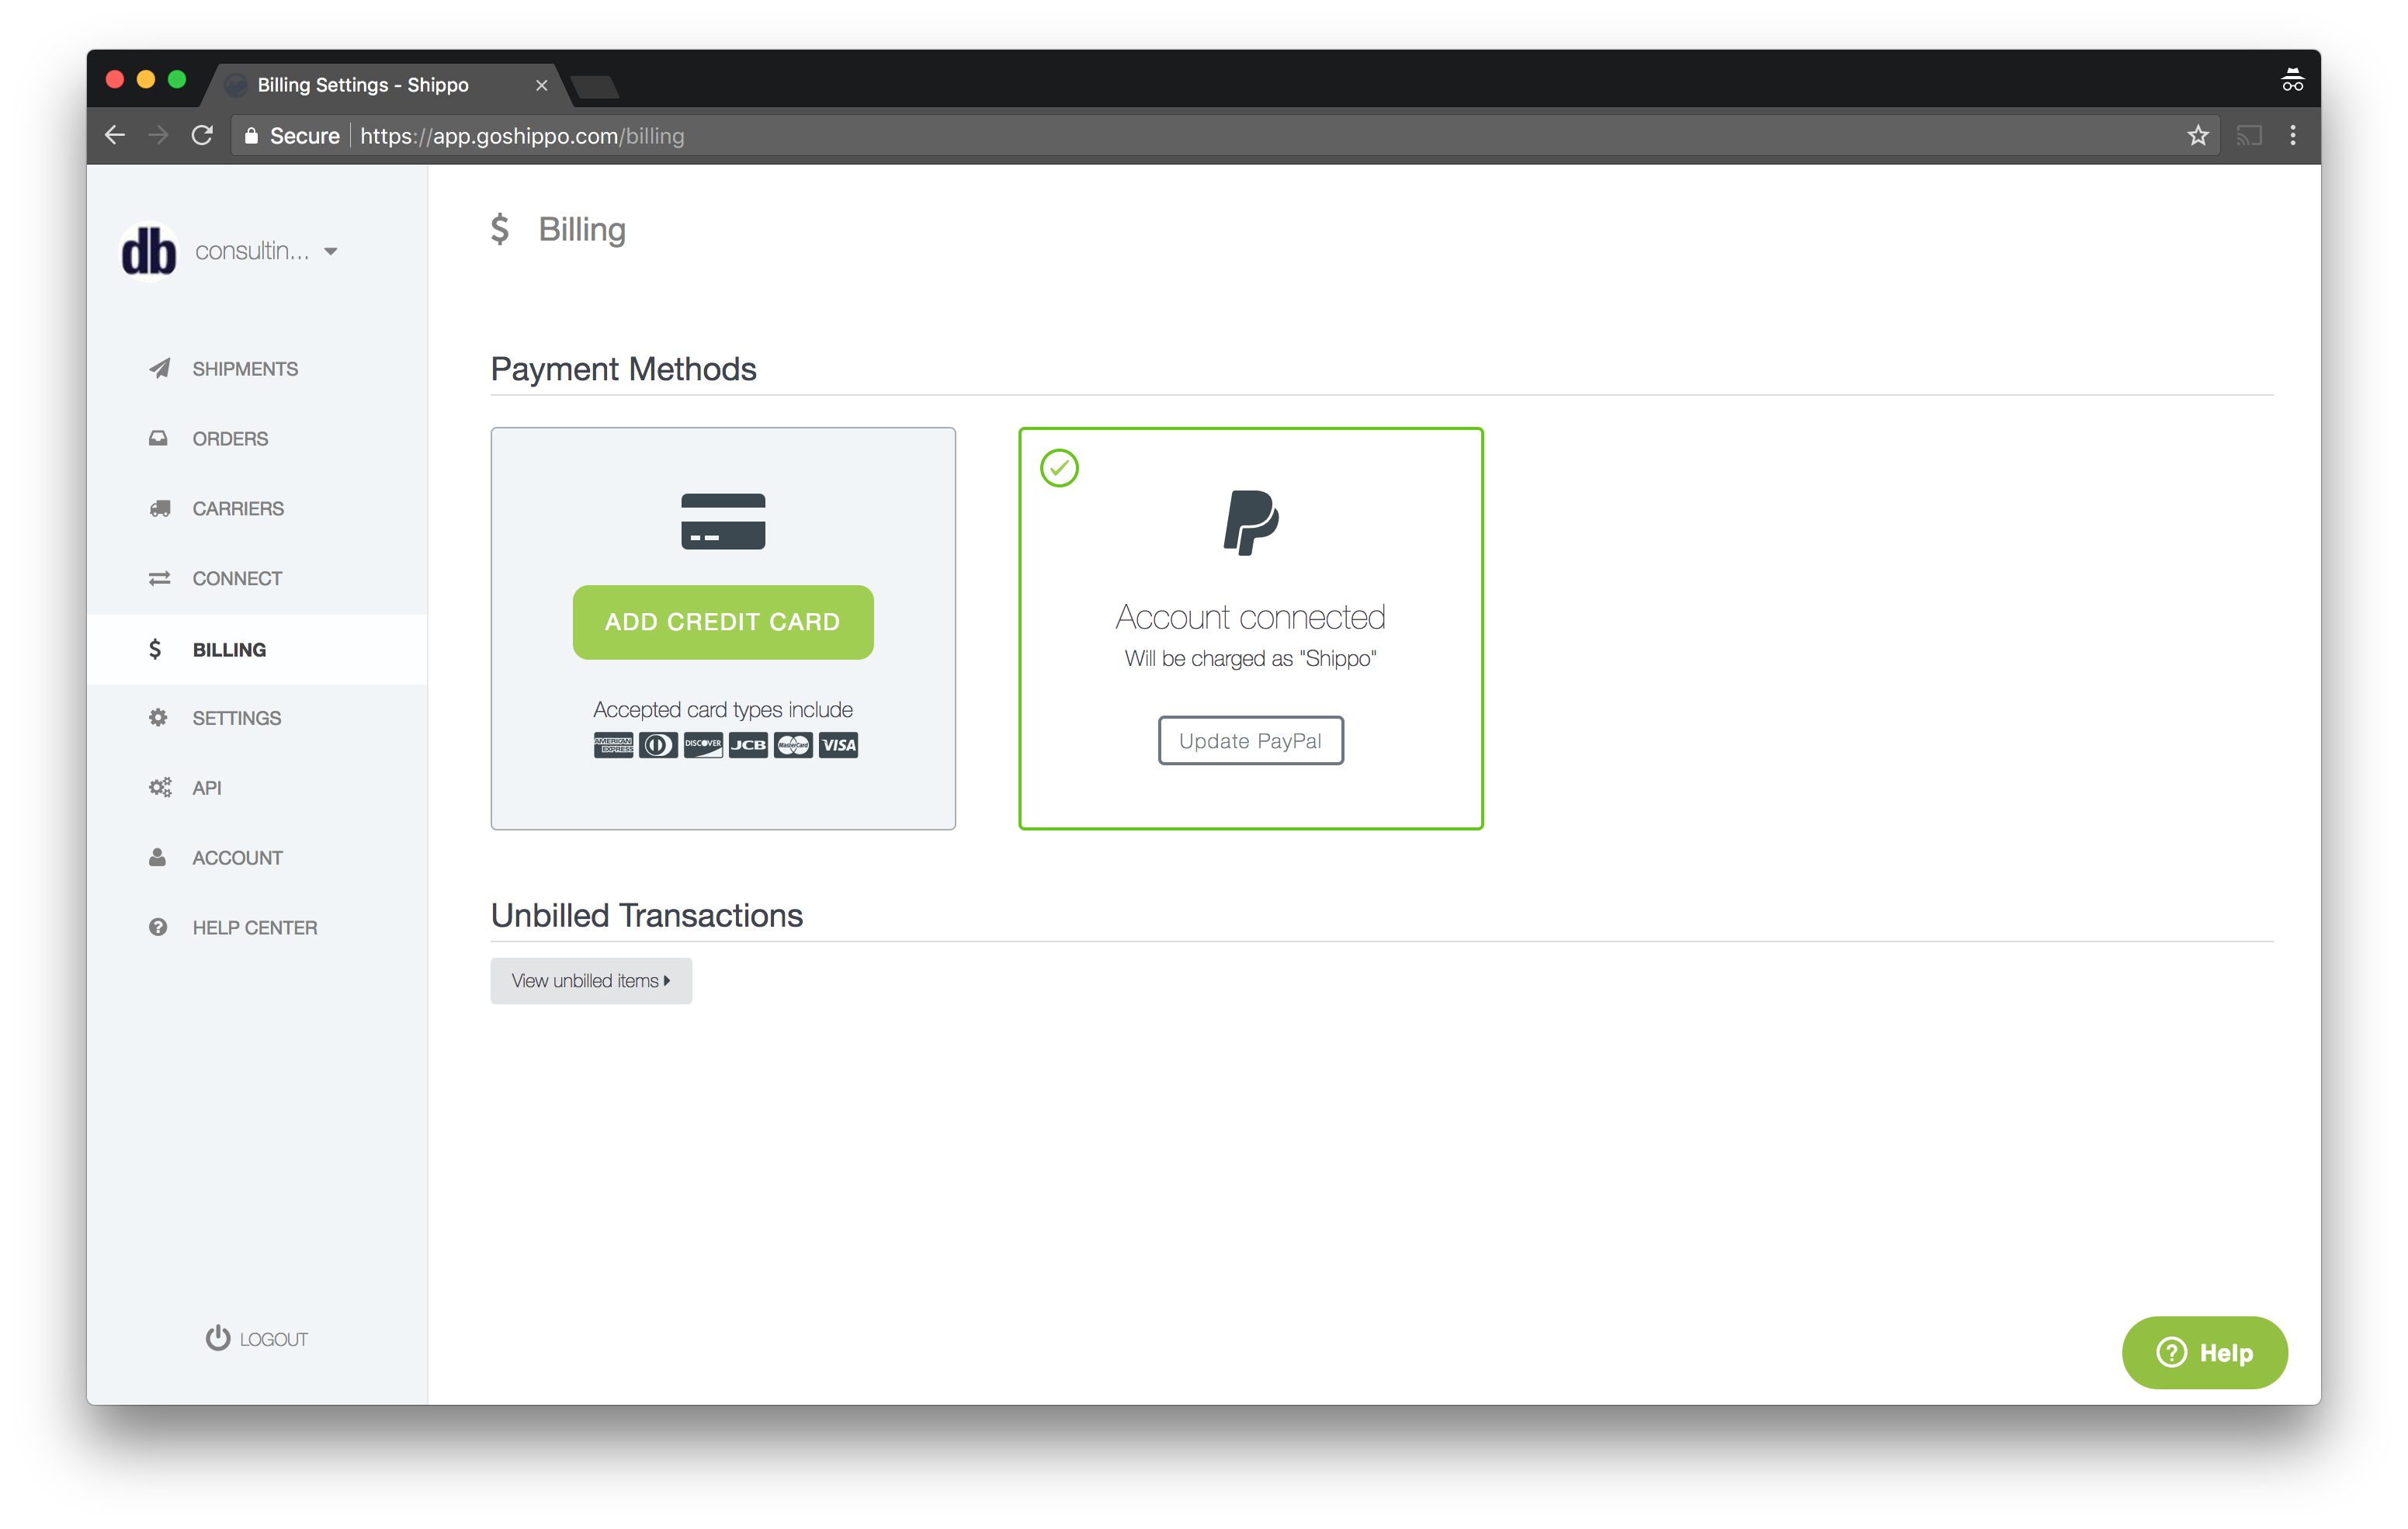
Set up Billing
Once you are in the Dashboard, fill out all of the information on the Account and Billing tabs (otherwise your account will be suspended after generating a few shipping label requests).
Get API Tokens
Click on the API tab and take note of the API Live Token and API Test Token.
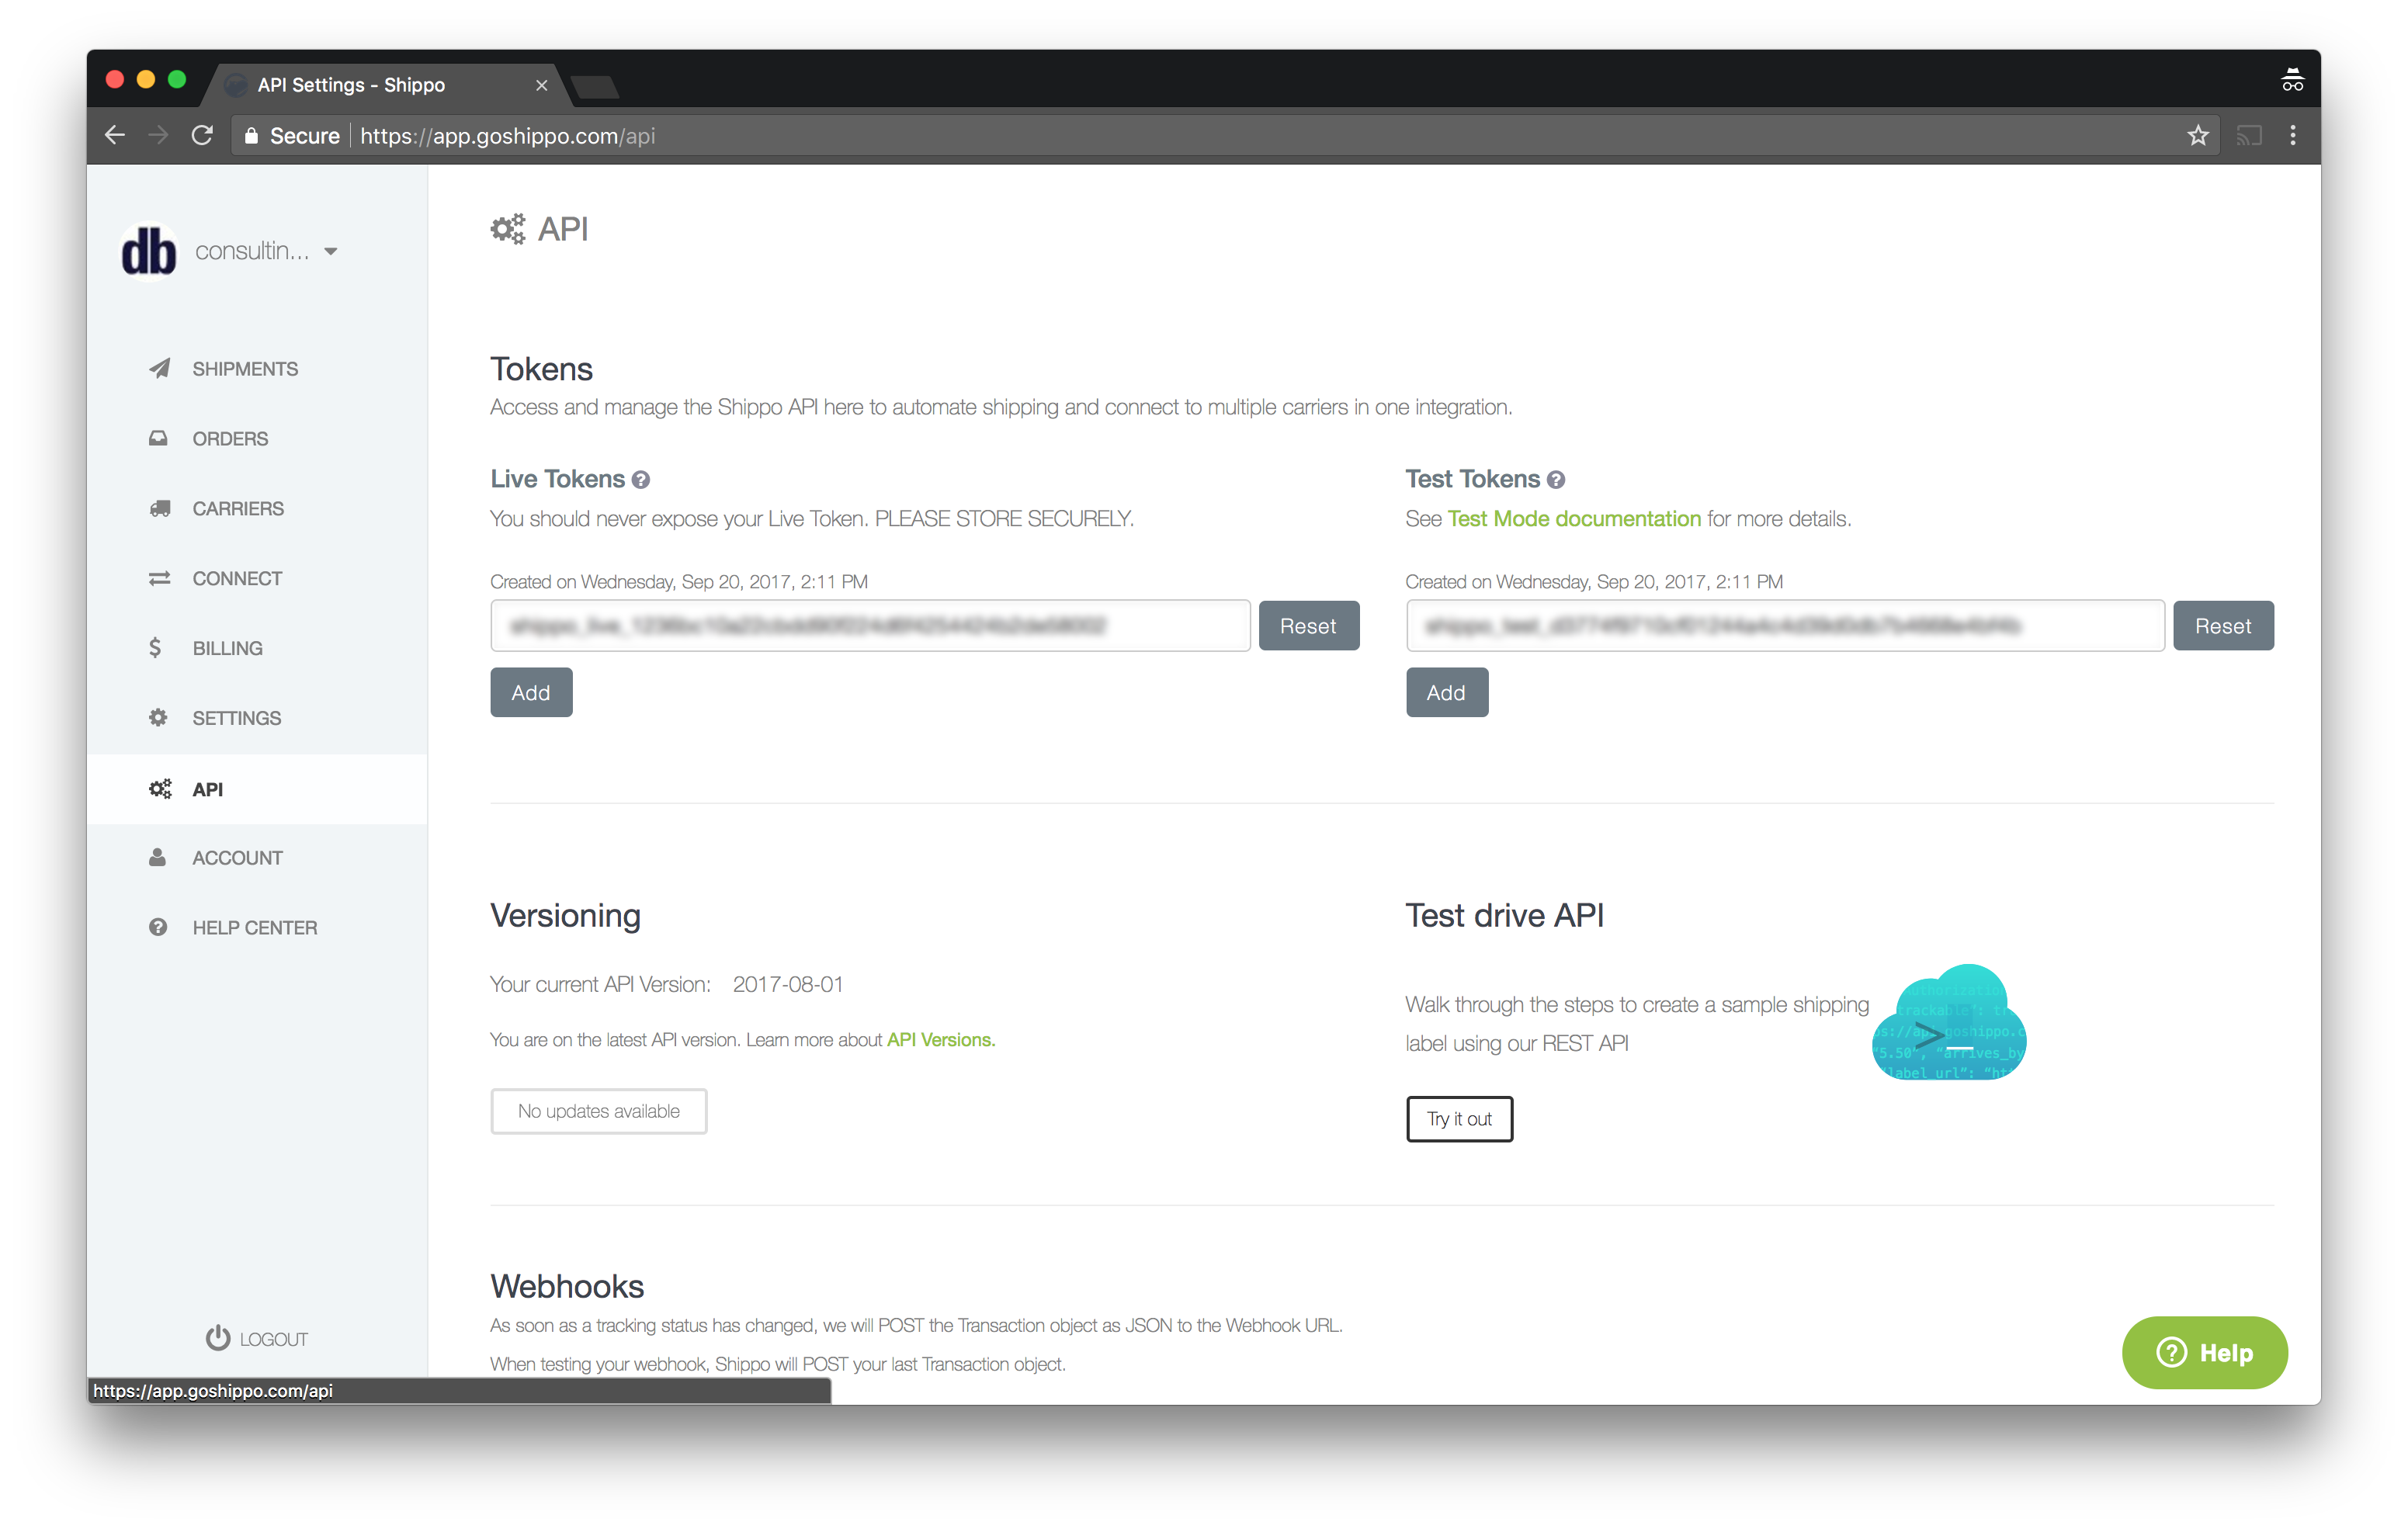
Also note your API Version. For the purposes of this article, we are using API Version 2017-08-01. From time-to-time, Shippo will update their API, but you will have to click a button on the API tab in order to upgrade to the latest version. Keep in mind that upgrading could break your code, so we recommend that you create a developer account to test with before upgrading in a production environment.
Enable Shipping Carriers
Click on the Carriers tab and enable all of the carriers that you want to use.
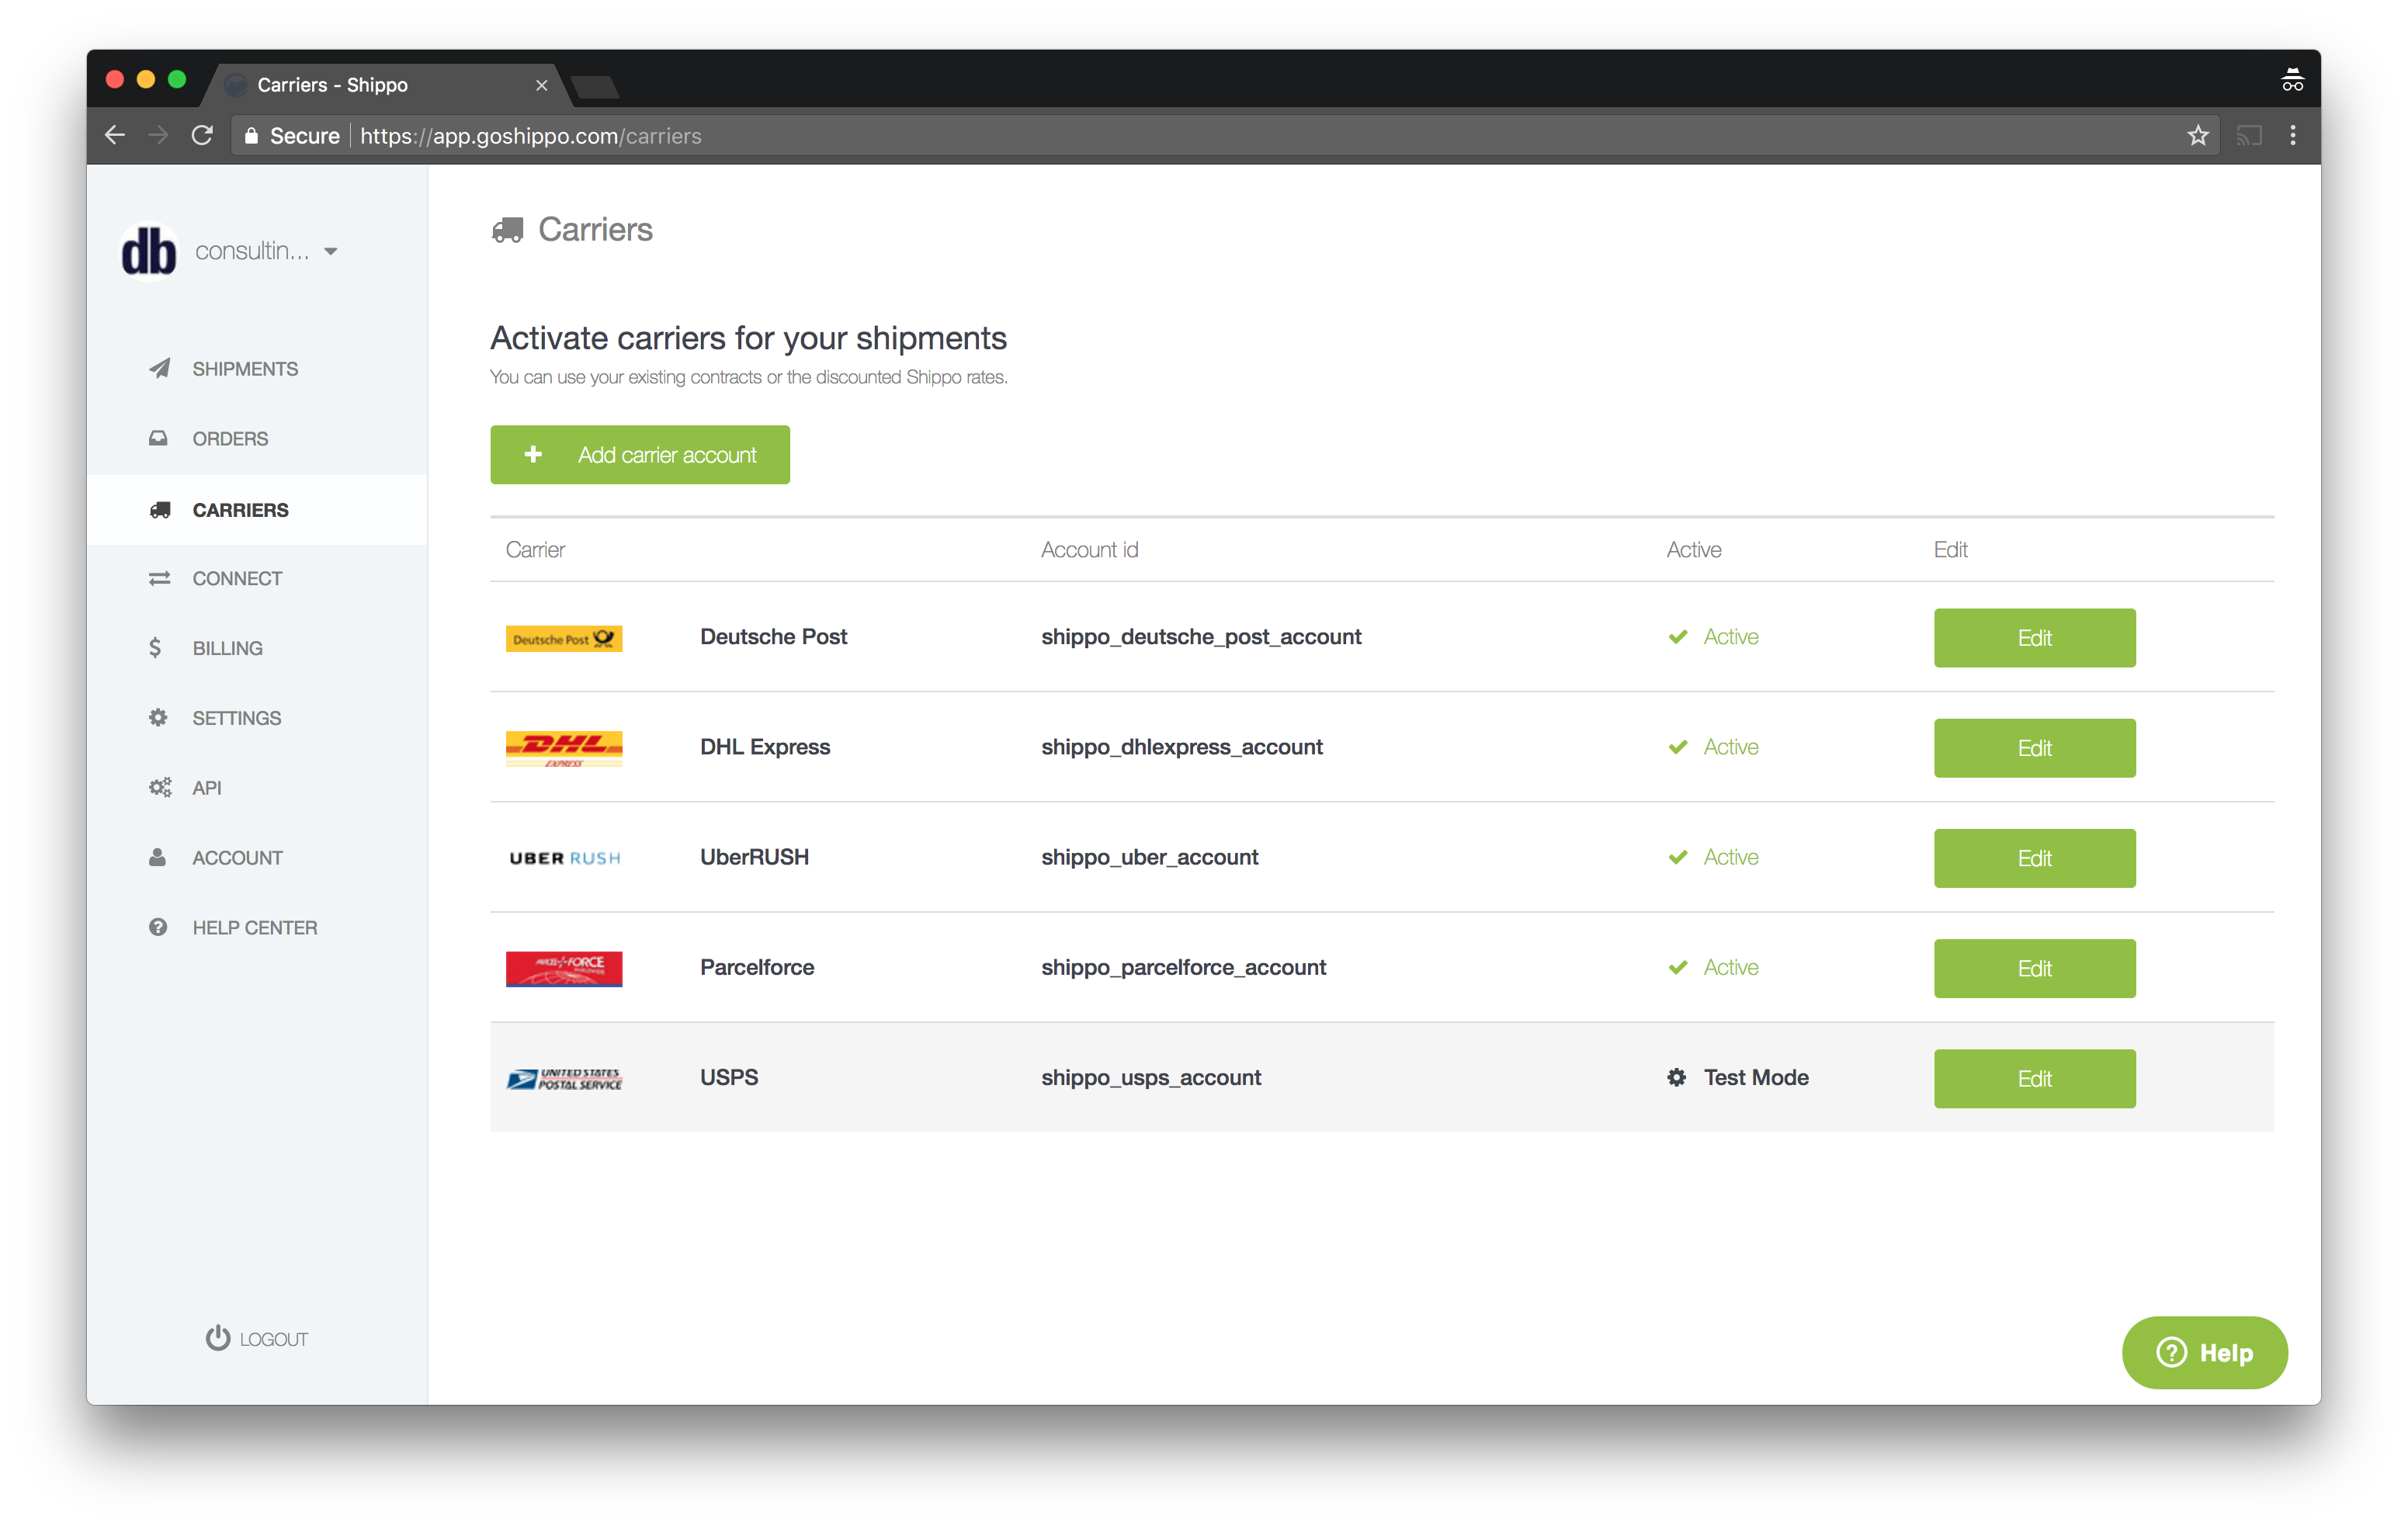
For this demo, we are using the fully capable and heavily discounted USPS account that is provided by default. Also, we are going to activate test mode for USPS so that we can create a testing environment without being charged.
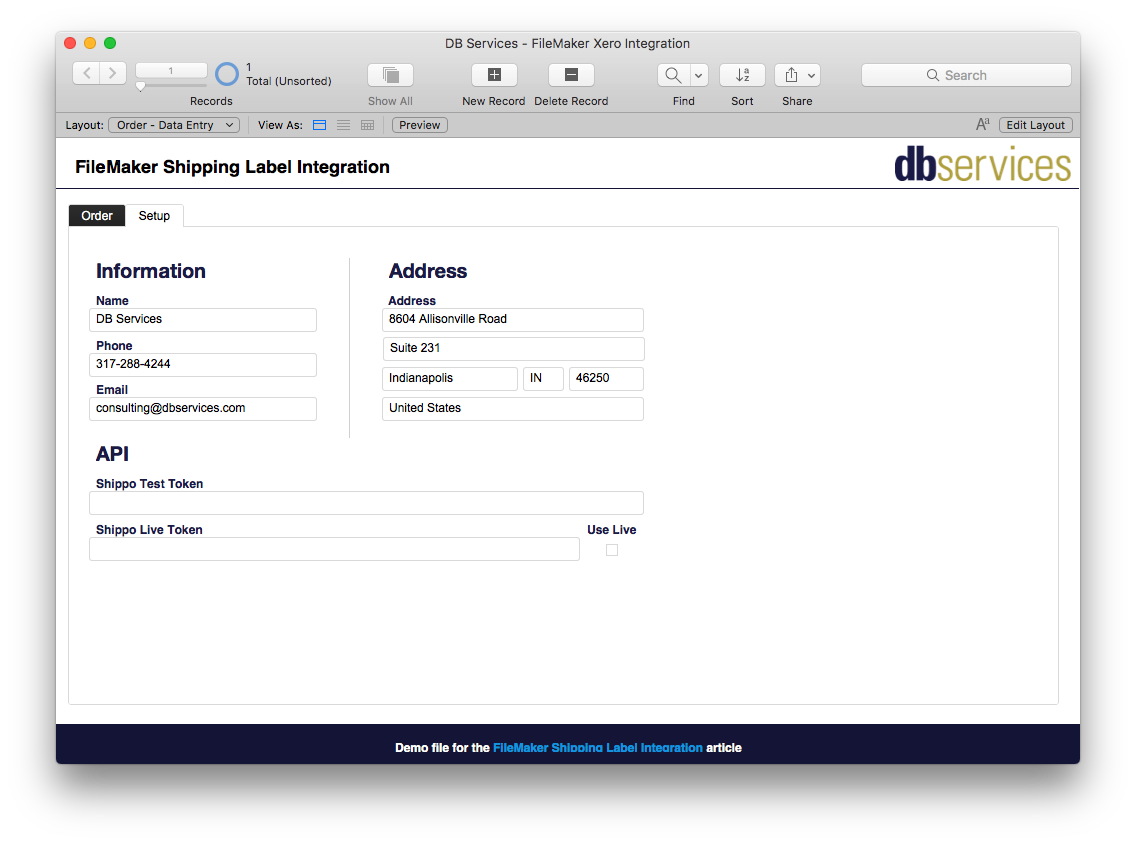
Set up API Keys in Demo File
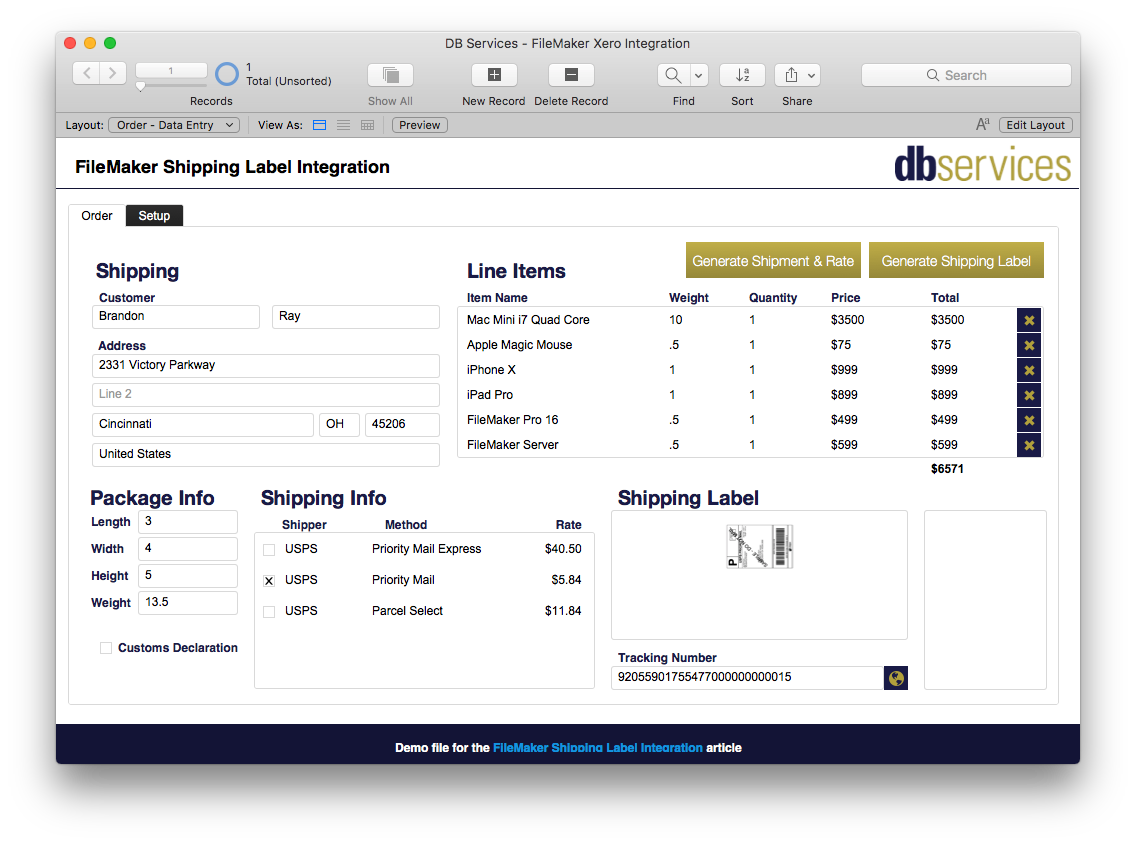
We have provided a demo file at the bottom of this article that will get you started with the basic example to integrate into your custom solutions. Once you open this file, you will notice that the layout consists of two tabs: order and setup. Click on the Setup tab. From here you'll need to fill out all of fields at the top (Information & Address) as well as paste in your API Live Token and API Test Token into the corresponding fields. There is also a checkbox toggle that will allow you to go from "test mode" to "live mode." During test mode, your account will be able to generate test shipping labels and tracking codes (that cannot be used for actual shipping), but our account will not be charged.
Test
Once you are ready to test, go ahead and fill out the order form, then click Generate Shipment & Rate. This will populate the portal underneath Shipping Info with multiple rates to choose from. You can select your desired rate and then click Generate Shipping Label. If all goes well, a brand new shipping label and tracking number will appear!
Breakdown
Now that you've tested with the demo file, let's breakdown exactly what we did so that you can build it yourself (or use the demo file if you wish).
Tables and Fields
You need to create 5 tables:
LOG
housekeeping fields (primary key, creation/mod date, account, and timestamp)
request (text)
response (text)
ORDER
housekeeping fields (primary key, creation/mod date, account, and timestamp)
customer first name (text)
customer last name (text)
customer email (text)
customer phone (text)
customer address fields (address 1, address 2, city, state, zip, country)
customs declaration id (text)
customs declaration toggle (number)
shipment object id (text)
shipping label (container)
shipping label errors (text)
shipping dimension fields (height, length, width, and weight)
shipping tracking number (text)
shipping tracking number url (text)
log id (global)
constant 1 (global)
ORDER_LINE_ITEM
housekeeping fields (primary key, creation/mod date, account, and timestamp)
order id (text)
item name (text)
item quantity (number)
item weight (number)
item price (number)
item extended price (auto-enter of quantity x price)
PREFERENCES
housekeeping fields (primary key, creation/mod date, account, and timestamp)
company name (text)
company address fields (address 1, address 2, city, state, zip, country)
company email (text)
company phone (text)
Shippo live token (text)
Shippo text token (text)
Shippo live mode/test mode toggle (number)
RATE_OPTION
housekeeping fields (primary key, creation/mod date, account, and timestamp)
shipping carrier account id (text)
order id (text)
rate id (text)
rate amount (number)
chosen rate checkbox (number)
duration terms (text)
estimated days to delivery (text)
shipping provider (text)
service level name (text)
service level token (text)
Relationships
You need to create 5 relationships off of the ORDER table:
a creation/deletion relationship to ORDER_LINE_ITEM using the ORDER primary key.
a cartesian relationship to PREFERENCES using the primary keys.
a creation relationship to LOG using the global logID field.
a relationship to RATE_OPTION using the ORDER primary key.
a relationship to RATE_OPTION using the ORDER primary key and chosen rate field.
Scripts
You need to create 6 scripts:
Startup
You need to create (or modify) a script that runs on startup of the FileMaker database.
Add a script step that goes to a new layout called based on ORDER (we will create the layout later).
After going to the new layout, set the global constant 1 field to the value of 1. You will use this global to make the chosen shipping rate relationship work that you created earlier.
Create a Shipment
You need to create a new script that generates a shipment in Shippo.
In this new script, set a variable for the URL we will POST the shipment information to (https://api.goshippo.com/shipments/). Add three more variables: one for the Shippo test token, one for the Shippo live token, and one for the checkbox that determines if the live or test token is used. You'll need to use the cartesian relationship from ORDER to PREFERENCES for these three variables.
Next, set all the variables for the company that is shipping the product (company name, phone, email, fax, address, city, state, and zip). Again, these fields come from the PREFERENCES table, so you will need to use the cartesian relationship from ORDER to PREFERENCES for these variables.
After that, set all the variables for the customer (full name, company, address 1, address 2, city, state, zip, country, email, and phone). All of this information is on the order screen so there is no need to use a relationship here, just use the ORDER context (and ensure you are on the ORDER context when running the script).
Then, set all the variables for the shipping info (weight, length, height, width, and requires customs declaration checkbox). These fields are also on the order screen, so just use the ORDER context again.
In this step, you can choose to validate that all of the variables you set are present before you run the rest of the script. We recommend doing this so that you aren't wasting time with the API call if all of the variables are not set correctly.
Next, check to see if the shipment requires a customs declaration. If it does, you will run the "Create a Customs Declaration" script that we will go over in the next script breakdown. Check that the script doesn't return an error. If there are no errors, expect a customs declaration ID to be returned to be added to the JSON request payload in the next step.
Now that all the variables are set, you need to wrap it all up in a nice JSON variable to be sent as a request payload. You can see exactly how Shippo wants to receive this request payload here. Also, if you need help building the JSON variable, you can read up on JSON functions with FileMaker here.
After you've created a request, you can use the Insert from URL script step to send the JSON request payload. A JSON response payload will come back from Shippo. You can take this JSON response payload and parse it out however you wish, but you can check the "status" key-value pair to see if the response is "SUCCESSFUL" or not.
Next, you need to save the "object_id" key-value from the JSON response payload into the shipment object ID field in the ORDER table. You will use this later to create shipping rates.
Last, you need to run the "Create Shipping Rates" script that we will go over in a later script breakdown.
Create a Customs Declaration
For international shipments, you will need a Customs Declaration. This is basically a piece of paper that tells Customs Officers what is in the package.
To generate a Customs Declaration you need to create a new script with a variable for the URL we POST to (https://api.goshippo.com/customs/declarations/). See three more variables: one for the Shippo test token, one for the Shippo live token, and one for the checkbox for if we are using the live token or not. You will need to use the cartesian relationship from ORDER to PREFERENCES for these three variables.
Next, set a variable for the full name of the customer you are shipping to. Create four more variables that use the List function to group the name, weight, quantity, and extended price from the ORDER_LINE_ITEM relationship off of ORDER.
Now, create a JSON request payload based off of the payload Shippo is expecting (you can see this expected payload here). You'll see that Shippo is expecting a list of items in the shipment. To do this, you will need to loop through all of the order line items and append them to the JSON request payload.
Last, send the JSON request payload to Shippo and receive the JSON response payload. Check for success or errors. If successful, grab the "object_id" key-value and set it as the customs declaration ID in the ORDER table. Then, pass the "object_id" key-value back to the parent script in the 'Exit Script' script step.
Create Shipping Rates
You need a way to generate all possible shipping rates for a particular shipment.
Create a new script and set a variable for the URL we will POST to (https://api.goshippo.com/shipments/[SHIPMENT_OBJECT_ID_GOES_HERE]/rates/[CURRENCY_TYPE_GOES_HERE]). The currency type, in this case, is simply USD. Set three more variables: one for the Shippo test token, one for the Shippo live token, and one for the checkbox for if we are using the live token or not. You will need to use the cartesian relationship from ORDER to PREFERENCES for these three variables.
Next, you need to set a variable for orderID and for shipmentObjectID.
Once again, you can validate that all of the variables are set before running the script.
Now, do an Insert from URL script step using a cURL command on the URL by sending just the Authorization with the live or test Shippo token using a GET method.
This time, you want to check if you received shipping rates from the JSON response payload by checking for a "count" key-value. If you don't get a count, then check for errors. If you do get a count, then you will go to the RATE_OPTION table, check to see if shipping rates for the current order already exist (if they do, simply delete the found count of records), and then loop over each JSON rate array and parse the information into the following fields: orderID, rateID, carrier account, rate amount, service level name, service level token, provider name, estimated days, and duration terms.
Create Shipping Label
You need a way to generate the shipping label and tracking number information based on the rate that was chosen.
First, create a script and set a variable for the URL we will post to (https://api.goshippo.com/transactions/). Set three more variables: one for the Shippo test token, one for the Shippo live token, and one for the checkbox for if we are using the live token or not. You need to use the cartesian relationship from ORDER to PREFERENCES for these three variables. Also, you need to set a variable for the selected shipping rate by using the relationship from ORDER to RATE_OPTION that uses the chosen rate field.
Once more, you can validate that all of the variables are set before proceeding.
Next, create a request payload by using the Insert from URL script step and passing in cURL options for authorization, rate, label file type and async using a POST method.
Now, check to see if you receive a "SUCCESS" status from the JSON response payload, otherwise, check for errors.
Then, set a variable for a shipping label image URL by getting the "label_url" key-value from the JSON response payload. Do an Insert from URL script step onto the shipping label container field with the URL set to the shipping label image URL variable. This will pull the PDF of the shipping label into the shipping label container field.
Last, set the tracking number and tracking URL fields with the "tracking_number" and "tracking_url_provider" key values you get from the response.
Select Shipping Method
You need a way to select a shipping rate from the Shipping Info portal. You will have checkboxes in the portal to select a rate, but you don't want to be able to select multiple (which is the default behavior). This script will run through all of the shipping rates in the portal and only leave the one selected as the one checked off.
Create a script with two variables: orderID and rateID, with orderID being the current order primary key and rateID being the ID of the shipping rate selected from the portal.
Next, write a Go To Layout script step that goes to the base table layout for RATE_OPTION, do a find for all of the records that match the orderID, and loop through them.
Inside the loop, check each record to see if the rateID of the record matches the rateID variable that you set earlier. If it matches, set the "chosen rate" field to 1, otherwise, set the field to "".
Layouts
Order Layout
Create a layout based on the ORDER table to use as the order data entry screen.
Add all of the fields from the ORDER table to the layout and arrange how you see fit.
Make sure the Customs Declaration field is a checkbox and the value list value of 1.
Create a portal based on ORDER_LINE_ITEM using the relationship from ORDER. Add the item name, weight, quantity, price, and extended price fields. Format the fields how you see fit. You can optionally add a delete portal row button.
Create a portal based on RATE_OPTION using the relationship from ORDER (not the relationship that uses the chosen rate field). Add the chosen rate (checkbox with value list value of 1), provider, service level name, and amount fields. Format the fields how you see fit. Make the chosen rate checkbox a button with the "Select Shipping Method" script attached.
Create a button called "Generate Shipment & Rate" that runs the "Create a Shipment" script.
Create a button called "Generate Shipping Label" that run the "Create Shipping Label" script.
Setup Layout
Create a layout based on the PREFERENCES table.
Add to the layout all of the company name and address fields along with the Shippo live token, test token, and live mode/test mode toggle (as a checkbox with the value list value of 1).
Conclusion
Integrating with an API service like Shippo to generate shipping labels and tracking information inside your FileMaker solution can greatly reduce your workload and increase your bandwidth to do more revenue-generating activities. If you need assistance integrating Shippo into your custom FileMaker solution, feel free to contact us.
Did you know we are an authorized reseller for Claris FileMaker Licensing?
Contact us to discuss upgrading your Claris FileMaker software.
Download the FileMaker Shipping Labels with Shippo File
Please complete the form below to download your FREE FileMaker file.