Upgrading your custom FileMaker application used to require migrating data or manually following a complex set of instructions which would take quite a bit of time to complete. Now FileMaker has released a command line tool that will upgrade your custom application in a matter of minutes. At the moment, the FileMaker Solution Upgrade Tool is considered to be a preview software and is subject to change.
In the video below I will walk you through the process of upgrading your FileMaker custom app to the newest version using the new FileMaker Solution Upgrade Command Line Tool.

New Privilege
A new extended privilege has been created for this process. In order to run the patch file the user must have a full access account or at least have the fmupgrade privilege.
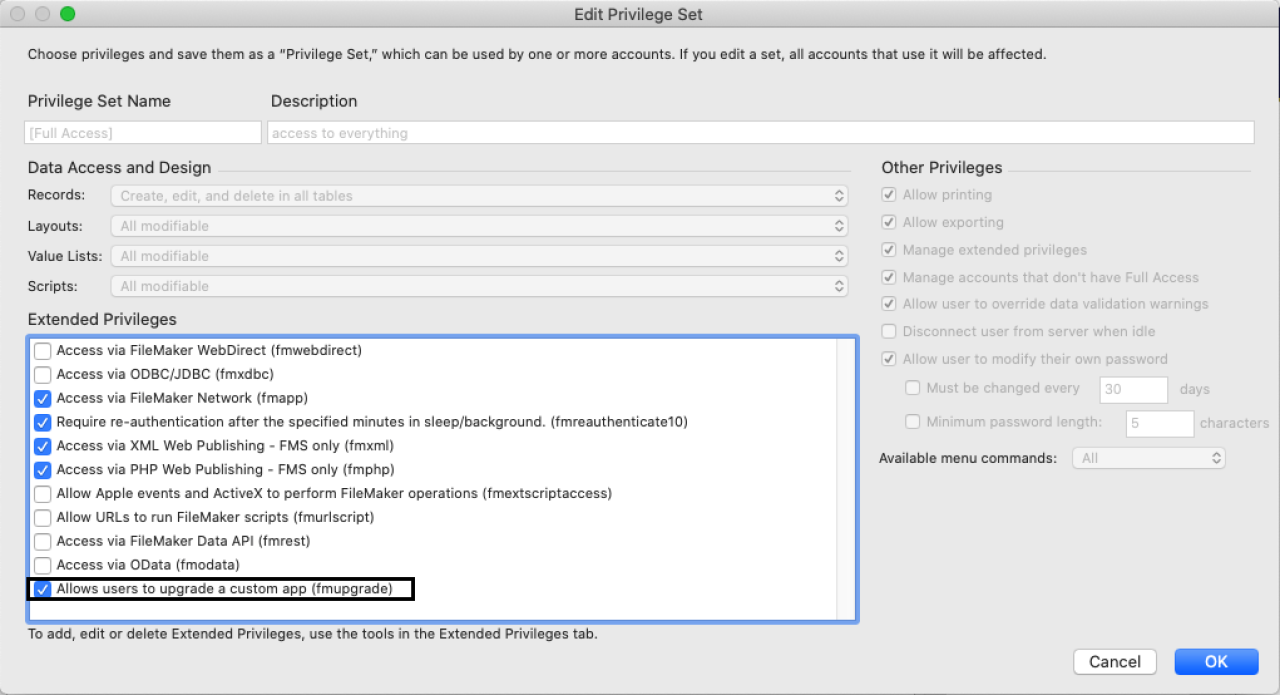
If the patch file is an encrypted xml file, then you will open up the source file first and the provided account’s suffix of the fmupgrade privilege extension will be used as a decryption key for the patch file. An example of this would be creating an upgrade passkey (such as MyPass123) and appending it to the end of the privilege extension – fmupgradeMyPass123.
What The Tool Transfers Over
It’s important to know that this tool transfers over everything except for your FileMaker data. You will still need to use the data migration tool if you’re planning on doing that. You can find the article including the download for our FileMaker Data Migration Companion here.
Creating The Command
Once you’ve downloaded the command line tool, you’re ready to start creating the command. The first step you want to take in creating your command is generating the GUIDs for versions 01 and 02 of your applications, which will look something like this:

The generateGUIDs command is important because it ensures that all objects have a unique ID.
Once you’ve generated the GUIDs, you will then save the newly generated copies of the files as XML. It is important that you use a diff tool when creating your patch file. In my video I show you which tool I use online for comparing my XML files.
For reference, the skeleton of the patch file should look like this:
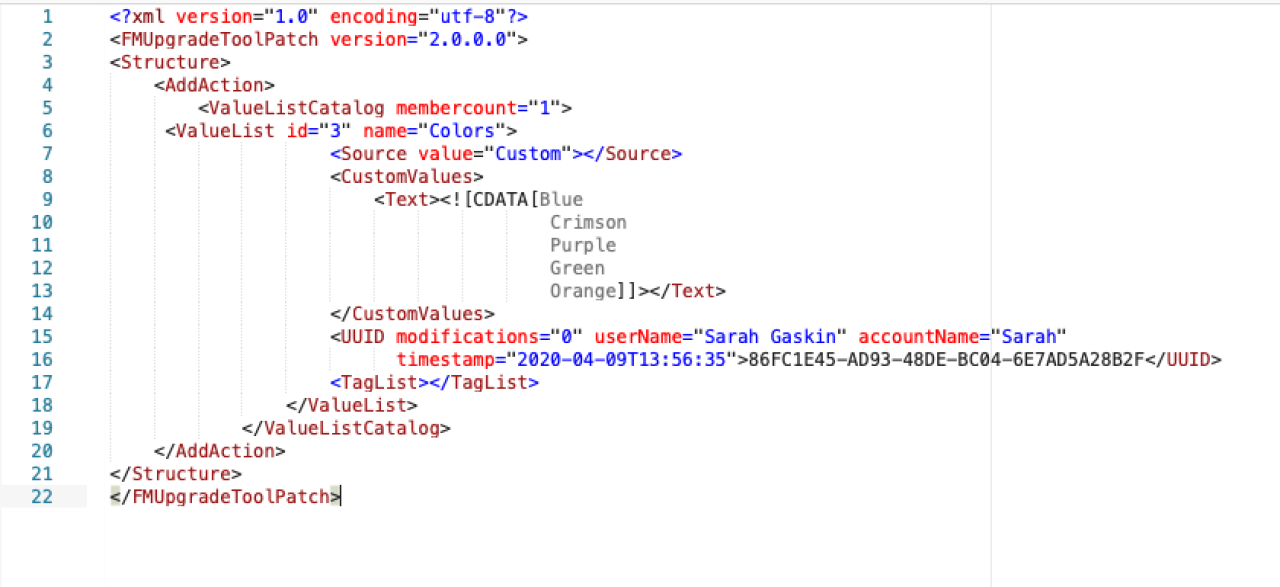
You want to wrap each change in <AddAction></AddAction>. In the above example, I have wrapped a value list between the “<AddAction>” tag. Another tag that you can utilize is the <DeleteAction> tag, and as the name implies, this tag allows you to remove objects from your solution.
After you’ve created the patch file, you will run a set of commands that look similar to this:
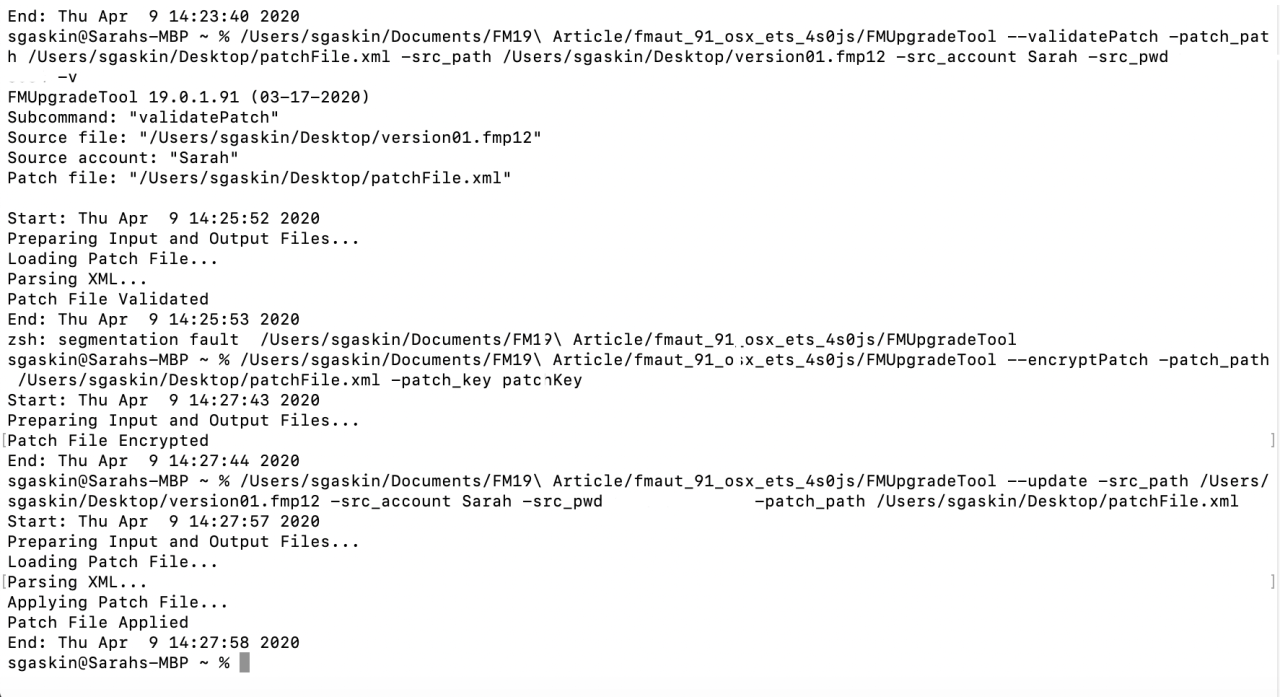
If you’ve successfully upgraded your file you will see the output, “Patch File Applied”.
Best practice is to test the patch file on a copy of your original FileMaker solution to ensure that the upgrade will work. Once you’re confident in your patch file, you as the developer can run the command to upgrade the first version of the customer’s app or you can wrap the tool and the patch file into a batch script and distribute this to the customer.
Conclusion
The release of the FileMaker Solution Upgrade Tool is a welcome addition for both developers and clients. Now, upgrade your FileMaker app takes minutes and applying any code changes is an automated process.
Contact us if you need assistance with upgrading your custom FileMaker application!
Did you know we are an authorized reseller for Claris FileMaker Licensing?
Contact us to get a competitive quote on a Claris FileMaker License.
Download the FileMaker Solution Upgrade Tool File
Please complete the form below to download your FREE FileMaker file.


