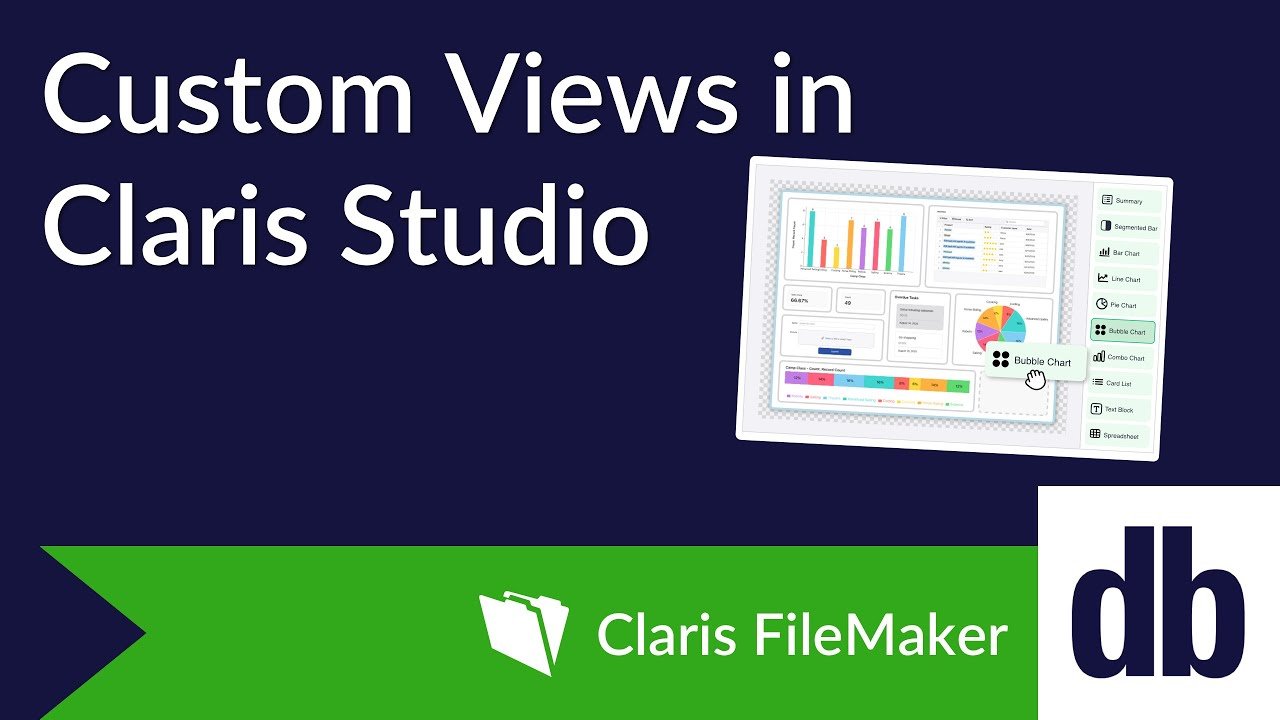
As of May 2025, Claris Studio now includes Custom Views, making it easier to shape dashboards and interfaces around your workflow. You can mix and match elements from different views, create role-specific layouts for team members or vendors, and access your FileMaker data more efficiently. In this article, we’ll explore how Custom Views can simplify your work and share practical examples to help you get started. For a closer look at related functionality, check out our previous article: Downloading Claris Studio Form Submissions as Leads in FileMaker Pro. Let's explore how Custom Views help you work smarter with your data and walk through examples of how to put them into action!
How Custom Views Can Help You
If you’ve used Claris Studio before, you're probably familiar with existing view templates like Form View, Spreadsheet View, and Kanban View. This collection of views works well when they match exactly what you need, but they can feel restrictive if you want something more customized. For instance, if we wanted a spreadsheet for quickly browsing and sorting our data, paired with a more detailed view of individual records, data visualization via a chart, and even navigation between multiple views, it couldn’t be done before. Custom Views make this possible with additional components that can be dragged onto the view and configured.
New Additions
Here are some of the additional objects we can use in Custom Views.
Data Control Objects
The Data Controls objects let us display many records from a table in a list and select individual records to show more information via the Field objects. If enabled, they can also support search, sorting, and filtering. A portal from FileMaker Pro would be an example of something similar to a Data Control object.
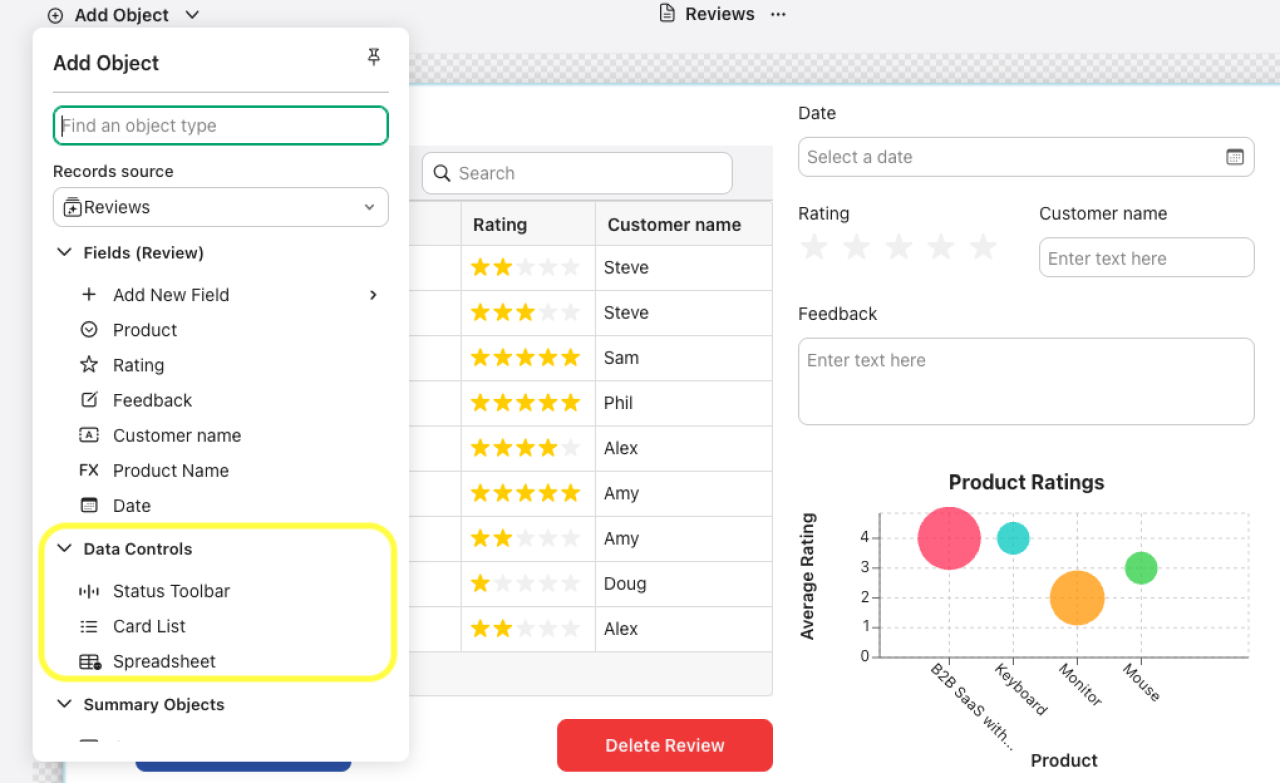
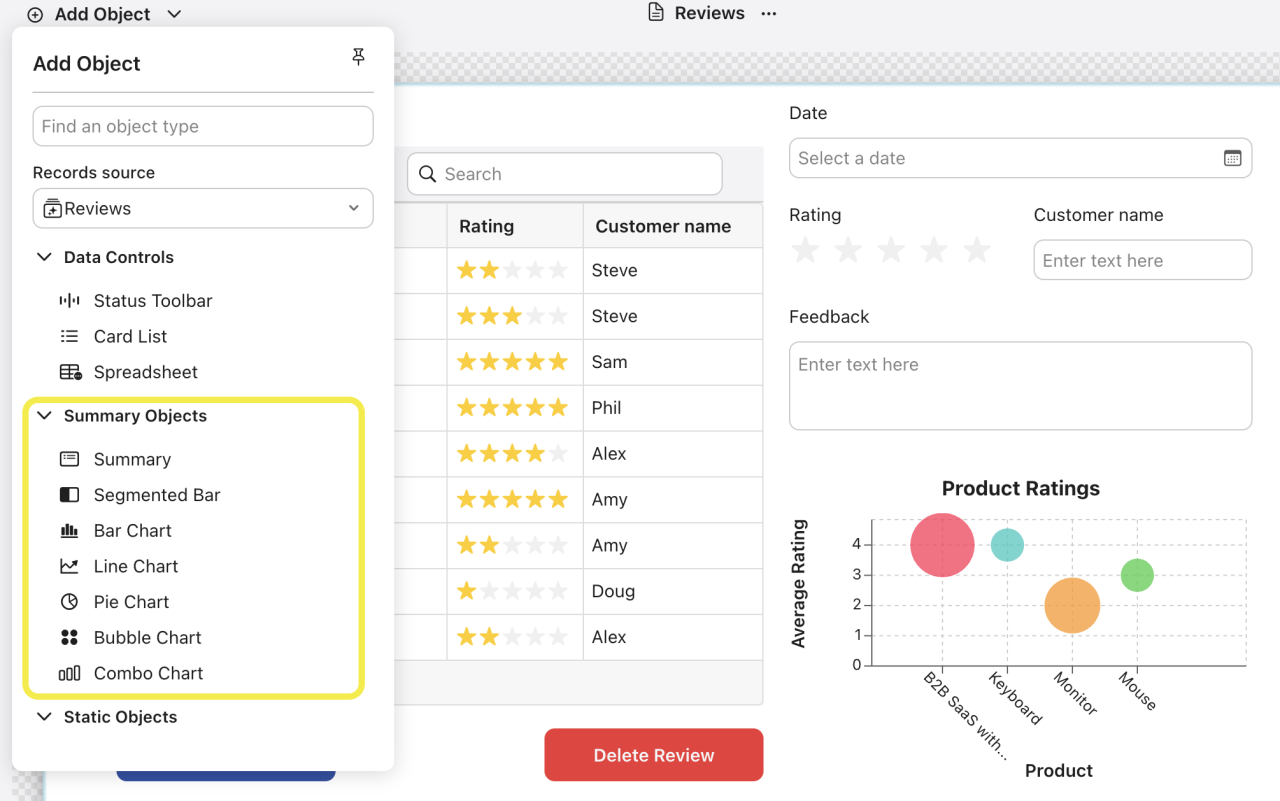
Summary Objects
Also new are the Summary objects, which can be used to visualize data from an entire table in several ways via a chart, or pick specific key fields and summarize by median, mean, max, min, etc. Custom Views also add buttons that redirect you to a different view or URL, allow you to delete or add a record, and more. These new objects open up the door for some new and inventive ways to use Claris Studio that were not possible before.
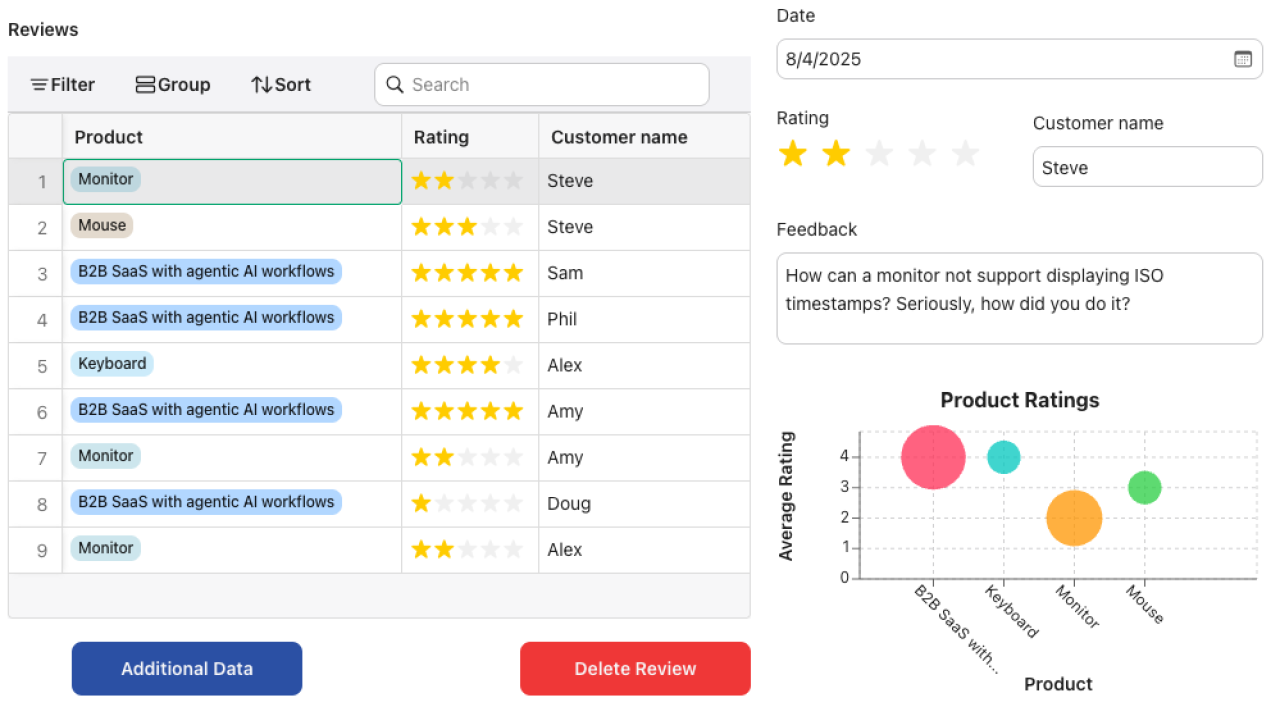
Example Custom View
The following Custom View shows us:
A spreadsheet for quickly browsing product reviews
Some extra information on the currently selected Review from the spreadsheet
A chart visualizing the average rating and the number of reviews by product via a Bubble Chart
And we have some extra functionality from the buttons
Let's start by showing how to get the fields in the top right to display data from our selected row in the spreadsheet.
Fields
This is the menu for configuring your fields on the view, in this case, the Rating field. These act fairly similarly to fields in FileMaker Pro, which you may already be familiar with. The object type is Rating, the table it expects data from is Review, and the field it expects is the Rating field (this is its name in the table). The key to getting the correct rating to display is using data control to set the source of our record from the spreadsheet. In this case, the name of the spreadsheet object on our view is spreadsheet2, so that is selected. You can check and change the names of an object from the automation tab when choosing it.

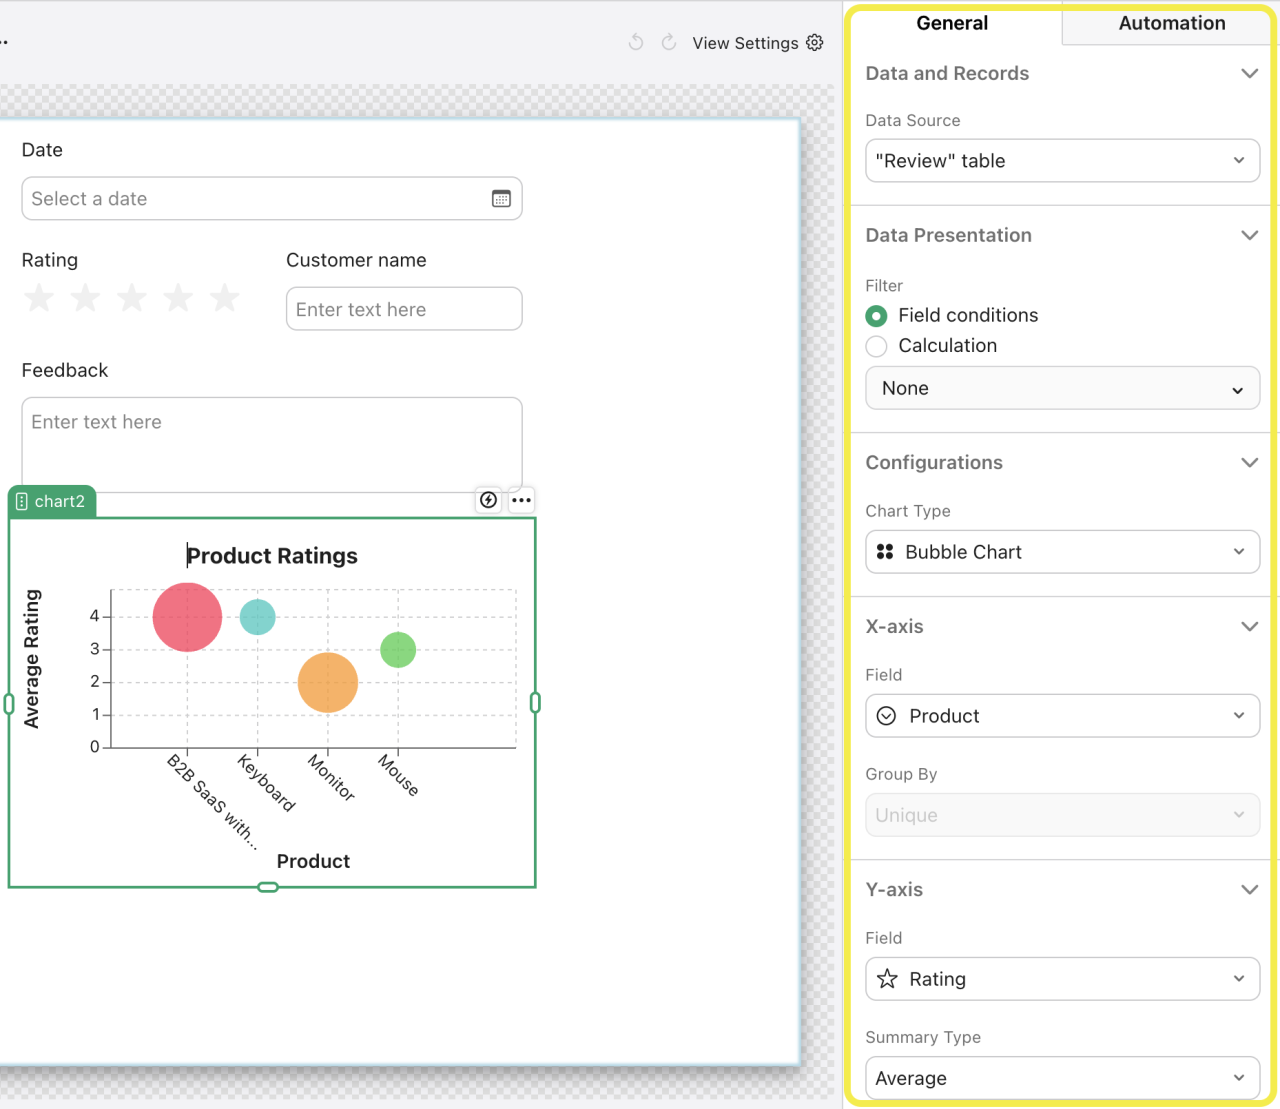
Chart
This is the configuration menu displayed when selecting our chart. We can pick the type of chart from the dropdown. Depending on what kind of visualization you want, several options are available. Here, a Bubble Chart lets us convey record counts with more detail than a standard Bar Chart. Its data source is once again the review table, our X-axis is set to the product field from the review table, and our Y-axis is set to rating. Specifically, we are plotting the average rating per product, but you could also plot a sum, range, min, max, etc., depending on your goals. We have enabled bubble size to represent each product's total number of review records.
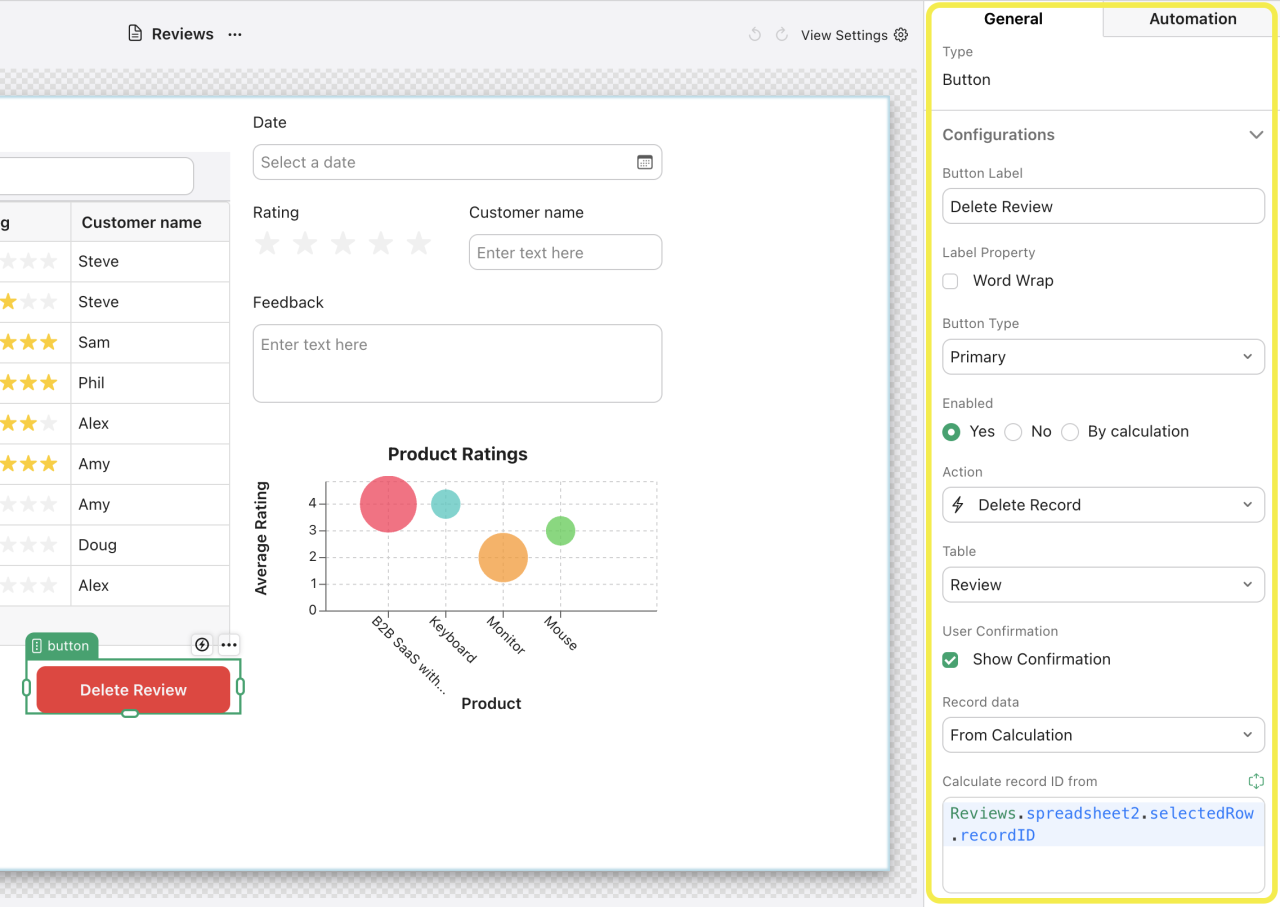
Buttons
This is the configuration menu for the delete button. The Delete Record action is selected, but the tricky part is telling the button which record to delete. The Record Data dropdown is set to “From Calculation,” which lets us specify a specific record to apply the action. How we write calculations in Claris Studio differs slightly from how they would work in the standard FileMaker platform. For a more detailed explanation, refer to Claris’s documentation page, Primer for Claris Studio calculations, which provides a comprehensive guide of the differences between FileMaker Pro and Claris Studio calculations. For this particular case, we start with Reviews (this is referencing the view we are on, called reviews, NOT the reviews table) and then a period (“.”) to indicate we want a “sub object” of the previous one. We then take the record ID of the selected row of the spreadsheet on the Review view. The auto-complete on Claris Studio makes viewing your options for calculations much easier.
The other button, “Additional Data,” is set to show a subview when pressed. A subview is like another view you can add to your existing custom view. You can create a subview by clicking on some space in your frame and clicking on your view’s name in the settings menu on the right.
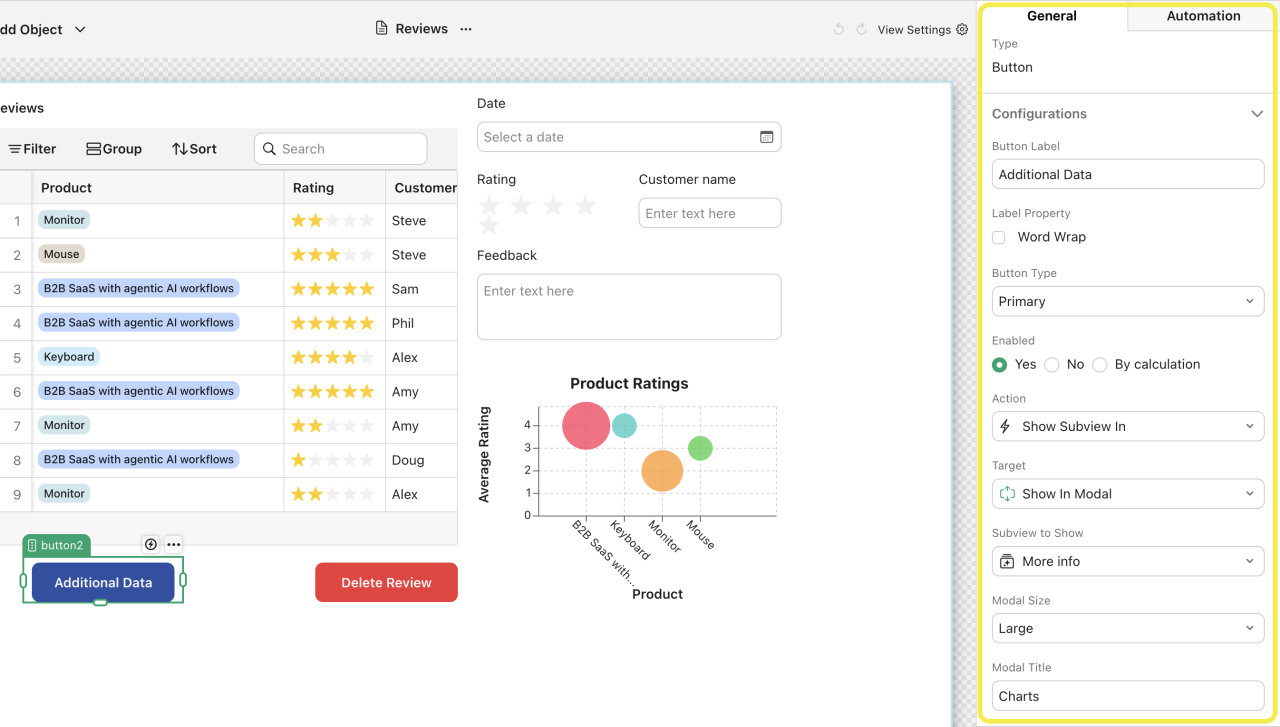
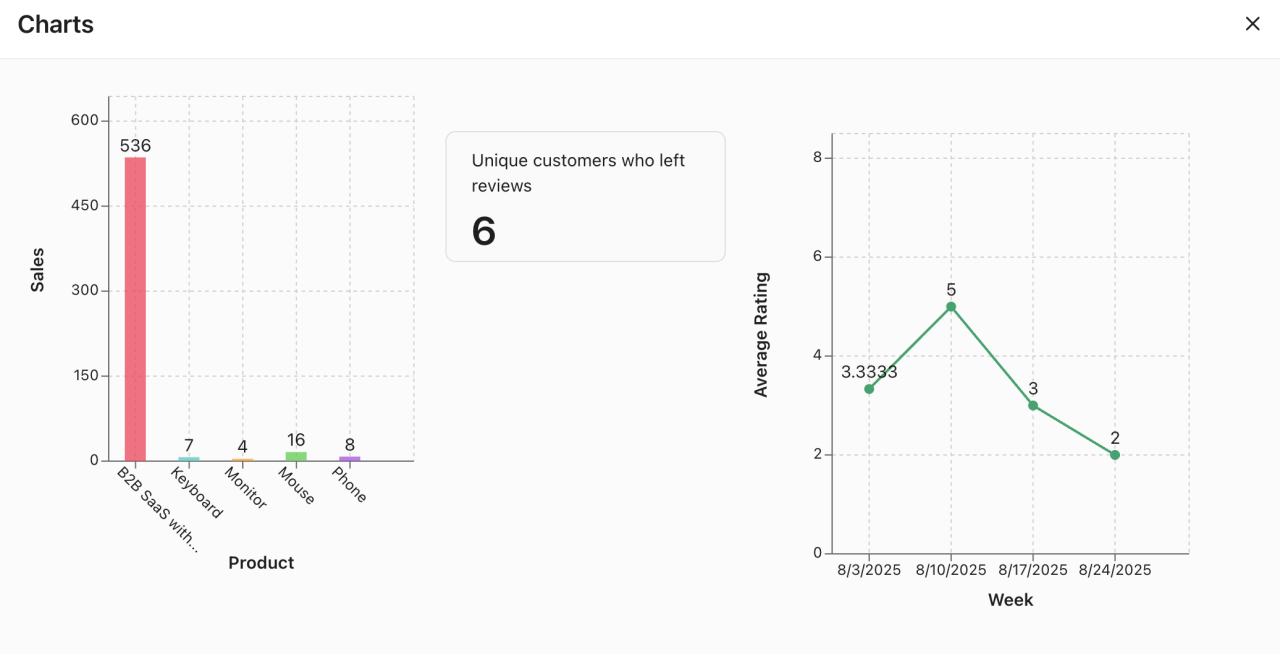
With a subview, you can add charts, fields, summaries, etc., on a clean page and show it when desired with a button using the selected show subview action. In our example, clicking the button pops up this view with some extra charts created with our review and product data.
Subviews are similar to Card Windows from FileMaker Pro, which you may be familiar with. You can also set your button action to go to an existing Normal View, not just subviews you have made on your Custom View. For more information on other view types, please reference our previous article: What is Claris Studio?
Conclusion
Custom Views give you the power to shape Claris Studio around your workflow, making it more flexible and effective than ever. With finer control over how you interact with your data, you can create enhanced visualizations, flexible layouts, and custom components, all tailored to how your team works. Ready to get started or have questions? Contact DB Services—we’re here to help!
Did you know we are an authorized reseller for Claris FileMaker Licensing?
Contact us to discuss upgrading your Claris FileMaker software.