Your team already generates valuable audio every day: client calls, meeting recordings, voicemails, and field notes. Transcribing even one hour of it by hand typically takes three to four hours of manual work. With the right integration, that time disappears entirely. FileMaker is already where your data lives and your workflows run, and connecting it to Google's Speech-to-Text API brings your audio into that same ecosystem: searchable, storable, and actionable, without adding a single extra step to your team's process. This article walks through exactly how to set that up using our demo file!
What is Google Speech-to-Text?
Google Speech-to-Text is a cloud-based API that converts audio recordings into written text. You send an audio file, Google processes it using machine learning models trained on massive amounts of speech data, and you get back a transcript. It handles a wide range of languages, accents, audio quality levels, and recording environments, and it does it at a speed and accuracy that would be impractical to replicate in-house.
For FileMaker developers and their clients, the practical use cases are significant:
Meeting and call transcription: Record a client call or internal meeting, attach the audio to a FileMaker record, and automatically generate a transcript: no manual note-taking, no third-party transcription service, no copy-pasting between systems.
Field data capture: Field technicians or inspectors who record voice notes can have those notes transcribed and written directly into the relevant record as soon as they're back in the system.
Voicemail logging: Organizations that receive high volumes of voicemail can route recordings through FileMaker and generate searchable text logs, making follow-up tracking far more manageable.
Interview and research documentation: Recorded interviews or research sessions can be transcribed and tied directly to project or contact records without leaving FileMaker.
Accessibility: Audio content attached to records can be made accessible to team members who are deaf or hard of hearing by surfacing a text version alongside the recording.
The API operates on a pay-per-use model with a free tier of 60 minutes per month, making it low-risk to experiment with before committing to it in a production solution. Pricing and current free tier details can be found on the Google Cloud site.
Setting Up the Integration
The demo file handles the FileMaker side of this integration for you, including the scripts, request structure, and transcript parsing, all built in. What you need to do first is get the Google Cloud side configured so the file has somewhere to send requests. This section walks through that process, start to finish.
Step 1: Google Account and Google Cloud Console
You'll need a Google account to access Google Cloud. A standard Gmail account works fine, and if your organization uses Google Workspace, that works too. Sign in at the Google Cloud Console, where first-time users will be prompted to agree to the terms of service before continuing.
Step 2: Create a Project
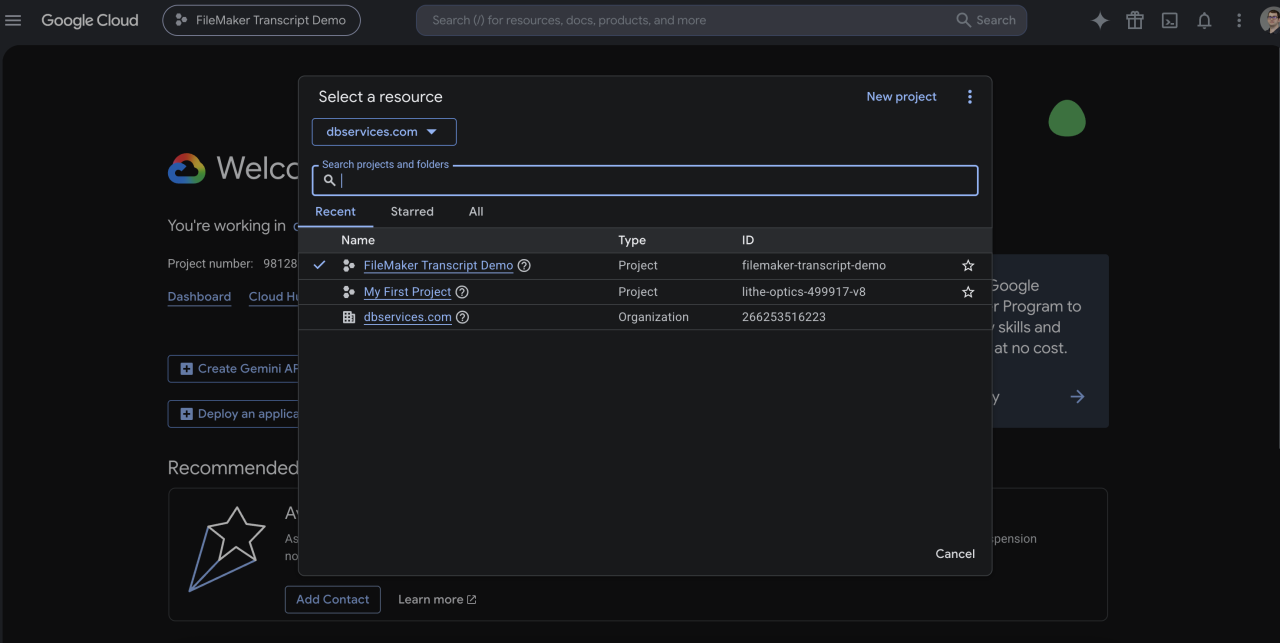
Google Cloud organizes everything under projects, which are places where you can store the APIs you enable, the credentials you create, and any associated billing. If you already have a project you want to use, you can skip ahead. Otherwise:
Click the project dropdown at the top of the Console
Click New Project
Give it a name, something like
FileMaker Speech Demoworks fineClick Create
Make sure the new project is selected in the dropdown before continuing. Everything from here applies to the active project.
Step 3: Enable Billing
Google Cloud requires a billing account to be attached before any API can be enabled, even if you stay within the free tier limits. In the left navigation, go to Billing. If no billing account is linked, click Link a billing account and follow the prompts to add a payment method. You won't be charged as long as you stay within the 60 minutes per month free tier during testing.
Step 4: Enable the Speech-to-Text API
APIs in Google Cloud are turned off by default and must be explicitly enabled per project.
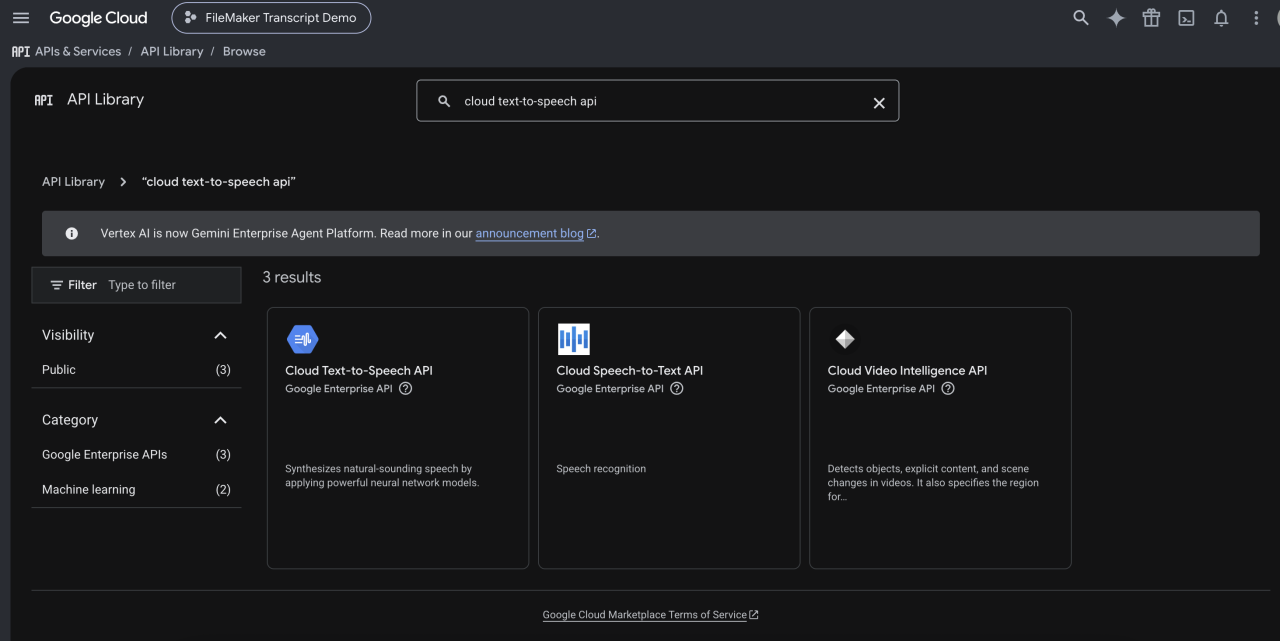
In the left navigation, go to APIs & Services > Library
Search for Cloud Speech-to-Text API
Click on it and then click Enable
It may take a few seconds to activate. Once the page confirms the API is enabled, you're ready for the next step.
Step 5: Create an API Key
The demo file authenticates with Google using an API key, which is a credential you generate in the Console and store in the file. Treat this like a password and keep it out of shared or public environments.
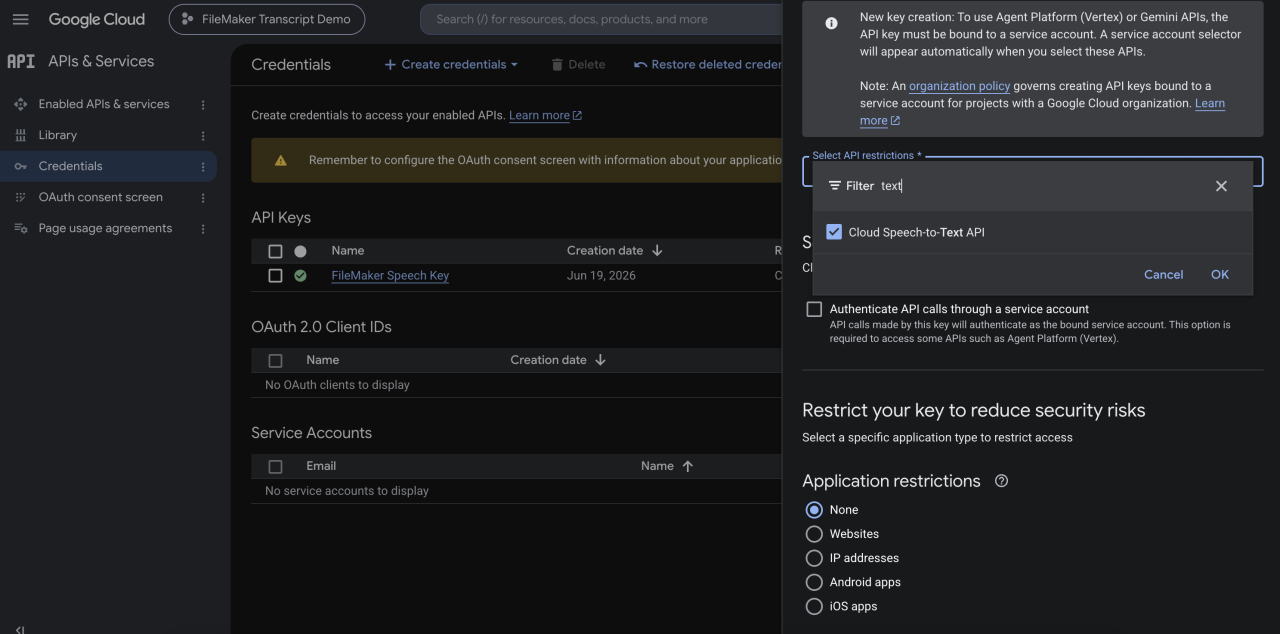
Go to APIs & Services > Credentials
Click + Create Credentials and select API key
Copy the key that's generated
Click Edit API key and under API restrictions, select Restrict key, then choose Cloud Speech-to-Text API from the list, and save
Restricting the key to Speech-to-Text only is a good habit as it limits exposure if the key were ever compromised.
Step 6: Configure the Demo File
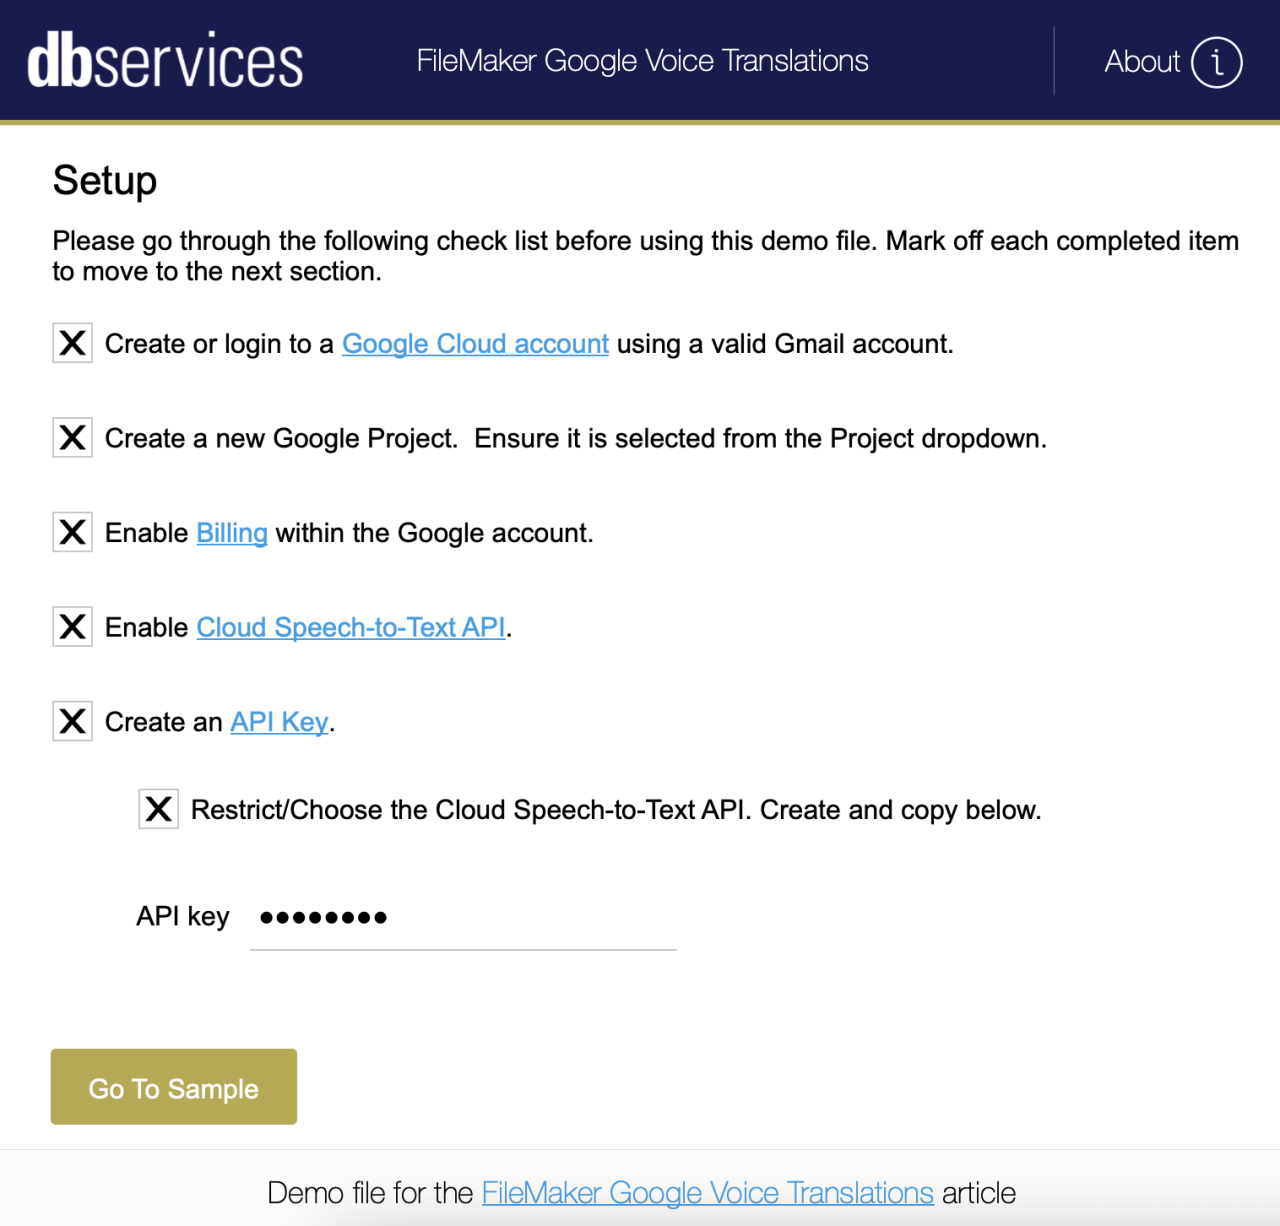
Open the demo file, and you should find yourself on the Setup layout. This contains the list of items you should have completed above that will allow us to connect to and run Google Speech-to-Text.
Start by checking off the items that you should have already completed.
Paste your newly created Google API key into the API Key field.
Click on Go To Sample to begin setting up the Audio File and API settings.
Step 7: Attach Audio and Generate a Transcript
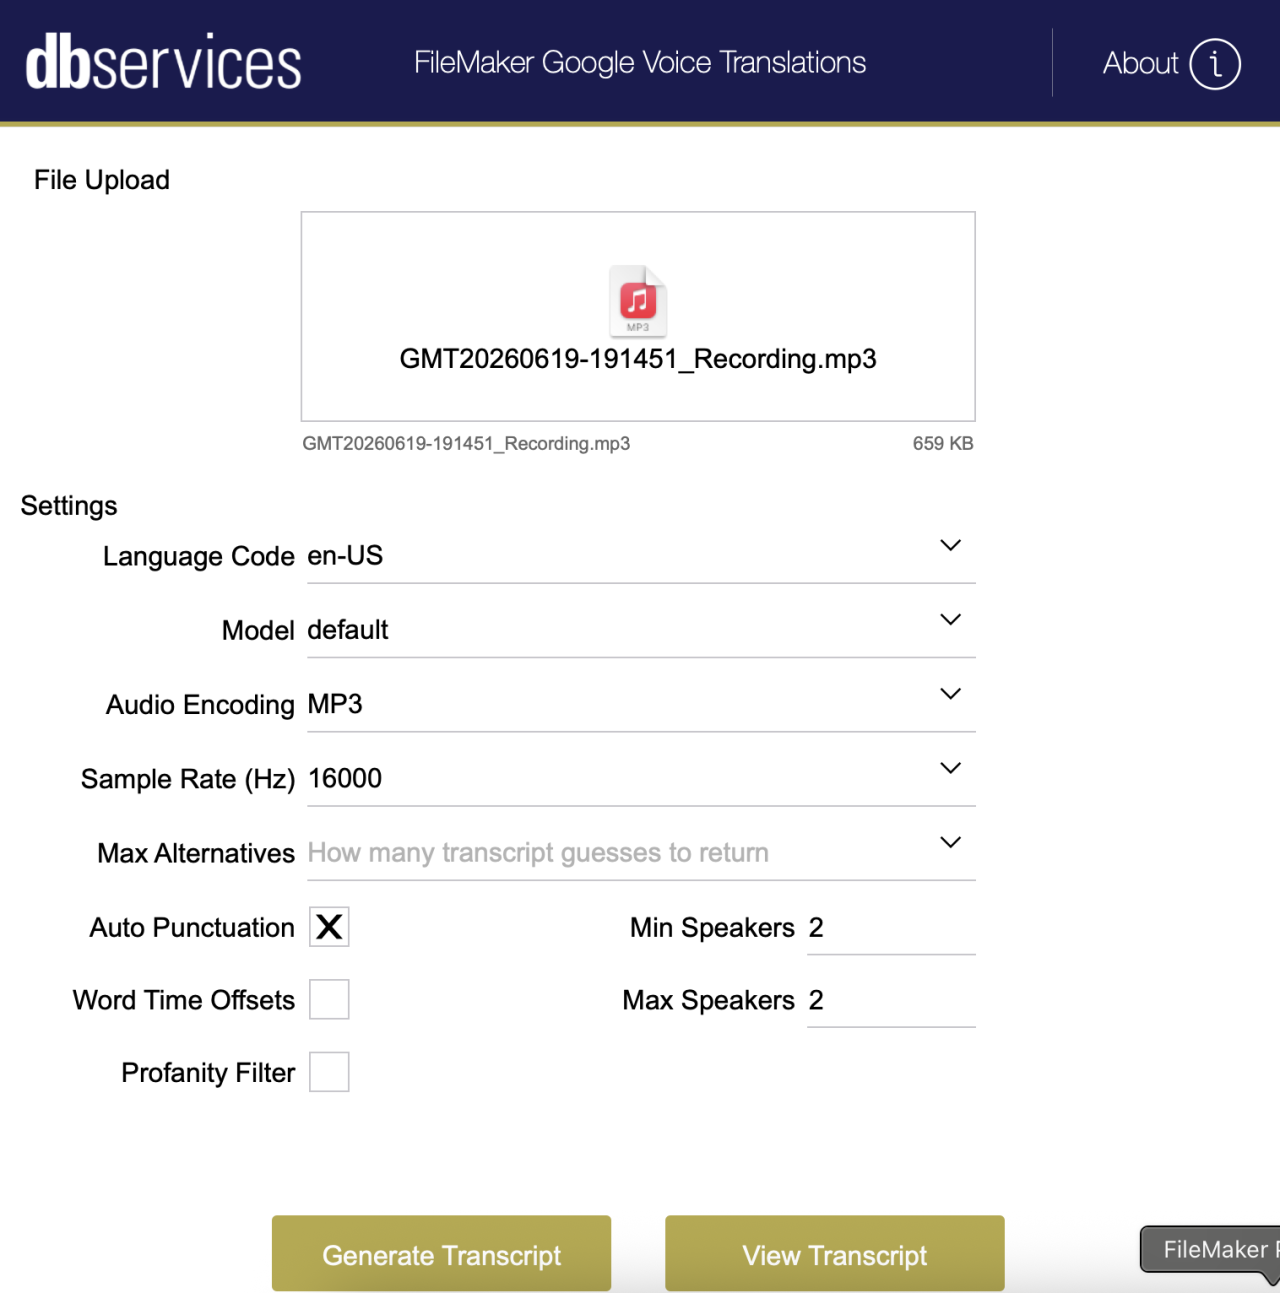
With the Setup layout configured, you should now find yourself on the File Input layout. This is where recordings are attached, configured, and transcripts are requested.
Drop or insert an audio file into the File Upload container field on the record. The demo file supports MP3, WAV, FLAC, OGG, and AMR formats. The encoding is detected automatically from the file extension. One important note: M4A files, which are common recordings from Apple devices, are not supported by the Google Speech-to-Text v1 API. If your audio is in M4A format, convert it to MP3 first before attaching it.
From there, work through the remaining settings:
Language: Select the language your audio is recorded in from the dropdown. This drives the
languageCodeparameter sent to Google. The full list of supported languages is available at cloud.google.com/speech-to-text/docs/languages.Model: The model controls which of Google's speech recognition engines processes your audio. For general recordings,
latest_longit is the right choice. If you're transcribing phone calls, tryphone_call, and for recorded video or meetings,videoit tends to perform better. When in doubt,defaultit is a safe fallback.Encoding: Leave this blank, and the demo file will detect the encoding automatically from the audio file's extension. If you need to override it, for example, if you're working with a format that doesn't map cleanly, you can enter the encoding value manually here. Supported values are
LINEAR16,FLAC,MP3,OGG_OPUS, andAMR.Additional toggles: The File Input layout includes settings to achieve more specific transcript outcomes. There are checkboxes for automatic punctuation, word time offsets, and profanity filtering. Automatic punctuation is on by default and recommended for readability. The others are off by default and can be enabled as needed. There are also Min Speaker and Max Speaker, which help make transcript results more accurate and default to
2and6respectively.
Once your audio file is attached and settings are finalized, click Generate Transcript. A dialog will confirm that the request has been sent and let you know that processing may take up to 5 minutes, depending on the audio's length. The script uses Google's long-running recognition endpoint, which means it submits the job and must wait for the transcription to be finalized. We check back automatically every 10 seconds until the result is ready.
When transcription completes, the result is written to the Transcript field on the record. Because the demo file has speaker diarization enabled, the transcript is formatted by speaker so that a two-person conversation will look something like this:
Speaker 1: Hey, thanks for jumping on the call today. Speaker 2: Of course, happy to connect. Speaker 1: I wanted to walk through the proposal before we move forward.
Google assigns speaker numbers for that specific recording. While they aren't identified by name, they are consistent within a single transcript, making it straightforward to read through and manually attribute them if needed.
Conclusion
Connecting FileMaker to Google Speech-to-Text turns your audio into one of your most useful data sources instead of an overlooked one. The demo file already has the full foundation in place: authentication, the API call structure, the polling loop, and transcript parsing, so you can put it to work right away.
Take a look at our integration capabilities for more ways to connect FileMaker to the tools you already use, or reach out if you'd like help getting this running in your own solution. We're happy to walk through it with you.
Did you know we are an authorized reseller for Claris FileMaker Licensing?
Contact us to discuss upgrading your Claris FileMaker software.
Download the Google Speech-To-Text Integration File
Please complete the form below to download your FREE FileMaker file.